For the last two years I’ve written blog posts detailing my own personal photography workflow that I use. As the tools to process photos change and as I learn more about processing photos, so does my workflow.
I probably get more questions about my workflow (or what camera to buy) than any other sorts of questions. So since it’s been a year now, I thought I’d update my own personal photography workflow.
 Step 1. Capture the Image: At present my daily set up includes a Canon EOS 5D Mark II
 camera (which I love but which has a *horrible* problem with dust), and five Canon lenses. The 14mm f/2.8
, the 24mm f/1.4
, the 50mm f/1.2
(with crappy autofocus), the 100mm f/2.8 macro
and my favorite lens the 135 f/2
.
Also with me everywhere I go is a 17 inch MacBook Pro, a Hoodman high speed firewire 800 card reader
, my camera battery charger and an extra battery and 3CF cards (a 8GB, 16GB and 32GB, all by SanDisk
). My 16GB card has recently been having problems and has been acting up so I’ll probably throw that out and buy another new 32GB card before my next big photography trip.
I recently replaced my camera backpack going from the Lowepro CompuDayPak to the Computrekker Plus AW backpack. The zipper on my CompuDayPak was shot and after three years or so of daily use the bag was falling apart. It supposedly has a lifetime guarantee, but when I looked at the guarantee more closely it looked like it didn’t cover every day wear and tear and especially issues with zippers.
The new backpack is substantially more sturdy. I like it a lot more. My gear feels much better protected and it’s got a ton more room. Unfortunately it does feel a bit bulky and sometimes I feel like it looks like I’ve got a suitcase strapped to my back and look like a dork. 🙂
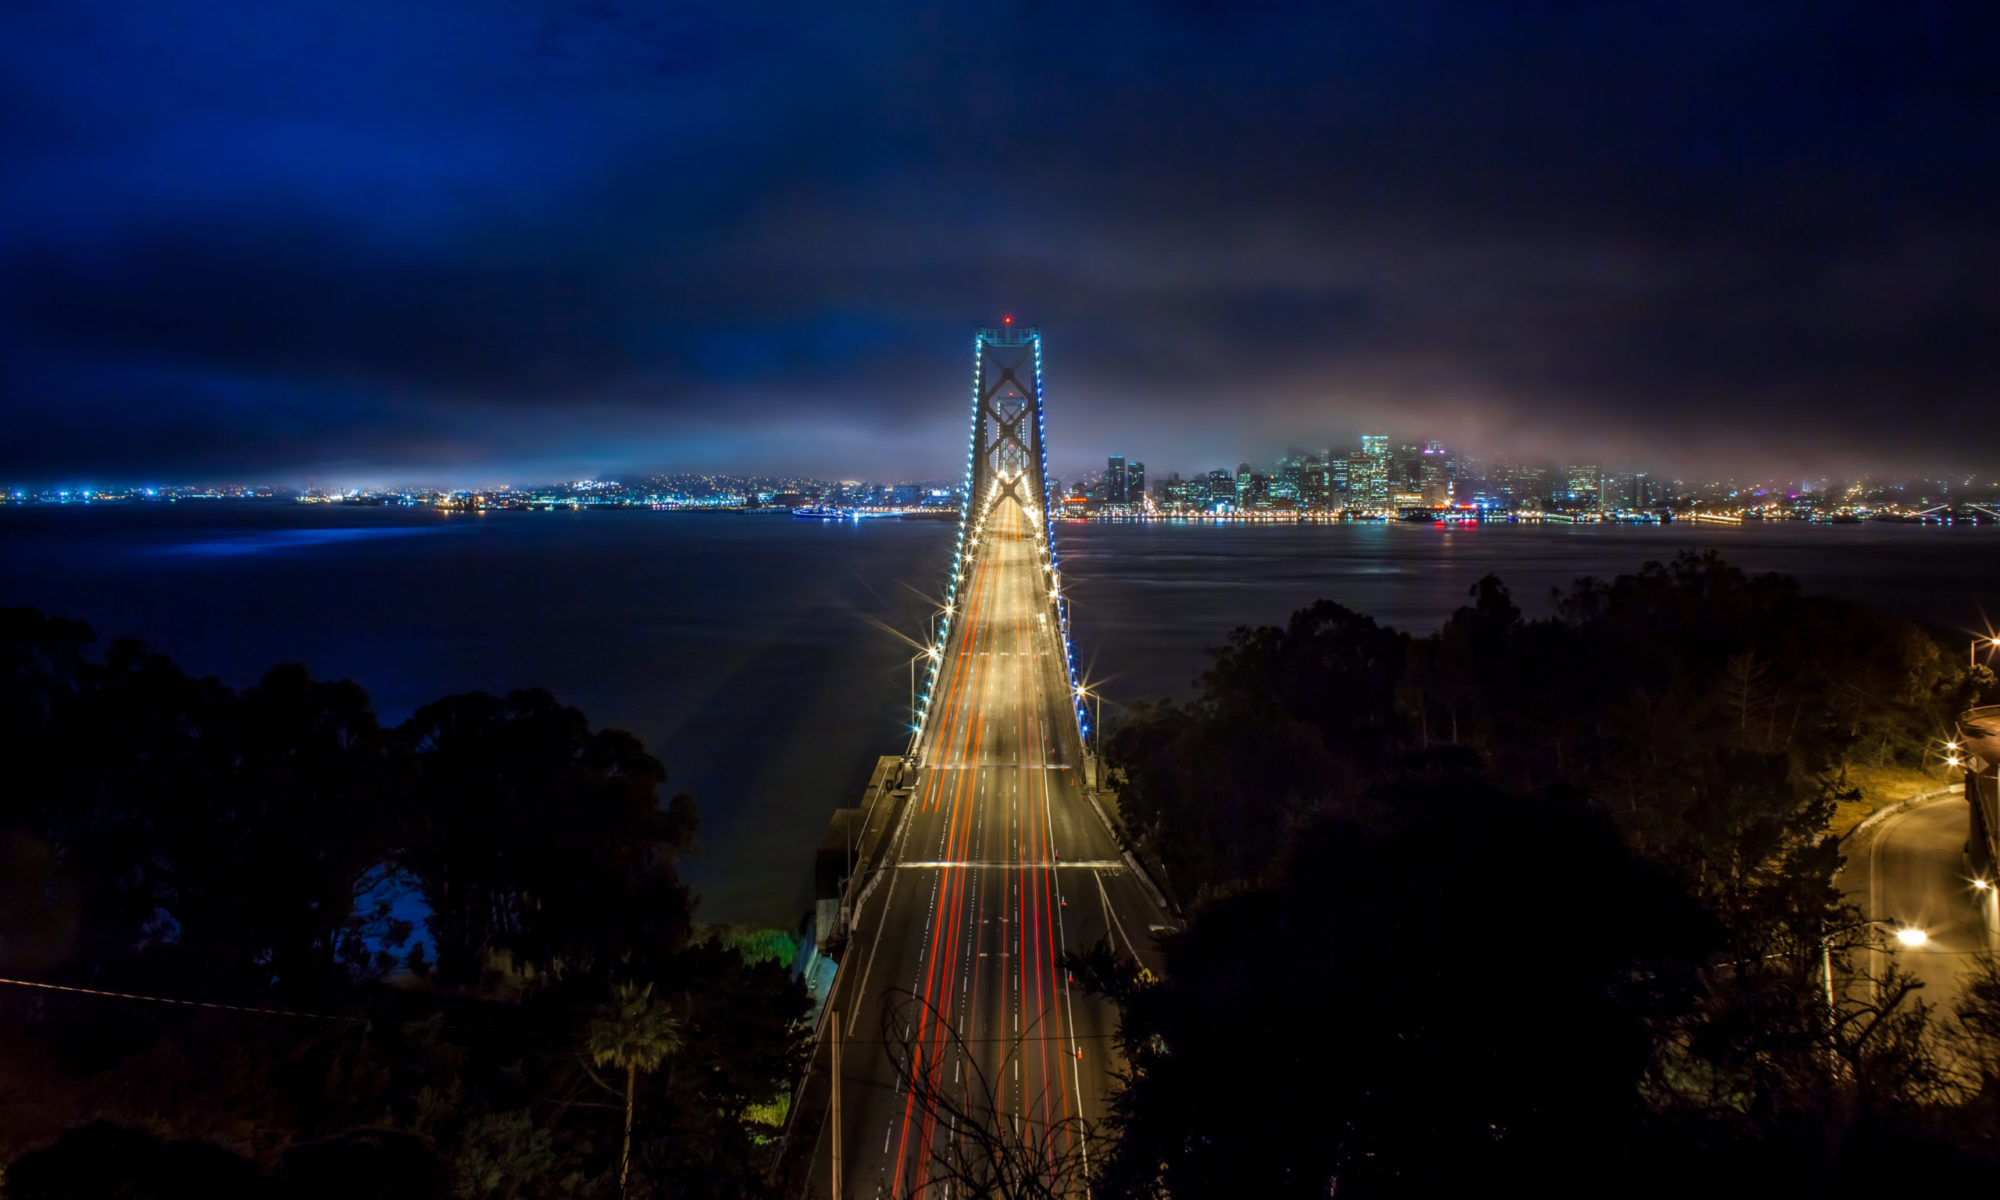
I shoot almost every day out and about in the Bay Area, sometimes at night for special events, photowalks etc. and most significantly as part of my project to document the 100 largest cities in America. Lately I’ve been taking intensive five day trips to different large American cities where I’ll shoot over 10,000 frames. I shot Nashville and Memphis in January, Miami in March and I’m heading to Detroit next in early June.
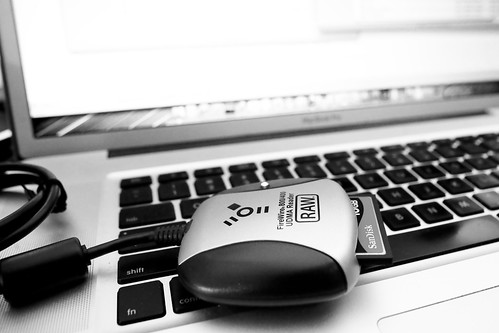 2. Step 2. Transfer my images to my MacBook Pro. One of the best photography tools I’ve purchased in the last few years has been my highspeed FireWire 800 card reader (see link above). It can transfer a full 32 GB card in less than 15 minutes. When I’m out in the field I’ll use little breaks occasionally to offload images from my cards to my MacBook Pro with this card reader which is always with me. If you are still using camera cables or a USB card reader, you have no idea the speed you are missing.
I usually drag and drop the files directly from the card to a folder I create on my MacBook Pro with the date of the shoot. If I’m in the field this is the fastest way to get the images off the card and get me back shooting again. It takes over twice as long to have Lightroom copy and import the photos for me, so I only use Lightroom to do this task if I’m already in for the night, at home, etc. and don’t care about the time it takes to transfer files.
I bring two hard drives with me on trips. A 750GB external Seagate Hard Drive that serves as a Time Machine drive to backup my Mac. And an extra 1TB Seagate Free Agent drive (which I LOVE, is USB powered and not much larger than an iPhone or a pack of cards — this drive is the ultimate portable travel hard drive and a great value). The Free Agent drive is where I put extra images when I fill up my MacBook Pro 500GB internal hard drive.
When I get home I’ll frequently offload day shoots from my MacBook Pro to one of my 5 archive Drobos. Here my photos are backed up and replicated. I can then later copy the files back to my MBP when I’m ready to actually process them. At any given time I’ve got photos I’m processing on my MBP (backed up with Time Machine).
I’ve also now begun backing up my files in the cloud to Mozy as well. More on this later.
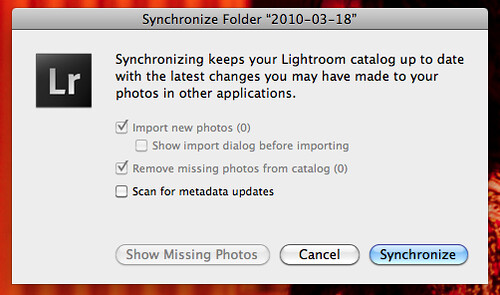 3. Step 3. Synch my images to Lightroom. After I add a day’s shoot to process I’ll synch my MBP photos folder with Lightroom to import these images into Lightroom.
4. Step 4. Flag Images in Lightroom. Next I go through a days shoot using Lightroom to flag all of the photos that I want to process. Depending on the shoot I’ll usually process anywhere from 5% of my shots to 20% of my shots I’d estimate.
5. Step 5. Move all of my flagged images to a “flagged photos” subfolder in that date’s folder. I do this so that I can keep straight which images I’ve processed and which I haven’t. This way if I want to go through the photos that I passed on the first time around and revisit them to process latter I’ll be able to keep this straight in my records. I don’t always process 100% of what I flag, but pretty close.
 6. Step 6. Develop my photos one by one. Here I go through Lightroom’s develop module to individually process every photo on a one by one basis. I rely heavily on presets as well. I’ve got probably 500 or so presets that I regularly use on my photos. Many of these I’ve gotten from other photographers. Many of these I’ve made myself. Sometimes I’ll process a photo without using a preset, but many times I’ll use a preset as my starting point to give the photo a certain look before tweaking it further from there. Rarely do I ever just use a preset and export. I almost always tweak the photo from my presets.
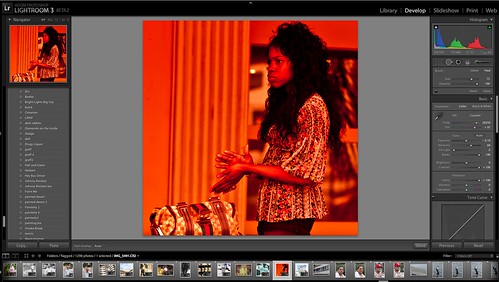
When I’m developing I will frequently adjust contrast, temperature, brightness, exposure, vignetting, sharpening and noise reduction. I’ve only recently been using noise reduction so much more with Adobe’s new beta version of Lightroom 3.
Adobe’s improved noise reduction tool in the new beta may be the single most significant advancement in digital photo processing that I’ve ever seen. It has blown me away and if you are not using it you really are missing out. Anyone can download the Lightroom beta for free right now here. Adobe’s new noise reduction technology allows for regular shooting at 6400 iso on my camera, which opens up a whole new realm of what is possible with night photography.
I was able to shoot some amazing night street portraits down in Miami Beach in March at very high isos and eliminate all of the noise in these high iso photos with this feature. Here’s an example of a street portrait that I shot at iso 4,000 in Miami. It’s amazing to me how easy it was for the new Lightroom beta to get the noise out of this high iso photograph.
Frequently I’ll also use the cloning tool in Lightroom to eliminate visible dust on my images. Canon’s so called anti-dust technology sucks big time (see above). Cloning out dust is the number one waste of time for me in processing my images. Recently I bought the Arctic Butterfly brush to give that a try to improve the situation. I was using sensor swabs and methanol but they weren’t really working. I’ll try and post an update on the Arctic Butterfly once I have time to test it out sufficiently.
6B. Step 6B. External Processing in Nik Silver Efex or Photoshop. Occasionally I’ll do additional developing work on an image using either Nik Silver Efex or Photoshop CS5. Photoshop CS5 kicks serious ass. I haven’t been using Silver Efex really since I’ve been on the Adobe Lightroom 3 Beta. For some reason it seems to warp my images when I send them to Nik as an external editor. My images also get warped if I send them to photoshop as an external editor as well, so usually when I do work in photoshop I’ll just open the exported file directly in Photoshop to do more work on them.
Nik Silver Efex Pro is one of the best black and white conversion packages I’ve ever used. I’m hoping that when the official non-beta LR release is out that it will make it possible for me to use Nik Silver Efex again. You can download and use Nik Silver Efex Pro free for a 15 day trial. If you haven’t checked this out yet, you should.
Mostly in Photoshop I’ll do little things like add a frame, or add a blending layer to manufacture artificial film like scratches on a photo, or little touches like this. I don’t do this alot because it’s time consuming. Lately I’ve also begun painting some of my photographs in Photoshop. You can read more about that in my review on the CS5 Photoshop Beta here. Look for Photoshop CS5 to be released shortly.
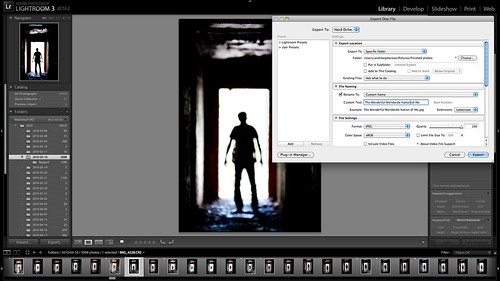
7. Step 7. Export my file as a full sized high quality JPEG image. Lightroom defaults to 240 DPI (not sure why) so I use this as my output DPI with the highest quality full sized JPG. These images are exported to a “finished photos” folder.
As I export each photo I will name it at that time. A lot of people ask me where the titles on my photos come from. They come from all over really. My titles are frequently very personal to me, obscure and abstract. They frequently have a story that only I know behind them. They are frequently inspired by music or are lyrics to a song that I relate to that image in my own mind.
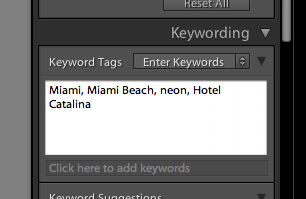 8. Step 8. Keywording. Once I’ve finished processing a days shoot, I will synchronize my finished files folder in Lightroom and begin keywording. I’ll apply broad general keywords to all of the photos usually like the location (city, state, country) or batch keyword big groups of photos that cover the same subject (graffiti, neon, venue, subject, etc.). Then I’ll go through the photos one by one looking at each for any unique keywords possible.
If the photo is of a neon sign or of a specific location I’ll also frequently go get the address of the venue from Google and paste that into the keyword description.
This meta data is later automatically applied to my image when I upload it online.
9. Step 9. Geotagging. I use Google Earth and Geotagger next to geotag *some* of my images. In general I’ll geotag if it’s easy. For awhile the OCD in me was geotagging every single image I’d process. I’d painstakingly go through Google Earth and geotag them one by one by one. This was a ton of work, especially if the work needed to be done in a city that I’m not as familiar with. Now I’ll just geotag the images if it’s super easy and I can get there quickly in Google Earth or if a bunch of images are from same location and I can batch them.
Once the new version of iPhone’s OS can multitask, I’ll probably start trying out some of the geotagging geolocational apps for the iPhone. Or there’s a good chance that I’ll switch to an Android based phone in July when my iPhone contract is up and I’ll see what I can use for that there.
10. Step 10. Archiving. Once I’m done with this I’ll sort my images into what I consider A quality photos and B quality photos. These are then transferred to a Drobo, where I have an “A to be uploaded” folder and a “B to be uploaded” folder.
11. Step 11. Publishing. Twice a day (once in the morning, once at night) I’ll pull 5 photos from my A folder and 17 photos from my B folder at random and upload them to Flickr. This is a total of 44 photos a day that I upload.
I’ve got about 20,000 unpublished photos in my to be uploaded photos folders at present. I always upload what I feel are my five strongest images of any batch upload as the last five to Flickr. This way these are the five that will show up for my contacts when they see my photos in their contacts page. These 5 will also show up on the first page of my main Flickr page if someone goes there directly.
If a photo gets 25 faves or more on Flickr, I’ll generally blog that photo at thomashawk.com as well. You can see these photos on a version of thomashawk.com filtered only for the photoblog portion here.
Once these photos are published they go into a folder by month based on upload date. (Note, the original RAW files always stay in the folder of the date they were taken).
Anyways, that’s about it. This article is a bit longer than the past few years, but I’ve been doing a lot more with my processing as well. Feel free to ask any questions in the comments or offer up any suggetions you might have for improving my own workflow. Thanks!
You are one of the most productive photographers out there. The sheer volume of shots you share is remarkable. So to learn a little bit about how you do it all is quite a treat. Thanks for sharing!
PS do you ever sleep?
Great tips, thanks for sharing. I have a similar flow, but more simple, since I don’t shoot as much as you.
Sounds pretty similar to mine, though I’m pretty anal about keywording and doing it right after I’ve uploaded the images into Aperture.
One of the things I’d recommend is checking out the Hoodman RAW CF cards. I was surprised you had a Hoodman reader and Sandisk cards. I love these things, even if they are a bit pricey. I keep reading about other photographers having card failures with Lexar, Kingston or SanDisk. None with my Hoodmans, though. The company advertises that they’ve never had a report of their card getting a failure in the field. Add that with the 675x speed and I’m feeling pretty good about them.
I just hope that doesn’t all blow up in my face now.
Thomas do you not do anything with the naming of the files? One of the reasons that I use Lightroom to import my images is because I add the date to all of my image names. That way even if an image is out of place in my folder structure (or someplace else completely) I still know when it was taken. Maybe the way your camera names the files is different from the Nikon numeric sequence that I have.
Great post, thanks for all the detail.
Wow, I read through most of it will be back to read through the rest…
You really cart around a 17″ MBPro with you every where? Isn’t it a bit bulky (like I have room to talk 🙂 15″MBPro and sometimes PC laptop)
I have LR2 but have not played with it enough for organization… will try that out..
Great Post .. like I said will be back.
Hi Thomas,
Any chance you woud be willing to share any of the presets you have collected over the years?
Very nice. You are so kind to share your secrets to us.
Great write up, Thomas. I’ve switched to Lightroom as of January 1st, and I’m starting to get comfortable with it. Have you tried using smart collections to automatically filter out flagged/unflagged photos? I find that they are a great way to keep track of what needs to be processed.
You might be interested in the G-Raid Mini (http://www.g-technology.com/products/g-raid-mini.cfm). It’s a bus powered Firewire portable hard drive that has hardware RAID built in. It uses laptop hard drives, so it’s quite small and efficient. I’ve been using it as my primary Lightroom catalog repository. It’s nice having the combination of portability and redundancy when importing photos, especially when I’m away from home.
Thanks for sharing your workflow!
Thanks for sharing, it’s always nice to read how other people work, my workflow is about the same, only less photo’s and I start by marking the bad photo’s as Rejected, skip the keepers and rate the best photo’s. The photo’s rated 5 will end up on Flickr.
That’s a lot of presets by the way, are those specifically targeted at your kind of photography or more general types of presets?
Hi
For geotagging take a small gps unit with you and use HoudahGeo http://www.houdah.com/houdahGeo/. Nice software and it’s very fast and easy to use.
Aaron
Jeremy, I haven’t utilized that technology because my entire library is too large to maintain as a constant library in Lightroom. I’ve played around with importing my entire library in the past it just slows lightroom down too much. Surprisingly it was actually able to import all of my photos (it took about two days), but the subsequent library was just too bogged down to be practical.
So to creating smart collections would work while they were in the library, but not later. So hence I need the folder structure. It’s pretty easy though. G Raid sounds cool. It sounds like then I might be able to just bring one hard drive when I travel instead of two maybe depending on the size. I’ll check that out.
Robert, mostly general presets that I like. 🙂
Ken, I should do a post on presets and include some at some point. A lot of the presets were given to me by other people though and I might not feel comfortable offering them up without their permission. I’ve got a lot I’ve made myself that I could probably share though. Will have to look at that when I’ve got some time.
I’d be interested in knowing which presets you use too.
It seems there should be some kind of device that would let you transfer photos from a CF/SD card directly to a portable hard drive like the FreeAgent you mention. This would eliminate the need to carry a laptop every where.
Great work flow! Thank you for sharing this.
thanks for the thorough work flow guide!
Do you have your LightRoom pre-sets available for download? (or at least the the one’s you got from others?)
So I’m assuming LR3 is safe for use? Do you use LR2 at all?
A&B files, once you’ve uploaded a set, how do you prevent yourself from re-uploading them in the future?
Geotagging…I tried a geotag system, didnt like it; but have been using http://mytracks.appspot.com/ for hiking; thinking it will work great for geotagging; e.g., http://bit.ly/agwbiT
Great post, Thomas.
I have been pondering Lightroom for a while now. I finally tried downloading the beta and could not get it to successfully start up. A quick Google finds that the error I got is common and requires a ridiculous work-around. I guess I will be sticking with Aperture…it just works!
Good stuff to know, Thomas. I’m checking out the LR3 beta now.
This is really a wonderful peek into your world. Thanks for sharing this great information.
Thomas, once again a wonderfully put workflow. Like Lisa says you are indeed a productive photographer with about 44 awesome photos going online everyday.
You mentioned about Lightroom pre-sets. Would be great if you can share more about that. Your favourites? great places to check them out?
thanks!
Always very interesting to see how others work through the whole process.
Thanks for the in-depth break down Thomas.
The 17 and 5 uploads to Flickr is brilliant use of their layout. Great idea!
Can you post some of your Lightroom Presets? I have some but always looking for more, and from the names I see I’m curious what they do.
Anyway, could your post or email me the hall and oats, smoke break, hey bus driver, barbie, dark rabbits, drugs liquor, bright lights big city and diamonds on the inside presets?
Also how is the new bag working out, I think I had that same one before… Does it swing around to the front without having to take it off?
Maybe you should buy a zoom then you wouldn’t have to change lenses so often and probably get less garbage stuck to your sensor.
And lets face it – a large portion of your images don’t rely on the optical quality of primes !.
I’ll put in my .02USD and say that I like JungleDisk on Amazon S3 MUCH better then Mozy. YMMV
|-<:)
Thanks, Thomas! Very interesting!
Now I have everything I need to take a gazillion pictures, except the time. 🙂
I enjoy your quest.
With the amount of photos you shoot how often do you wear out your camera’s shutter?
Great site – and some really useful techniques that you have kindly shared, thank you.
Do you archive every photo taken? Or just the ones that you process?
Do you maintain any correlation between the RAW file and the finished JPG file?
Do you archive every photo taken? Or just the ones that you process?
Do you maintain any correlation between the RAW file and the finished JPG file?
Concise and well crafted, thank you for the info.
Hey, I simply hopped over for your site by means of StumbleUpon. Now not one thing I would typically learn, but I appreciated your emotions none the less. Thank you for making something value reading.
Great site – some really useful tips and have already seen some good results. Thank you.
My spouse and I stumbled over here by a different website and thought I might check things out. I like what I see so now i am following you. Look forward to finding out about your web page again.
Really nice photos i must say, your photos is top quality, i wonder which camera you use. But you have maybe already said it in this blog.