For the last two years I’ve written blog posts detailing my own personal photography workflow that I use. As the tools to process photos change and as I learn more about processing photos, so does my workflow.
I probably get more questions about my workflow (or what camera to buy) than any other sorts of questions. So since it’s been a year now, I thought I’d update my own personal photography workflow.
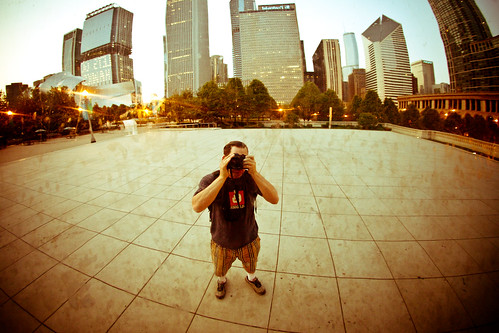 Step 1. Capture the Image: At present my daily set up includes a Canon EOS 5D Mark II
 camera (which I love but which has a *horrible* problem with dust), and five Canon lenses. The 14mm f/2.8
 , the 24mm f/1.4
 , the 50mm f/1.2
 (with crappy autofocus), the 100mm f/2.8 macro
 and my favorite lens the 135 f/2
 .
.
Also with me everywhere I go is a 17 inch MacBook Pro , a Hoodman high speed firewire 800 card reader
 , my camera battery charger and an extra battery and 3CF cards (a 8GB, 16GB and 32GB, all by SanDisk
 ). My 16GB card has recently been having problems and has been acting up so I’ll probably throw that out and buy another new 32GB card before my next big photography trip.
I recently replaced my camera backpack going from the Lowepro CompuDayPak to the Computrekker Plus AW backpack. The zipper on my CompuDayPak was shot and after three years or so of daily use the bag was falling apart. It supposedly has a lifetime guarantee, but when I looked at the guarantee more closely it looked like it didn’t cover every day wear and tear and especially issues with zippers.
The new backpack is substantially more sturdy. I like it a lot more. My gear feels much better protected and it’s got a ton more room. Unfortunately it does feel a bit bulky and sometimes I feel like it looks like I’ve got a suitcase strapped to my back and look like a dork. 🙂
I shoot almost every day out and about in the Bay Area, sometimes at night for special events, photowalks etc. and most significantly as part of my project to document the 100 largest cities in America. Lately I’ve been taking intensive five day trips to different large American cities where I’ll shoot over 10,000 frames. I shot Nashville and Memphis in January, Miami in March and I’m heading to Detroit next in early June.
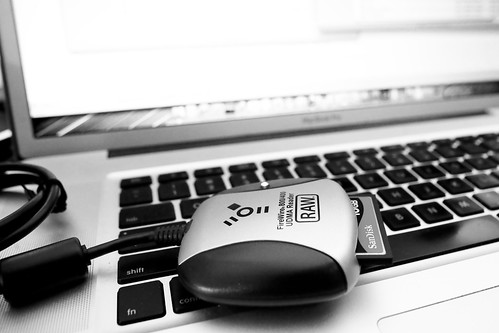 2. Step 2. Transfer my images to my MacBook Pro. One of the best photography tools I’ve purchased in the last few years has been my highspeed FireWire 800 card reader (see link above). It can transfer a full 32 GB card in less than 15 minutes. When I’m out in the field I’ll use little breaks occasionally to offload images from my cards to my MacBook Pro with this card reader which is always with me. If you are still using camera cables or a USB card reader, you have no idea the speed you are missing.
I usually drag and drop the files directly from the card to a folder I create on my MacBook Pro with the date of the shoot. If I’m in the field this is the fastest way to get the images off the card and get me back shooting again. It takes over twice as long to have Lightroom copy and import the photos for me, so I only use Lightroom to do this task if I’m already in for the night, at home, etc. and don’t care about the time it takes to transfer files.
I bring two hard drives with me on trips. A 750GB external Seagate Hard Drive that serves as a Time Machine drive to backup my Mac. And an extra 1TB Seagate Free Agent drive (which I LOVE, is USB powered and not much larger than an iPhone or a pack of cards — this drive is the ultimate portable travel hard drive and a great value). The Free Agent drive is where I put extra images when I fill up my MacBook Pro 500GB internal hard drive.
When I get home I’ll frequently offload day shoots from my MacBook Pro to one of my 5 archive Drobos . Here my photos are backed up and replicated. I can then later copy the files back to my MBP when I’m ready to actually process them. At any given time I’ve got photos I’m processing on my MBP (backed up with Time Machine).
I’ve also now begun backing up my files in the cloud to Mozy as well. More on this later.
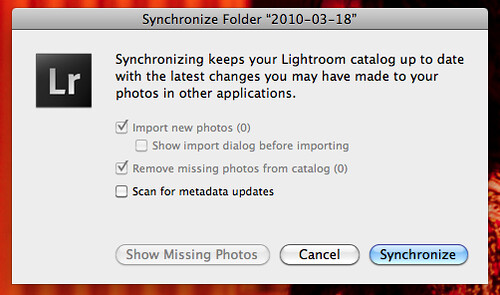 3. Step 3. Synch my images to Lightroom. After I add a day’s shoot to process I’ll synch my MBP photos folder with Lightroom to import these images into Lightroom.
4. Step 4. Flag Images in Lightroom. Next I go through a days shoot using Lightroom to flag all of the photos that I want to process. Depending on the shoot I’ll usually process anywhere from 5% of my shots to 20% of my shots I’d estimate.
5. Step 5. Move all of my flagged images to a “flagged photos” subfolder in that date’s folder. I do this so that I can keep straight which images I’ve processed and which I haven’t. This way if I want to go through the photos that I passed on the first time around and revisit them to process latter I’ll be able to keep this straight in my records. I don’t always process 100% of what I flag, but pretty close.
 6. Step 6. Develop my photos one by one. Here I go through Lightroom’s develop module to individually process every photo on a one by one basis. I rely heavily on presets as well. I’ve got probably 500 or so presets that I regularly use on my photos. Many of these I’ve gotten from other photographers. Many of these I’ve made myself. Sometimes I’ll process a photo without using a preset, but many times I’ll use a preset as my starting point to give the photo a certain look before tweaking it further from there. Rarely do I ever just use a preset and export. I almost always tweak the photo from my presets.
When I’m developing I will frequently adjust contrast, temperature, brightness, exposure, vignetting, sharpening and noise reduction. I’ve only recently been using noise reduction so much more with Adobe’s new beta version of Lightroom 3.
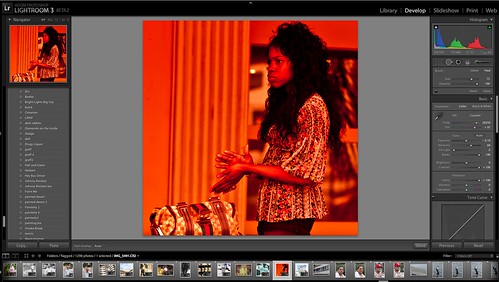
Adobe’s improved noise reduction tool in the new beta may be the single most significant advancement in digital photo processing that I’ve ever seen. It has blown me away and if you are not using it you really are missing out. Anyone can download the Lightroom beta for free right now here. Adobe’s new noise reduction technology allows for regular shooting at 6400 iso on my camera, which opens up a whole new realm of what is possible with night photography.
I was able to shoot some amazing night street portraits down in Miami Beach in March at very high isos and eliminate all of the noise in these high iso photos with this feature. Here’s an example of a street portrait that I shot at iso 4,000 in Miami. It’s amazing to me how easy it was for the new Lightroom beta to get the noise out of this high iso photograph.
Frequently I’ll also use the cloning tool in Lightroom to eliminate visible dust on my images. Canon’s so called anti-dust technology sucks big time (see above). Cloning out dust is the number one waste of time for me in processing my images. Recently I bought the Arctic Butterfly brush to give that a try to improve the situation. I was using sensor swabs and methanol but they weren’t really working. I’ll try and post an update on the Arctic Butterfly once I have time to test it out sufficiently.
6B. Step 6B. External Processing in Nik Silver Efex or Photoshop. Occasionally I’ll do additional developing work on an image using either Nik Silver Efex or Photoshop CS5. Photoshop CS5 kicks serious ass. I haven’t been using Silver Efex really since I’ve been on the Adobe Lightroom 3 Beta. For some reason it seems to warp my images when I send them to Nik as an external editor. My images also get warped if I send them to photoshop as an external editor as well, so usually when I do work in photoshop I’ll just open the exported file directly in Photoshop to do more work on them.
Nik Silver Efex Pro is one of the best black and white conversion packages I’ve ever used. I’m hoping that when the official non-beta LR release is out that it will make it possible for me to use Nik Silver Efex again. You can download and use Nik Silver Efex Pro free for a 15 day trial. If you haven’t checked this out yet, you should.
Mostly in Photoshop I’ll do little things like add a frame, or add a blending layer to manufacture artificial film like scratches on a photo, or little touches like this. I don’t do this alot because it’s time consuming. Lately I’ve also begun painting some of my photographs in Photoshop. You can read more about that in my review on the CS5 Photoshop Beta here. Look for Photoshop CS5 to be released shortly.
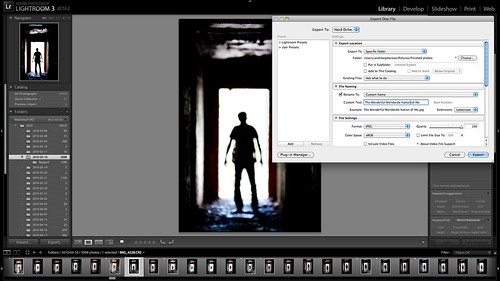
7. Step 7. Export my file as a full sized high quality JPEG image. Lightroom defaults to 240 DPI (not sure why) so I use this as my output DPI with the highest quality full sized JPG. These images are exported to a “finished photos” folder.
As I export each photo I will name it at that time. A lot of people ask me where the titles on my photos come from. They come from all over really. My titles are frequently very personal to me, obscure and abstract. They frequently have a story that only I know behind them. They are frequently inspired by music or are lyrics to a song that I relate to that image in my own mind.
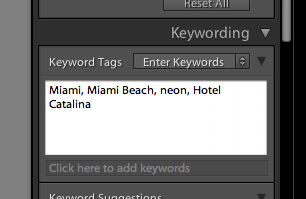 8. Step 8. Keywording. Once I’ve finished processing a days shoot, I will synchronize my finished files folder in Lightroom and begin keywording. I’ll apply broad general keywords to all of the photos usually like the location (city, state, country) or batch keyword big groups of photos that cover the same subject (graffiti, neon, venue, subject, etc.). Then I’ll go through the photos one by one looking at each for any unique keywords possible.
If the photo is of a neon sign or of a specific location I’ll also frequently go get the address of the venue from Google and paste that into the keyword description.
This meta data is later automatically applied to my image when I upload it online.
9. Step 9. Geotagging. I use Google Earth and Geotagger next to geotag *some* of my images. In general I’ll geotag if it’s easy. For awhile the OCD in me was geotagging every single image I’d process. I’d painstakingly go through Google Earth and geotag them one by one by one. This was a ton of work, especially if the work needed to be done in a city that I’m not as familiar with. Now I’ll just geotag the images if it’s super easy and I can get there quickly in Google Earth or if a bunch of images are from same location and I can batch them.
Once the new version of iPhone’s OS can multitask, I’ll probably start trying out some of the geotagging geolocational apps for the iPhone. Or there’s a good chance that I’ll switch to an Android based phone in July when my iPhone contract is up and I’ll see what I can use for that there.
10. Step 10. Archiving. Once I’m done with this I’ll sort my images into what I consider A quality photos and B quality photos. These are then transferred to a Drobo, where I have an “A to be uploaded” folder and a “B to be uploaded” folder.
11. Step 11. Publishing. Twice a day (once in the morning, once at night) I’ll pull 5 photos from my A folder and 17 photos from my B folder at random and upload them to Flickr. This is a total of 44 photos a day that I upload.
I’ve got about 20,000 unpublished photos in my to be uploaded photos folders at present. I always upload what I feel are my five strongest images of any batch upload as the last five to Flickr. This way these are the five that will show up for my contacts when they see my photos in their contacts page. These 5 will also show up on the first page of my main Flickr page if someone goes there directly.
If a photo gets 25 faves or more on Flickr, I’ll generally blog that photo at thomashawk.com as well. You can see these photos on a version of thomashawk.com filtered only for the photoblog portion here.
Once these photos are published they go into a folder by month based on upload date. (Note, the original RAW files always stay in the folder of the date they were taken).
Anyways, that’s about it. This article is a bit longer than the past few years, but I’ve been doing a lot more with my processing as well. Feel free to ask any questions in the comments or offer up any suggetions you might have for improving my own workflow. Thanks!