Adobe Updates Photoshop and Lightroom with Creative Cloud 2015 and Launches Adobe Branded Stock Photography Library

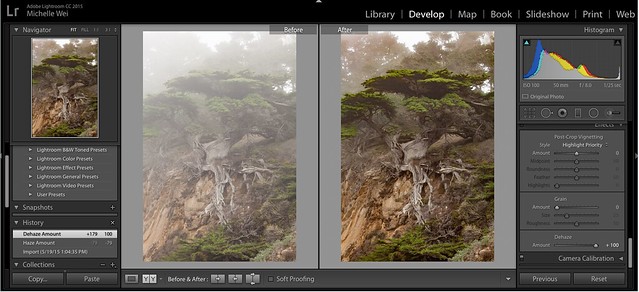
Lightroom Dehaze UI

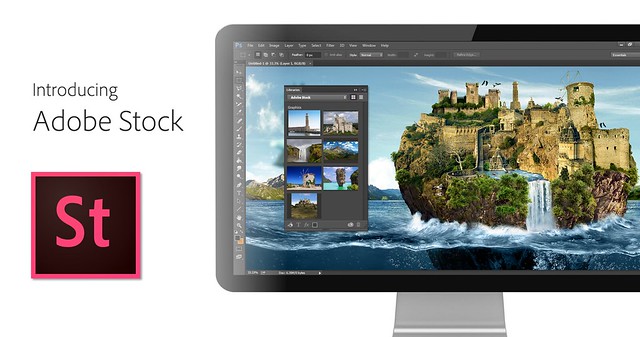
Today Adobe is announcing updates for their Creative Cloud 2015 Photography package as well as the launch of their new stock photography offering Adobe Stock.

I saw a demo last week of the new Creative Cloud enhancements. The enhancement that I liked the most was a new slider in Lightroom for haze and dehaze. With the haze slider you can now reduce unwanted haze in photos or add haze back in if you want more of an ethereal foggy type mood. I think that this tool will be especially dramatic when working with long exposure photography where you have clouds or low fog and want to get the mix of fog to subject just perfect.

Photoshop is also adding in an additive noise function where you can produce more camera like realistic bokeh and blur noise when desired, making the transition in blur more natural. The Photoshop healing brush also now heals in real time and is faster than previous versions.

These feature enhancements and updates will not be available to the current desktop versions of Lightroom and Photoshop, they will only be available for Adobe Creative Cloud subscribers. This is in line with Adobe’s previous stated goal of providing fast and rapid real time updates and upgrades to their subscription customers. I’m assuming that eventually these new enhancements will make their way to desktop upgrades/updates, but at present Adobe seems to be focused on providing the best and most current features available to their subscription customers.

There are also additional features being launched for the mobile versions of Adobe products including better tone and vignette adjustment for Lightroom mobile and an Android version of Photoshop Mix.

Adobe’s Creative Cloud photography package costs $9.99/month and you can subscribe to it here. They also offer a 30 day trial for you to try out Creative Cloud to see if it is right for you.

Adobe Stock

In addition to the improvements in Lightroom CC and Photoshop CC, Adobe is also announcing the launch of their new stock photography service simply called Adobe Stock.

Because Adobe is so widely used by creatives in general, leveraging their software products to sell an Adobe labeled stock photography library seems to make a lot of sense. Adobe’s stock photography service will be featured as a menu item in Photoshop and will allow stock buyers to use watermarked versions of stock photos to create mockups and test design/layout ideas. Once a stock buyer is ready to license an image they can license it directly from Photoshop and download the unwatermarked version of the image.

Images will cost $9.99 each to license or Creative Cloud subscribers can purchase one of two different subscription plans. The first plan costs $29.99/month and allows a subscriber to license up to 10 images a month and a second plan will cost $199.99 per month and will allow a subscriber up to 750 images per month.

Adobe will pay out 33% of their sales proceeds to photographers — photographers interested in applying can apply here.

Because so many stock photography buyers are connected into Adobe’s ecosystem, I think this stock photography offering will end up being very successful and represents formidable competition to the current stock photography giant Getty Images. Earlier this year Adobe purchased the stock photography agency Fotolia, but this new stock offering appears to be a different offering marketed directly under the Adobe brand and available through Adobe’s flagship Photoshop product.

More: MacRumors, The Verge, Engadget, Techmeme.

Next Version of Adobe Photoshop to Be Branded Photoshop CC, Includes Awesome New Motion Blur Sharpening Tool

Today Adobe announced a new branding of their flagship Photoshop product to be released later this year, Photoshop CC. The new version will only be available via a monthly subscription to Adobe’s Creative Cloud and will not be sold as a traditional boxed application that consumers can purchase.

Probably the most anticipated new feature in the next iteration of Photoshop is a revolutionary new image sharpening tool that focuses on fixing camera shake issues.

The new tool analyzes images that are out of focus due to the slight movement or motion that takes place while a shutter is open. There are lots of reasons why photographers may find camera shake in their images. Many images shot slower than about 125th of a second are susceptible to camera shake unless you’re on a tripod or have a very steady hand. Telephoto shots, especially can be problematic.

With the new version of Photoshop CC, Adobe uses an algorithm to try and detect which direction the camera was moving that produced the shake. They then try to account for the movement back into the direction of a steady image without camera shake. This new sharpening tool won’t help you with other types of focal blur issues, like lens position, but it does address a fairly common issue dealt with by photographers.

Adobe had previously offered a sneak peak of this new technology in a video that they posted to Youtube. Watch the video and you’ll be impressed.

What makes this interesting to me is that there are a lot of old images that I’ve taken in the past that now will suddenly become salvageable.

This new technology advancement should be yet another reminder to photographers why they should save ALL of their images, even the bad ones that they don’t think they can use. With technology advancements in image processing, I’m finding more and more images that I’d previously dismissed due to problems. Whether previous Adobe noise reduction tech or newer tech like this new sharpening tool, it pays to save all of your images no matter what. Storage is cheap and you never know when you may need that image that you never knew you needed at the time. Even years after you are dead, those images may be important to someone, somewhere for some reason.

While the camera shake feature is the sizzle of the new Photoshop upgrade, there are several other enhancements they have made to the program as well including, smart Sharpen (new technology promising more realistic sharpening without halos or noise) and new upsampling tech (this helps make your photos look better when you make them larger than you processed them).

The biggest news though is Adobe’s moving Photoshop 100% into the Cloud and 100% by subscription. You’ll still be able to purchase Photoshop CS for the time being, but it won’t have the new features available in CC.

Pricing varies by type of customer but starts at $49.99 a month per person for individuals. Existing Creative Suite customers, students, and teachers will get a discount to $29.99 a month. Creative Cloud has a lot more applications than just Photoshop and also includes Lightroom and a whole suite of other Adobe Creative applications. It also includes integration with Behance, a portfolio site for creatives that Adobe recently purchased.

Adobe Lightroom 4 is Out Today… It’s All About the Light Baby, All About the Light

So Adobe Lightroom 4 is Out Today, It's All About the Light Baby, All About the Light

Adobe Lightroom 4 is officially available today and at half the cost of Lightroom 3. The new version costs $79 for an upgrade and $149 for a brand new purchase. Many of you have been using the beta for the past few months which will probably expire soon. You can download a 30 day trial version to decide before you buy of Lightroom 4 here. The new release requires Windows Vista SP2 or later, or OS X 10.6.8 (Snow Leopard) or later so make sure your current operating system can support it.

So… is Lightroom 4 worth it?

In a word, hell yeah!

Opps, that was two words.

Why?

Well for no other reason the new lighting controls are fantastic. Every photographer knows at the end of the day it’s all about the light, and here the good folks at Adobe have outdone themselves with reworking the old exposure, recovery, fill light, and black sliders into four new sliders: highlights, shadows, whites and blacks. These new sliders give you far more control over how the light is exposed in your photographs allowing you much more granular control in all the details that matter. You also still get a broad exposure slider as well, but the other lighting sliders are where the action is for Lightroom 4. The new control over highlight light is especially welcome.

What else is cool and better with Lightroom 4? Clarity. The clarity slider in Lightroom 4 gives that ever so lovely grit that you love — only now with much less glowing halo. I feel like I’m addicted to clarity these days.

My favorite improvement of all though is more of a pet peeve than anything. The thing that probably drove me nuts the most about Lightroom 3 was that my noise reduction and sharpening effects would not render correctly in fill view in the Develop module. I had my fingers crossed big time when the Lightroom 4 beta came out that they’d fix this problem and indeed they did. Ironically noise reduction and sharpening effects still do not render correctly at fill view in the Library module, but this is of much less concern to me than the Develop module where I spend most of my time processing.

As far as speed goes, Lightroom 4 is an improvement over the Lightroom 4 beta (which was slow as hell), but not really much of an improvement over Lightroom 3 for me. This may be my biggest disappointment in the release. I was hoping for a bigger speed boost, but Lightroom 4 still feels just a touch sluggish to me. I’m on a 3-year-old MacBook Pro though and maybe this is just God/Mother Nature’s way of telling me that it’s about time for me to upgrade my Mac and finally make the jump to SSD while I’m at it.

I’ve also now begun changing my workflow with Lightroom 4 and am now importing all of my photos as DNG instead of CR2 files. I’m doing this mostly because I’m hoping that Lightroom will run faster if I do this. Recent comments made by Product Manager Tom Hogarty suggest that DNG adoption may improve performance with Lightroom 4.

With Lightroom 4 you get much better control with your brushes these days as well. Adjustment brushes now include temperature, noise reduction, shadows and highlights.

Additional improvements include a new Book module (which I don’t use now, but who knows, maybe someday I will), the ability to do very basic video edits, reverse geodecoding and tons of bug fixes.

More from CNET, 9 to 5 Mac, the Verge, and MacWorld.

My Photography Workflow 2011

My Photography Workflow 2011

Probably the number one question I get from people (after which camera should I buy) is “what is your workflow?” For the past two years I’ve published three different articles on my workflow, 2008, 2009 and 2010. Because my workflow changes so much over time, I figured now would be as good a time as ever to update this post for 2011.

I process *alot* of images. I’m trying to publish 1,000,000 photos online before I die — because of this it is imperative that I am as efficient as I can possibly be with the time that I spend processing images. I’m sure I could do some things better/faster, but I’m pretty comfortable with my system right now which is as follows:

Step 1. Capture the Images. At present my daily set up includes the same Canon EOS 5D Mark II camera that I’ve been shooting with for a few years now and five Canon lenses. The 14mm f/2.8, the 24mm f/1.4, the 50mm f/1.2, the 100mm f/2.8 macro and my favorite lens the 135 f/2.

Step 2. Import the images. I’ve got a high speed Hoodman FW800 card reader and four SanDisk cards (8GB, 16GB, 32GB and 64GB). Usually I just let Adobe’s Lightroom 3 import my images from my cards. LR puts each day’s image into a folder properly labeled with that date, so if I’ve got more than one day’s shoot on a card LR will automatically put the images in the right folders by day. If I’m out shooting in the field and need to dump a card and don’t have as much time, I might manually create a date folder myself and simply drag and drop the files from my CF card to the folder on my 17 inch MacBook Pro. This gets the photos to my computer faster.

Step 3. Back up the images. As soon as is practical (and hopefully before I’ve reformatted my CF cards) I will either transfer a day’s photos from my MBP hard drive to a drobo, or I’ll make sure that I’ve run Time Machine on my MBP’s internal hard drive. My drobos have two primary folders, photos to be processed and photos already processed (aka archive). I keep my drobos in a fire proof safe that’s bolted to a cement floor. I also keep copies of my files offsite. I did start using cloud storage as well but cancelled Mozy when they raised their rates. I’ve looked at a couple of the other cloud storage solutions but haven’t really found anything that is compelling for me yet.

Whenever I travel to shoot I always make sure that I bring my Time Machine backup drive and run it each night on the photos that I’ve already shot on that trip.

Step 4. Reimport the images For the most part I try to process in the order that I’ve taken the photos in. Sometimes I’ll skip ahead to process one or two photos from a photowalk, or if an event (like the Oakland riots) is time sensitive. But most of my work is not time sensitive and so I’ll just take my oldest unprocessed day and begin working on it. Right now I’m pretty far behind on my processing. I’m working on images from a Nashville trip from January 2010.

When it’s time to work on new images, I’ll copy that folder for that day’s images from my drobo to my MacBook Pro hard drive. Immediately Time Machine begins backing it up. I process most of my images on a 27 inch Apple Cinema Display. It’s great to have that as a second monitor. Note, if you leave Google+ on one of the displays it’s hard to get any actual processing work done. 😉

I’ll import a day’s image into my current Lightroom catalog and begin work from there.

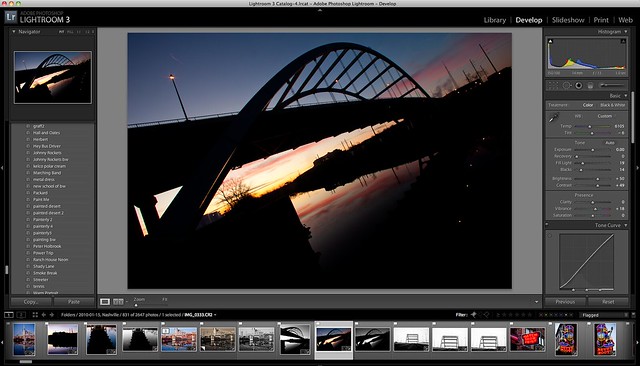
Step 5. Flag Images. The first thing I do with a folder’s images when imported into Lightroom is begin flagging the images that I’m going to want to process in Lightroom’s Library mode. How many images vs. frames that I process depends on the shoot. On some shoots I’ll process almost every image. On other shoots (like a sports event or runway models) I’ll way overshoot. In terms of the images for Nashville I’m working on right now, I’ve flagged 830 out of 2,646 photos for one of the days that I shot there.

Step 6. Process Images. Once I’ve flagged all of the images I want to process, I’ll filter by flag and begin one by one going through these images in Lightroom’s develop module. Each image is processed one by one by hand. I do have a ton of presets and sometimes I’ll use some fo these as jumping off points — many of these presets I’ve made myself, others I’ve found on the web, have been given by friends, etc. Most of the time though I don’t use presets and I just start tweaking the image using the various LR controls for what looks good to my eye and artistic sense.

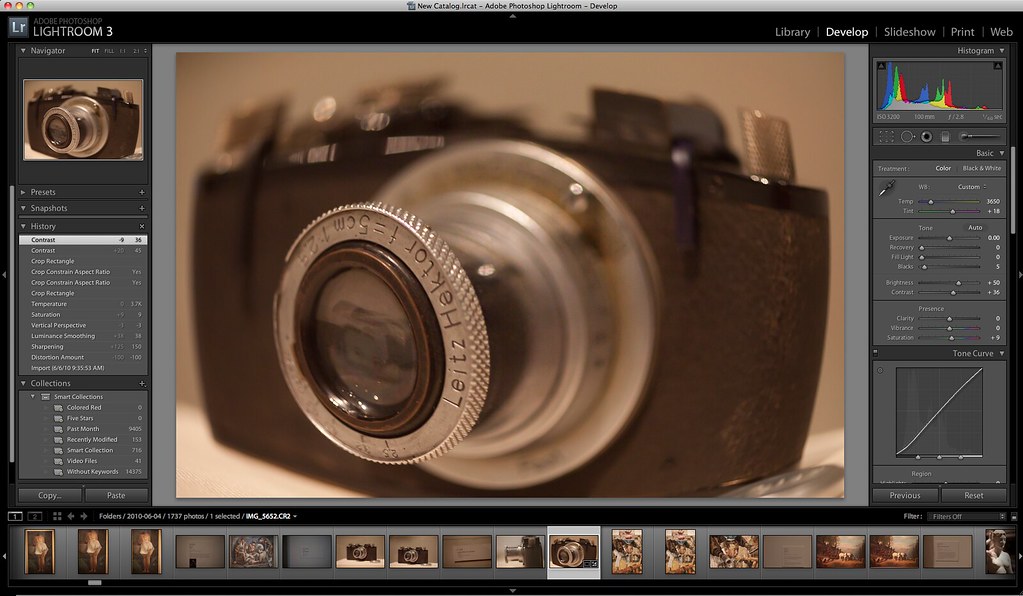
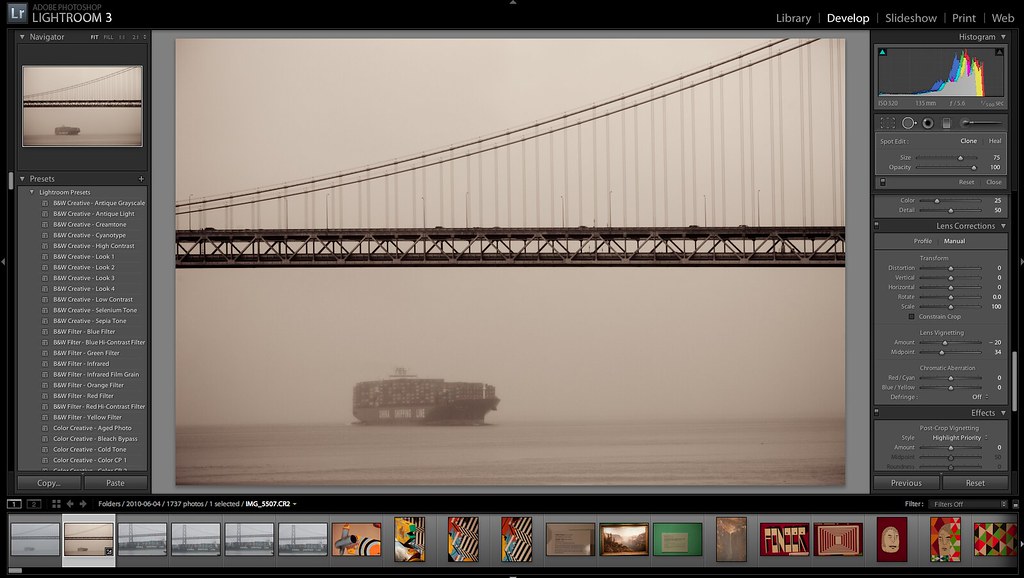
I use most of the tools available to me. Frequently I crop images, boost contrast or vibrancy/saturation, increase blacks and fill lighting, use cloning tools to remove the horrible dust from the 5DM2 and definitely apply Lightroom 3’s killer noise reduction tech as needed.

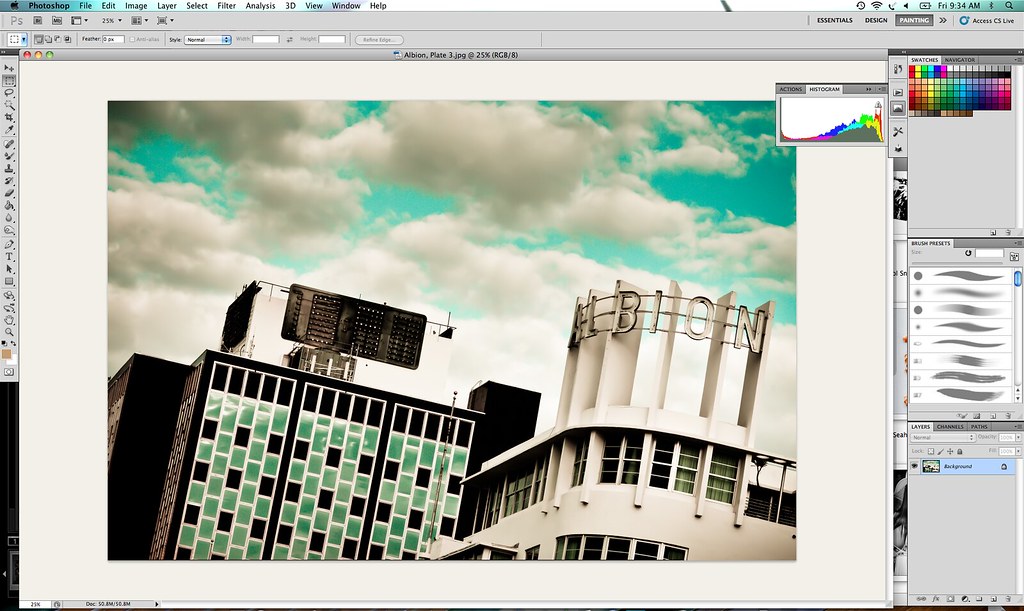
Less than 3% of the time I’ll want to do something even more than what I can do in Lightroom and I’ll bring the image into Photoshop to do some work on it there. You have to be careful with Photoshop though because when you bring an image in there it’s not uncommon to look at your watch and realize you’ve been working on the same image for the past 2 hours. 😉

Sometimes if something really works in black and white I might bring it into Nik Software’s excellent Silver Efex Pro. The black and white conversion effects available in there are remarkable.

Step 7. Keyword. Once I’m done processing each of my flagged RAW images, I’ll begin keywording them. First I’ll apply the broad keywords that apply to everything (eg. United States, United States of America, USA, Tennessee, Nashville). Then I might select multiple images to keyword, (all of my neon shots, all of my bw shots, etc.). Finally I’ll go through each image one by one to add unique keywords (i.e. sunset, Tootsie’s Bar, guitar, graffiti, etc.).

Step 8. Title photos. I spend a great deal of time on my photo titles. For me each image conveys a message. Some titles are obvious and descriptive. Other titles are more personal to me. Titles can be meaningful or random. Alot of my titles come from music. Alot come from poetry. Most are just made up out of things coming from my head. In the meta data “title” field I’ll title each image.

Step 10. Save metadata. A quick cmd-s saves all of my keywords and titles to my photos once I’m done with this process.

Step 11. Export files. Once I’m done with my processing, keywording and titling I’ll export my RAW files as JPGs for online publication. I export at full resolution. I don’t use or apply any crappy watermark. These finished photos then go into a “to be uploaded” folder to be added to about another 20,000 images that are waiting to be published. I title the file titles descriptively (eg. Oakland, Jan 2010, street — note these are just the JPG file titles, the actual image titles are in the meta data).

Step 12. Save folder as a catalog. After I’m done with all this, I will save the folder as its own Lightroom catalog. I then move this catalog file into the folder with the RAW images itself. This way if I ever need to go back and process more from that day’s shoot, I’ll know exactly how I left things when I was working with those images from before. Once this is done I’ll copy the day’s folder into a new archive folder on a drobo and delete the folder from my MacBook Pro’s hard drive.

Step 13. Geotag. Usually I geotag if it’s easy. If I’m shooting all of my images in one place (like a comic book convention in Houston) I’ll simply select all of those exported JPG images and use the application Geotagger to write geotags to them. Geotagger works by me loading up Google Earth and then manually finding the spot I took the photo and then dragging the files over the Geotagger icon in my dock.

I always get people suggesting to me that I use an actual GPS unit (or even my phone) to do my geotagging instead. Basically it’s just not worth the hassle to me. I know it’s gotten easier over the years, but I have to believe that we’ll see in camera geotagging reasonably soon and I just haven’t wanted to invest the time, money, or energy in coming up with a solution here. I hate that with most solutions that I have to synch my DSLR’s clock up with a phone/GPS unit and that I’d have to deal with merging files later, afterwards.

Step 14. Upload. Each day I do two batch uploads to Flickr, 25 images in the morning, 25 images at night. These images are largely pulled randomly from around a 20,000 image bank of reserve photos I have. I’ve also selected about 7,000 of what I feel are my stronger images to upload to Google+. I upload more sparingly to Google+ uploading 5 images spread out during the day there. These are my primary two places that I publish my work online. I’ll also put up some images up on 500px as well, but not systematically like I do with Flickr/Google+. If a photo of mine gets a lot of +1’s on Google+ I might also publish that photo to my blog.

Adobe Posts Lightroom 3.2 and Camera Raw 6.2 Release Candidates on Adobe Labs

Just got this from Adobe:

Adobe today announced the Lightroom 3.2 and Camera Raw 6.2 Release Candidates, available for immediate download on Adobe Labs. The updates extend raw file support to 12 new popular camera models, improve on several of the lens correction profiles introduced as part of the Lightroom 3 and Camera Raw 6.1 releases, and add over 50 new lens profiles to help photographers automatically correct for undesirable distortion and aberration effects.

In addition, the Lightroom 3.2 Release Candidate now allows Lightroom 3 customers the ability to publish their photos directly to Facebook from within the application, and addresses issues reported by customers on the Lightroom 3.0 release. Adobe continues to encourage the community to provide feedback on the updates so it can ensure the highest quality experience for customers working on a variety of hardware and software configurations.

Lightroom is the essential digital photography workflow solution, helping serious amateur and professional photographers quickly import, manage, enhance and showcase all their images from one application. The Photoshop Camera Raw plug-in provides fast and easy access within Photoshop to the raw image formats produced by many leading digital cameras.

Pricing and Availability
The Lightroom 3.2 Release Candidate is available as a free download for Lightroom 3 customers, and the Photoshop Camera Raw 6.2 Release Candidate is available as a free download for Photoshop CS5 customers. For more information and to test out the updates visit http://labs.adobe.com/. Feedback can be provided on the Adobe User to User forum at http://forums.adobe.com.

*Please visit the Lightroom Journal for more information on these Release Candidates and a full list of the improved and newly added lens profiles: http://blogs.adobe.com/lightroomjournal

Newly Supported Camera Models
Panasonic DMC-FZ100, Panasonic DMC-FZ40 (FZ45), Panasonic DMC-LX5, Pentax 645D, Samsung NX10, Samsung TL500 (EX1), Sony A290, Sony A390, Sony Alpha NEX-3, Sony Alpha NEX-5

Also, this update improves the color and noise profiles for the following cameras that utilize the DNG raw file format already supported in previous versions of Lightroom and Camera Raw: Casio EXILIM EX-FH100 (DNG) and Leica S2 (DNG).

Become Adobe Photoshop’s Next Evangelist

#1 Photoshop Fan from Adobe Next Photoshop Evangelist on Vimeo.

Adobe is running an interesting contest right now. They are inviting people to upload a two minute length tutorial video to Vimeo sharing why they think that they should be the next Photoshop evangelist.

From Adobe: “submit a two-minute Photoshop video tutorial demonstrating why you should be the Next Photoshop Evangelist. Your video must use Photoshop CS5, a new Photoshop CS5 feature, and, to celebrate the 20th anniversary of Photoshop, incorporate the concept of “20” somewhere in the final image. Have fun!”

Once you make your video you submit it to their Vimeo group here.

Adobe will then select up to 12 finalists where the general membership of their Facebook Photoshop Community will vote on which finalist video is the best for the Grand Prize.

The Grand Prize winner will receive a copy of Creative Suite 5 Design Standard, a trip to Photoshop World (Spring 2011), the chance to demo their tutorial at the conference, roundtrip coach airfare, lodging and meals. All Finalists will also be showcased on the Photoshop YouTube channel.

So Adobe’s incorporating Vimeo in this one. YouTube. And even Facebook. A nice contest that touches on a lot of the social web.

Personally I think someone could do something pretty creative with the new painting features using the mixer brush that’s new in CS5. By the way, here is my own review on the new CS5 from a few months back.

Submissions must be in by August 24th.

Good luck!

Adobe Lightroom 3, I Feel the Need for Speed, Oh, And The Most Significant Advancement In Photo Noise Reduction I Have Ever Seen

Adobe Lightroom 3, I Feel the Need for Speed, Oh, And The Most Significant Advancement In Photo Noise Reduction I've Ever Seen

For the past week or so I have been editing my photos exclusively with the official release of Adobe Lightroom 3. There’s alot to like about the new version of Lightroom, it’s faster and more stable than previous versions, it has some cool new lens calibration features, it has better watermarking features, more natural post crop vignetting, you can tether the program to your camera now and watch your photos in near real time as you shoot them in a studio, and lots more. But far and away, the single most compelling feature of the new release comes down to two simple words: noise. reduction.

Quite simply Lightroom 3 represents the single most significant advancement in photographic noise reduction I’ve ever seen. I’m *blown* away. Thousands of photos that were previously unworkable for me, now have suddenly become available to process. High iso low light shots with tons of noise can be salvaged, saved and turned into beautiful images. What’s more, pushed to it’s extremes, this new noise reduction technology gives photographs an almost painterly quality, allowing new potential for artistic representation of photographs.

In fact, combined with new in camera technology allowing isos to be bumped to as high as 6400 natively, this new noise reduction technology by Adobe opens up a whole new world of hand held night photography never before available. Not having to worry about the noise at 6400 iso (or higher) gives today’s photographer an enormous amount of freedom to pursue low light subjects that as recently as one year ago would have been simply unthinkable.

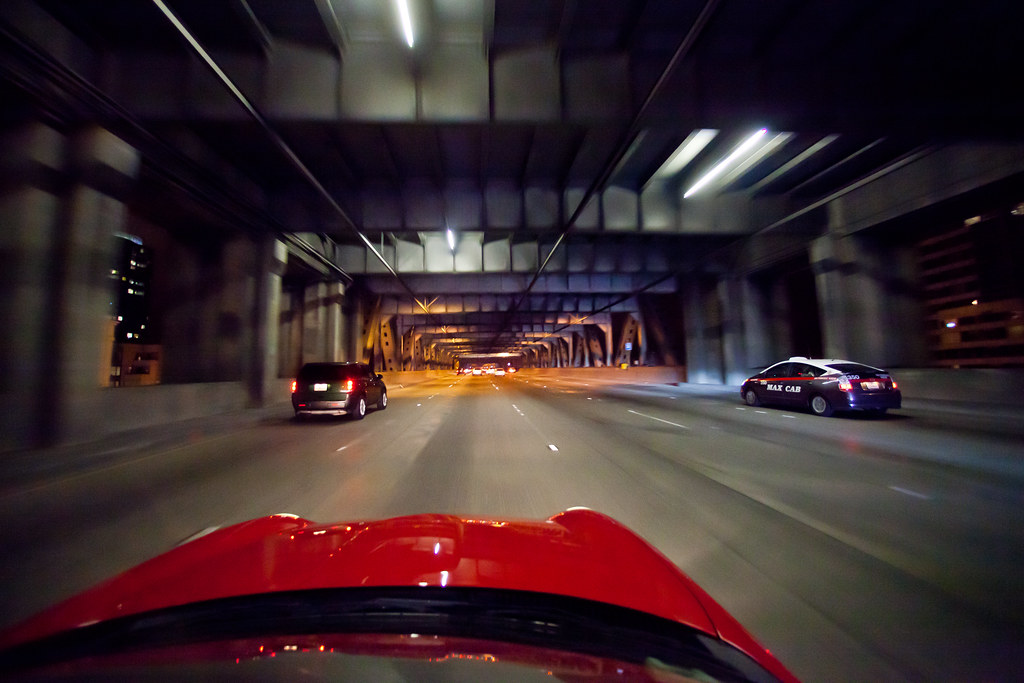
Photo Pre Lightroom 3 Luminance Noise Reduction

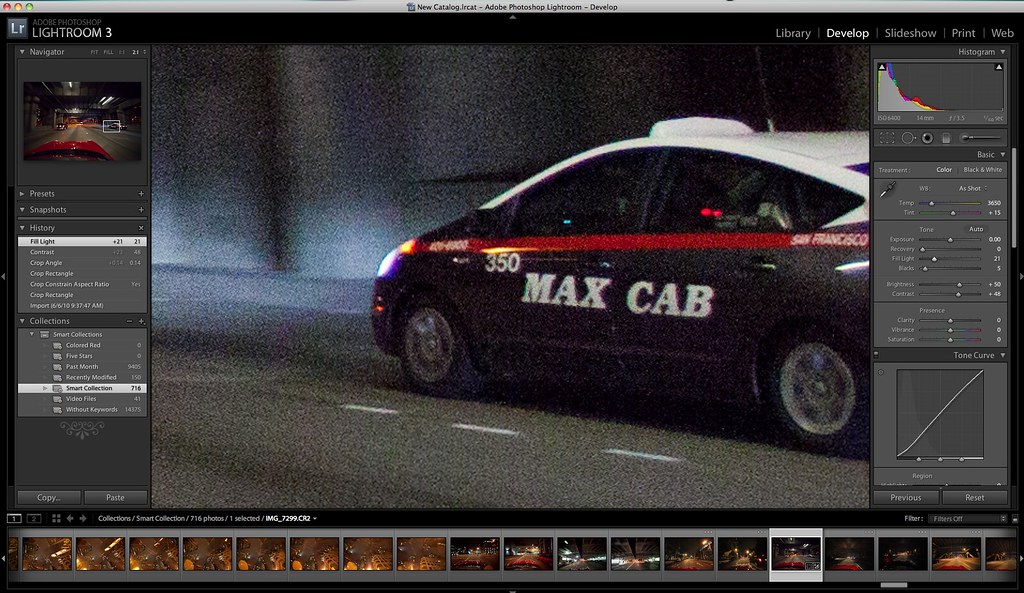
The photo above is a photograph of mine shot at 6400 iso taken on Saturday night while driving a red convertible sports car over the Bay Bridge, (don’t worry folks, I was the passenger, not the driver). The shot was done hand held as I was standing in the fast moving car at night. The photograph has the following settings (iso 6400, f/3.5, 1/60th of a second exposure). I’ve zoomed in on a very small detail portion of the photograph to display the noise at 6400. If you want to get a closer view at this image you can click through here and see it directly.

Photo Post Lightroom 3 Luminance Noise Reduction

Now. Look at the exact same photo after I’ve used the luminance noise reduction slider to remove the unwanted noise. As you can see, the difference between the before and after is remarkable and dramatic. You can also click through here to see this screenshot in greater detail.

Unbelievably good! In addition to the impressive advancements in luminance noise reduction, Lightroom 3 also has made new advancements in color noise reduction as well. The noise reduction improvements in Lightroom 3 were so dramatic for me that it was hard for me to get as excited about some of the other improvements by comparison. But there are lots of other new features and improvements in the new version.

Lens Correction Features in Adobe Lightroom 3

I’ve only played around a little bit with some of the new lens correction tools, but they offer some very impressive abilities to pretty significantly alter or improve basic lens distortion. Of course you can also use this new feature to do some interesting and extreme things with your photos as well (for instance turning a regular photo into an almost fisheye photo, like in the photo above). The new version of Lightroom also includes some cool new profile tools which allow you to use existing (or future created) profiles to match up your specific camera with your specific lens and have Lightroom automatically make the known lens correction based on that profile. For the purist who wants their photo exactly like it was shot using their exact set up this will be a nice feature.

The lens correction features also include a unique “perspective” lens correction that can turn a photo of a sign or building or whatever shot up at or down at to look more like it was shot directly at.

Other notable improvements include the ability to add natural looking grain to a photograph (this is especially useful in working with black and white images), the ability to create more natural feeling post crop vignetting, the ability to import video files now directly into Lightroom, faster importing, more customized photo layouts for printing and more flexible watermarking. Lightroom 3 also simplifies publishing your photos to Flickr allowing you simple drag and drop functionality using the Flickr API and allows you to synch some of the photos in your collection directly to a folder to then be synched with your iPhone or Google Android phone so that you easily have the photos that you want on your phone.

Default Presets Included in Lightroom 3

Adobe also ships a number of preconfigured presets with this version of Lightroom. Lightroom presets have been some of the most hotly traded items around the web amongst photographers. I wouldn’t say that the default presets are the best that I’ve ever seen, but they are a solid jumping off point for those who would like to work more with presets. Hopefully Adobe continues working with presets and adding more and more custom presets in the future. The photo above is an example of their “Color Creative – Aged Photo” preset.

All and all I’m extremely impressed with this version of Lightroom 3. It is by far the best tool that I know of today to process your photos. If you want to purchase a copy of the new Lightroom or upgrade a previous version of Lightroom you can do that here. The program costs $299 for a new copy or $99 for an upgrade from Lightroom 1.X or 2.X. There is also a fully functional trial version that you can try first before deciding to purchase.

Update: Stephen Shankland over at CNET has another good review here. CrunchGear has a review here. Kerry Garrison interviews Senior Lightroom Product Manager Tom Hogarty for the cameradojo Podcast about Lightroom 3 here. John Nack has a post here. A good link roundup from the Lightroom Blog here.

Adobe Photoshop CS5 Available for Trial And Purchase

Adobe Photoshop CS5 Available for Trial And Purchase

You can go get it here. You can download a free trial to try first here. It’s nice that Adobe allows you a free trial version first before deciding if you want to purchase it.

I think this is the most significant upgrade for Photoshop yet. You can read my review on the new software from a few weeks back here.

More from John Nack on the release here.

Full press release from Adobe on the product below.

Adobe Ships Creative Suite 5

Breakthrough Interactive Design Tools and Innovative Online Services Maximize Impact of Creative Content and Digital Marketing Campaigns

SAN JOSE, Calif., — April 30, 2010 — Adobe Systems Incorporated (Nasdaq:ADBE) today announced the availability of the Adobe® Creative Suite® 5 product family, the highly-anticipated release of the industry-leading design and development software for virtually every creative workflow. With more than 250 new product features, the Creative Suite 5 product line brings exciting full-version upgrades of flagship creative tools and workflow enhancements to designers and developers — enabling the creation, delivery and optimization of content across media for greater impact and results.

The Adobe CS5 product family is powering the creation of content and applications for the upcoming releases of Flash® Player 10.1 and Adobe AIR® 2, which are optimized for high performance on mobile screens and designed to take advantage of native device capabilities for a richer, more immersive user experience. Featuring integration with online content and digital marketing measurement and optimization capabilities for the first time, Creative Suite 5 products include access to signature Omniture® technologies, to capture, store and analyze information generated by websites and other sources. Adobe Creative Suite 5 products also integrate with Adobe CS Live*, a set of five innovative online services that accelerate key aspects of the creative workflow and enable designers to focus on creating their best work (CS Live services are complimentary for a limited time).

The Creative Suite 5 line-up includes five new versions: Creative Suite 5 Master Collection, Creative Suite 5 Design Premium, Creative Suite 5 Web Premium, Creative Suite 5 Production Premium, Creative Suite 5 Design Standard, as well as 15 point products and associated technologies. Creative Suite now includes a brand-new component, Adobe Flash® Catalyst™, a professional interaction design tool that allows designers to rapidly create expressive Web application interfaces and design interaction without writing code.

“We’ve seen from early customer reaction that Creative Suite 5 continues to inspire the design and developer world by combining time-saving workflow and productivity features with astonishing new capabilities, such as Content-Aware Fill in Photoshop CS5, that really push the creative envelope,” said John Loiacono, senior vice president of Creative Solutions at Adobe. “Whatever the media, CS5 is ensuring that publishers and creatives can deliver stand-out work and build great businesses around their unique digital assets and content.”

Also available as part of the Creative Suite 5 product family, sold separately or in one of the five Creative Suite editions, are new versions of the Adobe Creative Suite tools, including Photoshop® CS5, Illustrator® CS5, InDesign® CS5, Flash Catalyst CS5, Flash CS5 Professional, Dreamweaver® CS5, Adobe® Premiere® Pro CS5, After Effects® CS5 and more.

The Creative Suite 5 products offer more than 250 new features that embrace interactivity, enhance performance and maximize the impact of creative content and digital marketing campaigns. InDesign CS5 powers the transition to digital publishing with new interactive documents and enhanced electronic reader device support. Image creation and editing get a boost with Truer Edge technology in Photoshop CS5, which offers better edge detecting technology and masking results in less time. Photoshop CS5 also includes the ability to remove an image element and immediately replace the missing pixels with Content-Aware Fill. New stroke options allow Adobe Illustrator CS5 users to create strokes of variable widths and precisely adjust the width at any point along the stroke. New Text Layout Framework in Flash Professional CS5 provides professional-level typography capabilities with functions like kerning, ligatures, tracking, leading, threaded text block and multiple columns. In addition, Dreamweaver CS5 now supports popular content management systems Drupal, Joomla! and WordPress, allowing designers to get accurate views of dynamic Web content from within the product.

Performance improvements abound in the Creative Suite 5 product line with engineering breakthroughs, including native 64-bit support on both Mac and Windows® in Adobe Photoshop, Adobe Premiere Pro and After Effects, that allows users to work more fluidly on high-resolution projects. The much anticipated NVIDIA® GPU-accelerated Adobe Mercury Playback Engine allows Adobe Premiere Pro CS5 users to open projects faster, refine effects-rich HD sequences in real time and play back complex projects without rendering. The revolutionary timesaving Roto Brush tool in After Effects helps users isolate moving foreground elements in a fraction of the normal time.

Accelerate Creative Workflows with Adobe CS Live
Adobe Creative Suite 5 products integrate with Adobe CS Live*, a set of five online services that accelerate key aspects of the creative workflow and enable designers to focus on creating their best work. CS Live online services are complimentary for a limited time and currently include: Adobe BrowserLab, Adobe CS Review, Acrobat.com, Adobe Story and SiteCatalyst® NetAverages™ from Omniture. Adobe CS Review enables online design reviews from directly in Creative Suite 5 applications, while Adobe BrowserLab is an indispensable tool for testing website content across different browsers and operating systems. NetAverages provides Web usage data that helps reduce the guesswork early in the creative process when designing for Web and mobile. Adobe Story is a collaborative scriptwriting tool that improves production and post-production workflows in CS5 Production Premium. Access to Acrobat.com services, such as Adobe ConnectNow Web conferencing, is also included to enhance discussion and information exchange with colleagues and clients around the globe.

Create and Deliver to More Mobile Platforms
Using Flash Professional CS5, designers and developers can create, test and deliver Web content across a wide range of mobile platforms and devices such as smartphones, tablets, netbooks and other consumer electronics. Users can look forward to deploying content in the browser with Flash Player 10.1 and as a standalone application with AIR 2.

Pricing and Availability

Adobe Creative Suite 5 products and its associated point products will be available through Adobe Authorized Resellers, Adobe Direct Sales and the Adobe Store at http://www.adobe.com/store. Estimated street price for the suites is US$1899 for CS5 Design Premium, US$1799 for CS5 Web Premium, US$1699 for CS5 Production Premium, US$1299 for CS5 Design Standard and US$2599 for Master Collection CS5. Upgrade pricing, volume licensing and education discounts are available. Adobe CS5 products integrate with Adobe CS Live online services which are complimentary for a limited time. For more detailed information about features, OS support, upgrade policies, pricing and international versions please visit: http://www.adobe.com/go/creativesuite.

About Adobe Systems Incorporated

Adobe revolutionizes how the world engages with ideas and information – anytime, anywhere and through any medium. For more information, visit http://www.adobe.com.

My Photography Workflow 2010

For the last two years I’ve written blog posts detailing my own personal photography workflow that I use. As the tools to process photos change and as I learn more about processing photos, so does my workflow.

I probably get more questions about my workflow (or what camera to buy) than any other sorts of questions. So since it’s been a year now, I thought I’d update my own personal photography workflow.
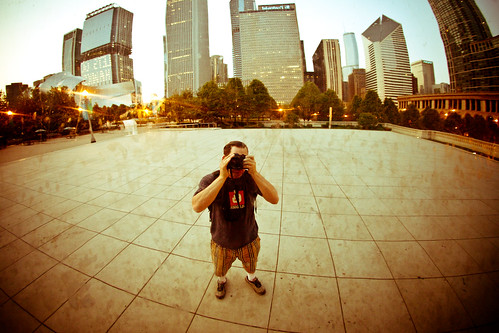
Self PortraitStep 1. Capture the Image: At present my daily set up includes a Canon EOS 5D Mark II camera (which I love but which has a *horrible* problem with dust), and five Canon lenses. The 14mm f/2.8, the 24mm f/1.4, the 50mm f/1.2 (with crappy autofocus), the 100mm f/2.8 macro and my favorite lens the 135 f/2.

Also with me everywhere I go is a 17 inch MacBook Pro, a Hoodman high speed firewire 800 card reader, my camera battery charger and an extra battery and 3CF cards (a 8GB, 16GB and 32GB, all by SanDisk). My 16GB card has recently been having problems and has been acting up so I’ll probably throw that out and buy another new 32GB card before my next big photography trip.

I recently replaced my camera backpack going from the Lowepro CompuDayPak to the Computrekker Plus AW backpack. The zipper on my CompuDayPak was shot and after three years or so of daily use the bag was falling apart. It supposedly has a lifetime guarantee, but when I looked at the guarantee more closely it looked like it didn’t cover every day wear and tear and especially issues with zippers.

The new backpack is substantially more sturdy. I like it a lot more. My gear feels much better protected and it’s got a ton more room. Unfortunately it does feel a bit bulky and sometimes I feel like it looks like I’ve got a suitcase strapped to my back and look like a dork. 🙂

I shoot almost every day out and about in the Bay Area, sometimes at night for special events, photowalks etc. and most significantly as part of my project to document the 100 largest cities in America. Lately I’ve been taking intensive five day trips to different large American cities where I’ll shoot over 10,000 frames. I shot Nashville and Memphis in January, Miami in March and I’m heading to Detroit next in early June.

The Hoodman RAW 400/800 FireWire Compact Flash Card Reader is Built For Speed2. Step 2. Transfer my images to my MacBook Pro. One of the best photography tools I’ve purchased in the last few years has been my highspeed FireWire 800 card reader (see link above). It can transfer a full 32 GB card in less than 15 minutes. When I’m out in the field I’ll use little breaks occasionally to offload images from my cards to my MacBook Pro with this card reader which is always with me. If you are still using camera cables or a USB card reader, you have no idea the speed you are missing.

I usually drag and drop the files directly from the card to a folder I create on my MacBook Pro with the date of the shoot. If I’m in the field this is the fastest way to get the images off the card and get me back shooting again. It takes over twice as long to have Lightroom copy and import the photos for me, so I only use Lightroom to do this task if I’m already in for the night, at home, etc. and don’t care about the time it takes to transfer files.

I bring two hard drives with me on trips. A 750GB external Seagate Hard Drive that serves as a Time Machine drive to backup my Mac. And an extra 1TB Seagate Free Agent drive (which I LOVE, is USB powered and not much larger than an iPhone or a pack of cards — this drive is the ultimate portable travel hard drive and a great value). The Free Agent drive is where I put extra images when I fill up my MacBook Pro 500GB internal hard drive.

When I get home I’ll frequently offload day shoots from my MacBook Pro to one of my 5 archive Drobos. Here my photos are backed up and replicated. I can then later copy the files back to my MBP when I’m ready to actually process them. At any given time I’ve got photos I’m processing on my MBP (backed up with Time Machine).

I’ve also now begun backing up my files in the cloud to Mozy as well. More on this later.
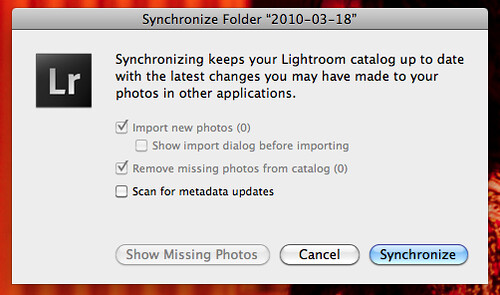
Synchronize3. Step 3. Synch my images to Lightroom. After I add a day’s shoot to process I’ll synch my MBP photos folder with Lightroom to import these images into Lightroom.

4. Step 4. Flag Images in Lightroom. Next I go through a days shoot using Lightroom to flag all of the photos that I want to process. Depending on the shoot I’ll usually process anywhere from 5% of my shots to 20% of my shots I’d estimate.

5. Step 5. Move all of my flagged images to a “flagged photos” subfolder in that date’s folder. I do this so that I can keep straight which images I’ve processed and which I haven’t. This way if I want to go through the photos that I passed on the first time around and revisit them to process latter I’ll be able to keep this straight in my records. I don’t always process 100% of what I flag, but pretty close.
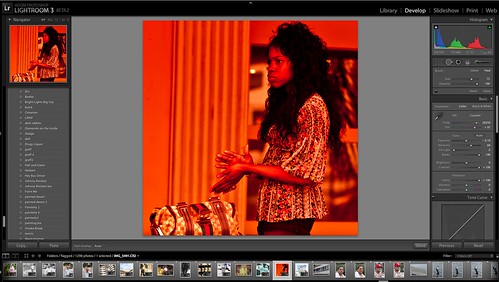
My Photography Workflow 20106. Step 6. Develop my photos one by one. Here I go through Lightroom’s develop module to individually process every photo on a one by one basis. I rely heavily on presets as well. I’ve got probably 500 or so presets that I regularly use on my photos. Many of these I’ve gotten from other photographers. Many of these I’ve made myself. Sometimes I’ll process a photo without using a preset, but many times I’ll use a preset as my starting point to give the photo a certain look before tweaking it further from there. Rarely do I ever just use a preset and export. I almost always tweak the photo from my presets.

When I’m developing I will frequently adjust contrast, temperature, brightness, exposure, vignetting, sharpening and noise reduction. I’ve only recently been using noise reduction so much more with Adobe’s new beta version of Lightroom 3.

Adobe’s improved noise reduction tool in the new beta may be the single most significant advancement in digital photo processing that I’ve ever seen. It has blown me away and if you are not using it you really are missing out. Anyone can download the Lightroom beta for free right now here. Adobe’s new noise reduction technology allows for regular shooting at 6400 iso on my camera, which opens up a whole new realm of what is possible with night photography.

I was able to shoot some amazing night street portraits down in Miami Beach in March at very high isos and eliminate all of the noise in these high iso photos with this feature. Here’s an example of a street portrait that I shot at iso 4,000 in Miami. It’s amazing to me how easy it was for the new Lightroom beta to get the noise out of this high iso photograph.

Frequently I’ll also use the cloning tool in Lightroom to eliminate visible dust on my images. Canon’s so called anti-dust technology sucks big time (see above). Cloning out dust is the number one waste of time for me in processing my images. Recently I bought the Arctic Butterfly brush to give that a try to improve the situation. I was using sensor swabs and methanol but they weren’t really working. I’ll try and post an update on the Arctic Butterfly once I have time to test it out sufficiently.

6B. Step 6B. External Processing in Nik Silver Efex or Photoshop. Occasionally I’ll do additional developing work on an image using either Nik Silver Efex or Photoshop CS5. Photoshop CS5 kicks serious ass. I haven’t been using Silver Efex really since I’ve been on the Adobe Lightroom 3 Beta. For some reason it seems to warp my images when I send them to Nik as an external editor. My images also get warped if I send them to photoshop as an external editor as well, so usually when I do work in photoshop I’ll just open the exported file directly in Photoshop to do more work on them.

Nik Silver Efex Pro is one of the best black and white conversion packages I’ve ever used. I’m hoping that when the official non-beta LR release is out that it will make it possible for me to use Nik Silver Efex again. You can download and use Nik Silver Efex Pro free for a 15 day trial. If you haven’t checked this out yet, you should.

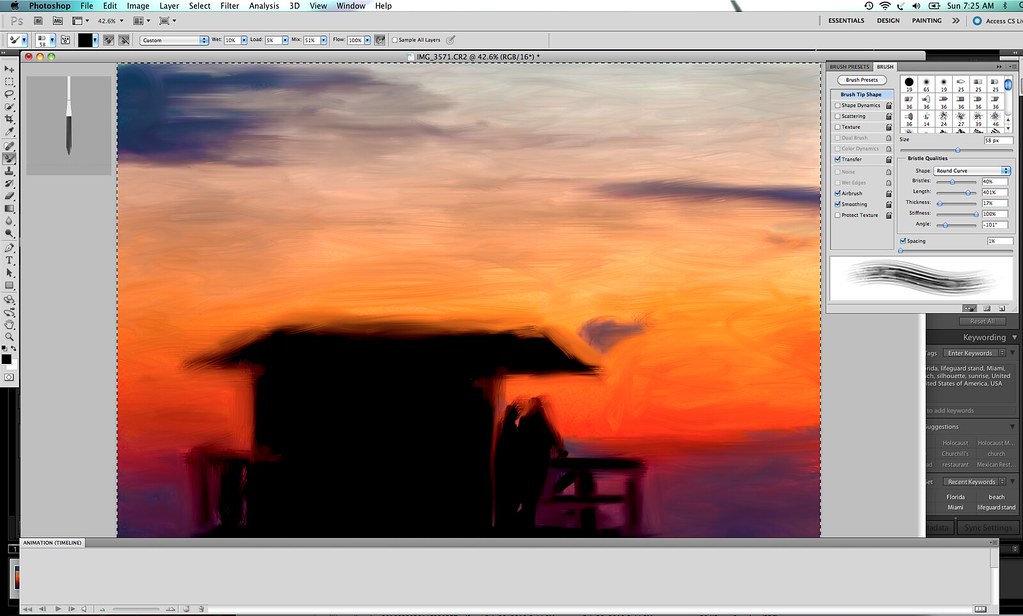
Mostly in Photoshop I’ll do little things like add a frame, or add a blending layer to manufacture artificial film like scratches on a photo, or little touches like this. I don’t do this alot because it’s time consuming. Lately I’ve also begun painting some of my photographs in Photoshop. You can read more about that in my review on the CS5 Photoshop Beta here. Look for Photoshop CS5 to be released shortly.
My Photography Workflow 2010, Plate 2
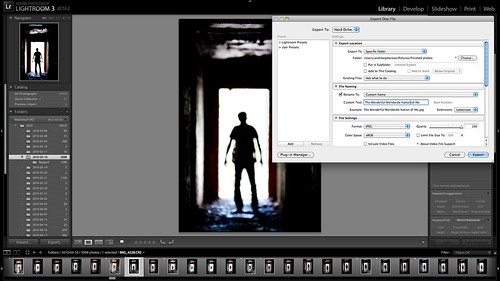
7. Step 7. Export my file as a full sized high quality JPEG image. Lightroom defaults to 240 DPI (not sure why) so I use this as my output DPI with the highest quality full sized JPG. These images are exported to a “finished photos” folder.

As I export each photo I will name it at that time. A lot of people ask me where the titles on my photos come from. They come from all over really. My titles are frequently very personal to me, obscure and abstract. They frequently have a story that only I know behind them. They are frequently inspired by music or are lyrics to a song that I relate to that image in my own mind.
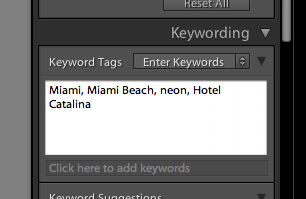
Keywording8. Step 8. Keywording. Once I’ve finished processing a days shoot, I will synchronize my finished files folder in Lightroom and begin keywording. I’ll apply broad general keywords to all of the photos usually like the location (city, state, country) or batch keyword big groups of photos that cover the same subject (graffiti, neon, venue, subject, etc.). Then I’ll go through the photos one by one looking at each for any unique keywords possible.

If the photo is of a neon sign or of a specific location I’ll also frequently go get the address of the venue from Google and paste that into the keyword description.

This meta data is later automatically applied to my image when I upload it online.

9. Step 9. Geotagging. I use Google Earth and Geotagger next to geotag *some* of my images. In general I’ll geotag if it’s easy. For awhile the OCD in me was geotagging every single image I’d process. I’d painstakingly go through Google Earth and geotag them one by one by one. This was a ton of work, especially if the work needed to be done in a city that I’m not as familiar with. Now I’ll just geotag the images if it’s super easy and I can get there quickly in Google Earth or if a bunch of images are from same location and I can batch them.

Once the new version of iPhone’s OS can multitask, I’ll probably start trying out some of the geotagging geolocational apps for the iPhone. Or there’s a good chance that I’ll switch to an Android based phone in July when my iPhone contract is up and I’ll see what I can use for that there.

10. Step 10. Archiving. Once I’m done with this I’ll sort my images into what I consider A quality photos and B quality photos. These are then transferred to a Drobo, where I have an “A to be uploaded” folder and a “B to be uploaded” folder.

11. Step 11. Publishing. Twice a day (once in the morning, once at night) I’ll pull 5 photos from my A folder and 17 photos from my B folder at random and upload them to Flickr. This is a total of 44 photos a day that I upload.

I’ve got about 20,000 unpublished photos in my to be uploaded photos folders at present. I always upload what I feel are my five strongest images of any batch upload as the last five to Flickr. This way these are the five that will show up for my contacts when they see my photos in their contacts page. These 5 will also show up on the first page of my main Flickr page if someone goes there directly.

If a photo gets 25 faves or more on Flickr, I’ll generally blog that photo at thomashawk.com as well. You can see these photos on a version of thomashawk.com filtered only for the photoblog portion here.

Once these photos are published they go into a folder by month based on upload date. (Note, the original RAW files always stay in the folder of the date they were taken).

Anyways, that’s about it. This article is a bit longer than the past few years, but I’ve been doing a lot more with my processing as well. Feel free to ask any questions in the comments or offer up any suggetions you might have for improving my own workflow. Thanks!
Adobe Photoshop CS5 Boldly Empowers the Digital Artist

This is A New Day

So I’ve been playing around with Adobe’s lateset version of Photoshop that will be coming out in the next month, CS5, and I have to say that I think it represents a bold, dramatic and fundamental shift in digital art creation. I’ve been using Photoshop for many years now but this version has blown me away like none that I’ve ever seen.

The new version has lots of cool new toys and tools for photographers, which I’ll get into, but for me by far the most significant achievement in this new version is that it has for the first time made painting available to the photographer.

I’ve wanted to paint for years, but have never had the talent with a physical paint brush. I’ve tried various software solutions to paint digitally and never have they done what I want. Usually painting effects in digital imaging software come out more as cheesy filters, routinely and uniformly applied over an entire image, resulting in something that feels more like a faux painting than a painting. But with Photoshop CS5’s new painting module, you have a new unprecedented amount of control over painting and brushes and can manually now paint over a photograph and turn it into the most realistic version of an actual painting I’ve ever seen.

Reclining Nude

Kodak

I can’t wait to see what people end up doing with the painting module in the new Photoshop. Yesterday I uploaded my first “painting” to Flickr (above). It’s very crude and rough and I only spent about 10 minutes on it, but I think you get the idea with what is possible. I’m really looking forward to trying to replicate more photorealism with some of my neon sign photographs especially. The other two images in this post of the reclining nude and neon Kodak sign are also paintings made from photographs of mine.

So more than anything the painting tools and their total realistic representation blew me away in Photoshop CS5. I’m impressed big time. I was so impressed with that new feature that I hardly had time to really dig into more of the new tools for the photographer.

Painting in Photoshop CS5

So what else is new for the photographer in CS5?

New HDR Functionality in Photoshop CS5

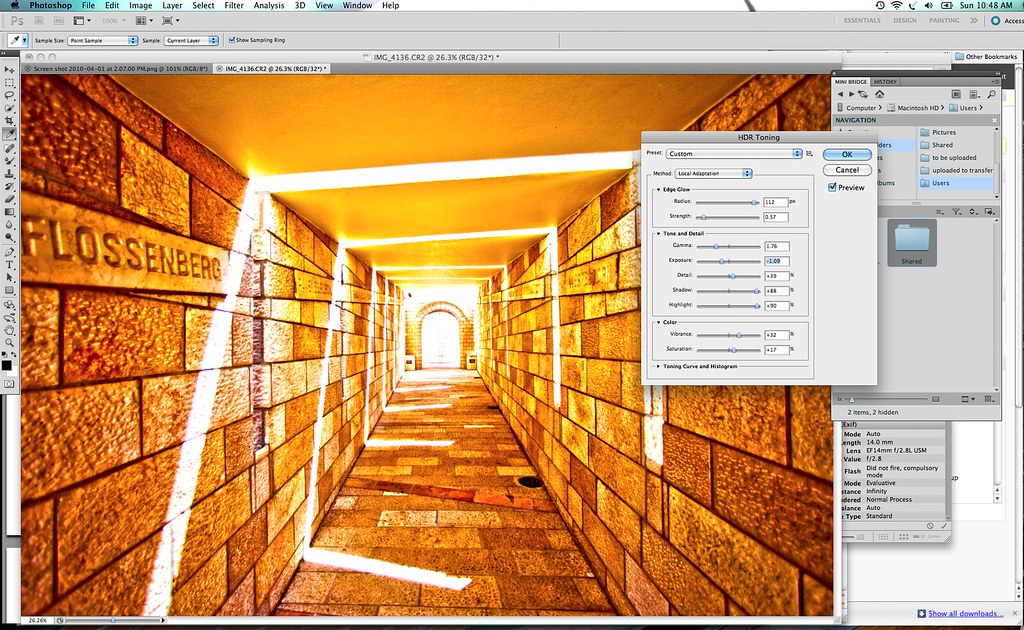
1. HDR, HDR, HDR. Now I’m not really an HDR photographer (yet), but Photoshop CS5 has new HDR functionality allowing you to combine multiple exposures to create hyper-realistic photos. Now I’ve tried HDR before in both Photoshop as well as other software packages and could never really get the hang of it. It seemed super hard to work with. It feels much easier in Photoshop CS5. CS5 also brings you the ability to create a HDR like photo from a single photograph rather than multiple exposures by using HDR Toning which mimics the HDR look in photos.

Remove Unwanted Elements in Photoshop CS5

2. Much cleaner removal of unwanted elements in your photos. In the past if I wanted to remove something from a photo it was very difficult. Painstaking. It was tough with the tools to get all of the nuance of color around an image, the little halo left behind, etc. Now Photoshop has what they call “content-aware fill options”.

Basically when you remove something it automatically analyzes the surrounding area to replace perfectly what was around that content. It looks at the lighting, tone, sharpness, and essentially dynamically rebuilds what should have been there. It can even handle complex patterns where someone is standing in front of something like a wall or something with an intricate design. Adobe showed me an example where they actually remove a guy from in front of a wall. You’d never have known he was ever there.

You Are the Puppet Master in Photoshop CS5

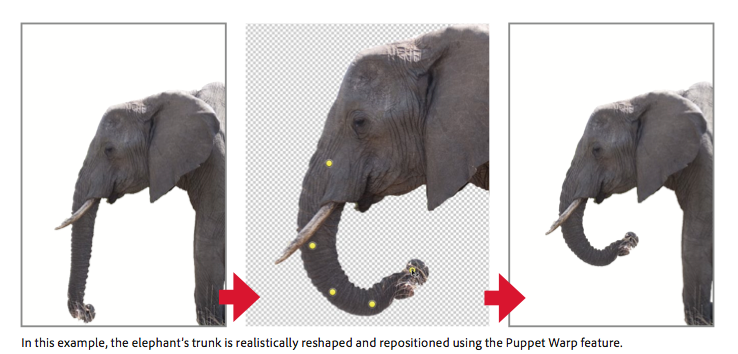
3. Puppet Wrap. Because you are the puppet master, right? It’s hard for me to explain puppet wrap exactly. But basically you can reshape objects in a frame, actually recompose a subject. See Adobe’s example of the elephant’s trunk.

4. Automatic lens correction. I don’t really use this, but the new Photoshop can now correct lens distortion better, correcting the three most common lens-based errors: geometric distortion, chromatic aberration, and vignetting.

5. Along with Photoshop CS5 comes the new camera RAW 6 plug in. This is the same camera RAW plug in that is presently being tested with the Lightroom 3, beta 2. Most significantly, Adobe has taken noise reduction to a new level with Camera RAW 6. I am amazed at how effortlessly and easily Adobe removes the noise from even the highest shot ISO images. Of all the things I’ve been playing around with in the Lightroom beta right now, this is by far the most significant improvement for me personally.

My only gripe about the noise reduction capabilities in the new camera RAW is that the results of your noise reduction (and sharpening) are only visible if you view at actual size 1:1. I wish that Adobe would render full sized view options with the actual results of noise reduction and sharpening instead of making you have to zoom in all the time — at least this is the case in Lightroom 3 Beta 2.

6. Adobe added a new mini bridge module for Photoshop. Now you no longer have to switch back and forth between Bridge and Photoshop to look at your photos from an organizational standpoint. Simply use the mini-bridge view from within Photoshop.

It should be noted that with Photoshop CS5 Adobe also introduced over three dozen new little productivity saving changes, features, shortcuts, etc. There are new features like cropping with a rule of thirds overlay, one click straightening, the ability to do better and easier conversions from color to black and white with tints to get tinted monochrome images and others.

Adobe also introduced some new tools to build 3D graphics with Photoshop. I can’t imagine using these personally, but if you do create graphics, this will be a nice new tool as well.

As always, you can easily use Lightroom as your first pass photo application and then use the Photo > Edit In > menu in Lightroom to bring the adjusted photo right into Photoshop to do your final finishing on it where wanted/needed.

Overall I’m *extremely impressed with the new version of Photoshop. While I do 95% of my processing of my images in Lightroom and usually only go into Photoshop for touching things up, it still is a must have application for my own workflow. More significantly going forward though, I will definitely be using Photoshop *much* more to keep up with my new hobby of painting my photographs. I’m also looking forward to exploring HDR a bit more and all of the other improvements that the new Photoshop brings to the table.

Hats off to the Photoshop team on the best version of Photoshop yet!

Stephen Shankland also reviewed the new Photoshop CS5 for CNET here and Adobe Featured Blogs here.