Don’t Wait Until You Lose Your Photos for the First Time to Begin Working on Your Backup Strategy

“Because I’m a jerk who doesn’t back up data, I’ve lost at more than a year’s worth of photos, emails, documents, and more. And, really, who knows what else.” — Mat Honan

Mat Honan was hacked yesterday and apparently lost more than a year’s worth of his photos. Like Mat, I too have lost photos in the past. If you shoot enough it’s almost inevitable, unless you are very, very meticulous about your backup strategy.

As strong as I think my backup strategy is today, I realize that it can still be stronger and plan on improving it later this year when the Drobo Mini is out. I’ll get more into this in a bit.

First off though, I’m sorry you were hacked Mat. That really sucks. I’ve had my Twitter account hacked before too. It’s not fun. After they hacked my Twitter account, they got into my blog and some of my other sites. It took time and money to clean it all up. It’s misery.

I’m not going to chide you about not having your photos backed up. People that chide you or mock you about that are assholes. It’s like kicking someone when they’re down. So while I’m using your experience to illustrate a point, it’s meant in a very sympathetic way.

I’ve known a lot of people over the years that have lost photos. It’s happened to so many people. The problem is that most people don’t start seriously working on a backup strategy until *after* they lose their first batch of photos. Everybody always means to work on a back up strategy, but it’s not fun. It’s tedious and boring. It’s so much more exciting to be out shooting or publishing your photos to the web than to be working on a backup strategy. Having lost photos though I can tell you that the sinking feeling you feel when that happens is just horrible and you must begin working on a strategy so what happened to Mat doesn’t happen to you.

I always tell photographers that one of the best things that can happen to you is *almost* losing your photos. Almost losing them because you don’t actually lose them, but it’s enough of wake up call for you to take backing up your photos more seriously.

In my case I have terabytes of data and so most cloud storage solutions simply are not economical. The cheaper plans would take years (because they throttle your data — I’ve tried them) and the more expensive plans from folks like Amazon and Google are simply too expensive for me. I don’t have hundreds of dollars per month to spend on storing my photos.

So it’s up to me to develop my own back up strategy and here is where I am today.

1. Photos that I’m working on are on my MacBook Pro. This drive is a 750GB internal flash drive. This is backed up to a time machine drive. If I lose my MacBook Pro or my hard drive fails I’ve got this time machine drive. This time machine drive is kept in a fire proof safe that is bolted to a cement floor when I’m not using it.

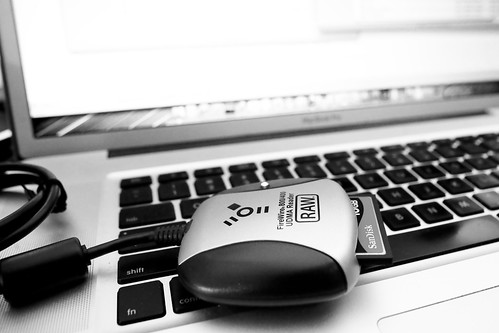
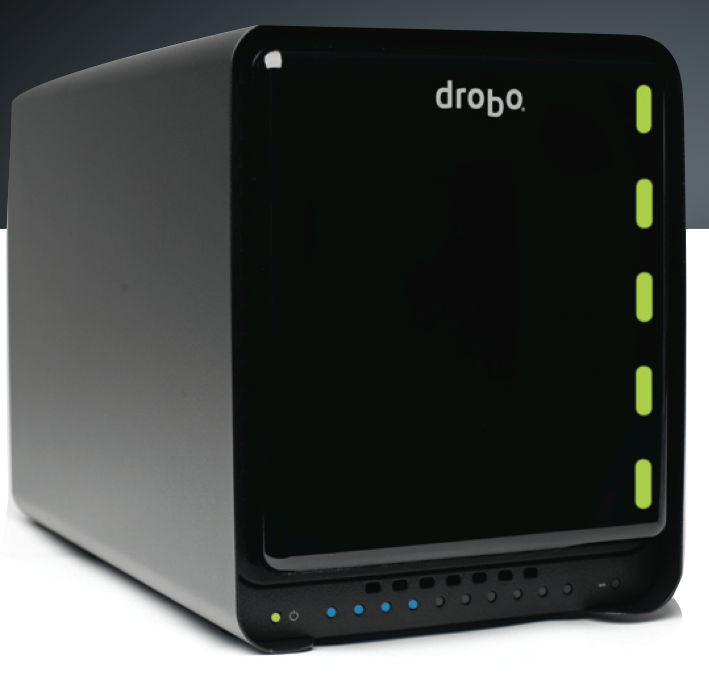
2. All of my “to be processed” photos (organized into folder by date) are kept on Drobos (I’ve got six). These are photos that I will eventually move over to my MacBook Pro to work on them. These Drobos are kept in the fireproof safe.

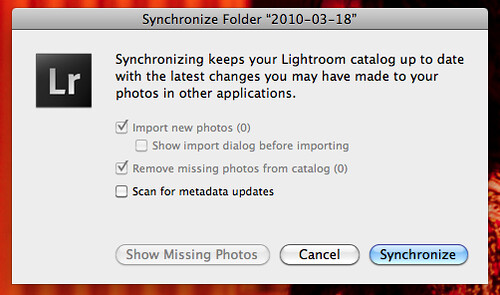
3. All of my “archived” photos that I’ve already processed along with the Lightroom Catalog for that day are kept on Drobos in my safe.

4. All of my processed JPG files, my finished photos, that are waiting to be uploaded (about 22,000 right now) are kept on my MacBook Pro hard drive, which is backed up with time machine and another copy is kept on a Drobo. My photos that I have already processed as JPGs and have been uploaded to Flickr are kept in folders by the month uploaded on a Drobo.

Another periodic backup of all of my processed photos is done and these are kept on USB hard drives locked in a drawyer at my office. Another hard drive of some of my most important processed photographs and family photographs is kept on a hard drive at my parents house in Southern California.

The weakness in my strategy? My RAW files aren’t backed up beyond storing them on Drobos in a locked safe today. Part of this is the sheer number or RAW files that I have. I haven’t added them up but I probably have at least 10 terrabytes of RAW photos.

I feel sort of ok having the drives replicated in the Drobos. I have had drives fail in my Drobos before and was able to simply eject the old drive and add a new one in and have all my stuff back. I’ve also had one Drobo fail. When a Drobo fails you can just put all four drives from your old Drobo into a new Drobo and get it back (this was my experience). Replicated data should be your first line of defense though and not your only line of defense.

Your second line of defense should be against theft, fire, natural disaster, etc. I’m sort of covered here. I feel pretty good about being protected against theft. The safe is huge, almost as tall as me. It took four guys to get it into the basement. I didn’t realize how large a safe I’d bought from Costco and it’s a lot bigger than I really need. It’s bolted to a cement floor in the basement. I’m currently remodeling my basement and am putting up walls that will prevent it from ever leaving the basement without moving the walls. I’m also putting it inside a wine cellar with a locked door on it. I feel pretty covered against theft.

As far as fire or other natural disaster? Who knows. I’m not comfortable with my strategy there. The safe is fire proof, but I’m sure it’s only good up to a point.

My other weakness is when I’m travelling on the road. Right now I dump all my photos on my hard drive which is backed up with time machine. The problem though is that I almost always fill up my MacBook Pro’s hard drive and have to dump some photos on an external USB drives. These files are then unprotected until I get them home and get them on a Drobo.

So what will I do differently this year? Later this year I’m going to buy a Drobo Mini when they come out. These small portable units are ideal to use as primary storage on the road. They use the smaller laptop drives which are more durable and robust than 3.5 inch drives. The new Drobo Mini is a Thunderbolt device so it will be fast. I’ll use this as my primary storage device on the road. This way I’ll have enough storage to always have my data replicated (the first line of defense) on the road.

The other thing I’ll use this new Drobo Mini for though is to fix a glaring weakness in my current strategy. At present my RAW files do not enjoy the ultimate line of defense of off site storage. So later this year I’m going to use the Drobo Mini to make back up copies of all of my RAW files (both “to be processed” and “archive” RAW originals) Because the Drobo Mini takes smaller laptop drives these will take up less space and be more durable and portable. I’ll then rubberband the four laptop drives from the Drobo Mini together and get a safe deposit box in a bank vault. This is where I’ll keep these RAW files. Periodically I’ll go visit my box to add new laptop drives to the box. I’ll also keep a copy of all of my processed photos here as well.

Once I make these changes later on this year I think my back up strategy will be even better. I’m sure it can get even better still, but the important thing is that I’m working on a strategy and that it’s evolving and moving forward.

What is your backup strategy? I wonder what percentage of people are like Mat and would lose precious photos if someone stole their computer or they were hacked or whatever. I bet it’s a pretty high number.

The new Drobo Minis likely will be out by the end of September, along with the new Thunderbolt Drobo 5D. If you want one you should pre-order and get on the waiting list because they’ll likely be hard to get early on. You can pre-order directly from Drobo here. You can pre-order from Adorama here.

Disclosure: Drobo is a sponsor of our weekly photography show Photo Talk Plus. I’ve used them for years though even before that and have been happy with them personally speaking. They are not for everybody though and if you are doing something else, that is fine too. The important thing is that you do have *some* sort of strategy — and if you don’t have some sort of strategy that you plan to start one as soon as possible, whatever that may be.

My Photography Workflow 2010

For the last two years I’ve written blog posts detailing my own personal photography workflow that I use. As the tools to process photos change and as I learn more about processing photos, so does my workflow.

I probably get more questions about my workflow (or what camera to buy) than any other sorts of questions. So since it’s been a year now, I thought I’d update my own personal photography workflow.

Self PortraitStep 1. Capture the Image: At present my daily set up includes a Canon EOS 5D Mark II camera (which I love but which has a *horrible* problem with dust), and five Canon lenses. The 14mm f/2.8, the 24mm f/1.4, the 50mm f/1.2 (with crappy autofocus), the 100mm f/2.8 macro and my favorite lens the 135 f/2.

Also with me everywhere I go is a 17 inch MacBook Pro, a Hoodman high speed firewire 800 card reader, my camera battery charger and an extra battery and 3CF cards (a 8GB, 16GB and 32GB, all by SanDisk). My 16GB card has recently been having problems and has been acting up so I’ll probably throw that out and buy another new 32GB card before my next big photography trip.

I recently replaced my camera backpack going from the Lowepro CompuDayPak to the Computrekker Plus AW backpack. The zipper on my CompuDayPak was shot and after three years or so of daily use the bag was falling apart. It supposedly has a lifetime guarantee, but when I looked at the guarantee more closely it looked like it didn’t cover every day wear and tear and especially issues with zippers.

The new backpack is substantially more sturdy. I like it a lot more. My gear feels much better protected and it’s got a ton more room. Unfortunately it does feel a bit bulky and sometimes I feel like it looks like I’ve got a suitcase strapped to my back and look like a dork. 🙂

I shoot almost every day out and about in the Bay Area, sometimes at night for special events, photowalks etc. and most significantly as part of my project to document the 100 largest cities in America. Lately I’ve been taking intensive five day trips to different large American cities where I’ll shoot over 10,000 frames. I shot Nashville and Memphis in January, Miami in March and I’m heading to Detroit next in early June.

The Hoodman RAW 400/800 FireWire Compact Flash Card Reader is Built For Speed2. Step 2. Transfer my images to my MacBook Pro. One of the best photography tools I’ve purchased in the last few years has been my highspeed FireWire 800 card reader (see link above). It can transfer a full 32 GB card in less than 15 minutes. When I’m out in the field I’ll use little breaks occasionally to offload images from my cards to my MacBook Pro with this card reader which is always with me. If you are still using camera cables or a USB card reader, you have no idea the speed you are missing.

I usually drag and drop the files directly from the card to a folder I create on my MacBook Pro with the date of the shoot. If I’m in the field this is the fastest way to get the images off the card and get me back shooting again. It takes over twice as long to have Lightroom copy and import the photos for me, so I only use Lightroom to do this task if I’m already in for the night, at home, etc. and don’t care about the time it takes to transfer files.

I bring two hard drives with me on trips. A 750GB external Seagate Hard Drive that serves as a Time Machine drive to backup my Mac. And an extra 1TB Seagate Free Agent drive (which I LOVE, is USB powered and not much larger than an iPhone or a pack of cards — this drive is the ultimate portable travel hard drive and a great value). The Free Agent drive is where I put extra images when I fill up my MacBook Pro 500GB internal hard drive.

When I get home I’ll frequently offload day shoots from my MacBook Pro to one of my 5 archive Drobos. Here my photos are backed up and replicated. I can then later copy the files back to my MBP when I’m ready to actually process them. At any given time I’ve got photos I’m processing on my MBP (backed up with Time Machine).

I’ve also now begun backing up my files in the cloud to Mozy as well. More on this later.

Synchronize3. Step 3. Synch my images to Lightroom. After I add a day’s shoot to process I’ll synch my MBP photos folder with Lightroom to import these images into Lightroom.

4. Step 4. Flag Images in Lightroom. Next I go through a days shoot using Lightroom to flag all of the photos that I want to process. Depending on the shoot I’ll usually process anywhere from 5% of my shots to 20% of my shots I’d estimate.

5. Step 5. Move all of my flagged images to a “flagged photos” subfolder in that date’s folder. I do this so that I can keep straight which images I’ve processed and which I haven’t. This way if I want to go through the photos that I passed on the first time around and revisit them to process latter I’ll be able to keep this straight in my records. I don’t always process 100% of what I flag, but pretty close.

My Photography Workflow 20106. Step 6. Develop my photos one by one. Here I go through Lightroom’s develop module to individually process every photo on a one by one basis. I rely heavily on presets as well. I’ve got probably 500 or so presets that I regularly use on my photos. Many of these I’ve gotten from other photographers. Many of these I’ve made myself. Sometimes I’ll process a photo without using a preset, but many times I’ll use a preset as my starting point to give the photo a certain look before tweaking it further from there. Rarely do I ever just use a preset and export. I almost always tweak the photo from my presets.

When I’m developing I will frequently adjust contrast, temperature, brightness, exposure, vignetting, sharpening and noise reduction. I’ve only recently been using noise reduction so much more with Adobe’s new beta version of Lightroom 3.

Adobe’s improved noise reduction tool in the new beta may be the single most significant advancement in digital photo processing that I’ve ever seen. It has blown me away and if you are not using it you really are missing out. Anyone can download the Lightroom beta for free right now here. Adobe’s new noise reduction technology allows for regular shooting at 6400 iso on my camera, which opens up a whole new realm of what is possible with night photography.

I was able to shoot some amazing night street portraits down in Miami Beach in March at very high isos and eliminate all of the noise in these high iso photos with this feature. Here’s an example of a street portrait that I shot at iso 4,000 in Miami. It’s amazing to me how easy it was for the new Lightroom beta to get the noise out of this high iso photograph.

Frequently I’ll also use the cloning tool in Lightroom to eliminate visible dust on my images. Canon’s so called anti-dust technology sucks big time (see above). Cloning out dust is the number one waste of time for me in processing my images. Recently I bought the Arctic Butterfly brush to give that a try to improve the situation. I was using sensor swabs and methanol but they weren’t really working. I’ll try and post an update on the Arctic Butterfly once I have time to test it out sufficiently.

6B. Step 6B. External Processing in Nik Silver Efex or Photoshop. Occasionally I’ll do additional developing work on an image using either Nik Silver Efex or Photoshop CS5. Photoshop CS5 kicks serious ass. I haven’t been using Silver Efex really since I’ve been on the Adobe Lightroom 3 Beta. For some reason it seems to warp my images when I send them to Nik as an external editor. My images also get warped if I send them to photoshop as an external editor as well, so usually when I do work in photoshop I’ll just open the exported file directly in Photoshop to do more work on them.

Nik Silver Efex Pro is one of the best black and white conversion packages I’ve ever used. I’m hoping that when the official non-beta LR release is out that it will make it possible for me to use Nik Silver Efex again. You can download and use Nik Silver Efex Pro free for a 15 day trial. If you haven’t checked this out yet, you should.

Mostly in Photoshop I’ll do little things like add a frame, or add a blending layer to manufacture artificial film like scratches on a photo, or little touches like this. I don’t do this alot because it’s time consuming. Lately I’ve also begun painting some of my photographs in Photoshop. You can read more about that in my review on the CS5 Photoshop Beta here. Look for Photoshop CS5 to be released shortly.

My Photography Workflow 2010, Plate 2
7. Step 7. Export my file as a full sized high quality JPEG image. Lightroom defaults to 240 DPI (not sure why) so I use this as my output DPI with the highest quality full sized JPG. These images are exported to a “finished photos” folder.

As I export each photo I will name it at that time. A lot of people ask me where the titles on my photos come from. They come from all over really. My titles are frequently very personal to me, obscure and abstract. They frequently have a story that only I know behind them. They are frequently inspired by music or are lyrics to a song that I relate to that image in my own mind.

Keywording8. Step 8. Keywording. Once I’ve finished processing a days shoot, I will synchronize my finished files folder in Lightroom and begin keywording. I’ll apply broad general keywords to all of the photos usually like the location (city, state, country) or batch keyword big groups of photos that cover the same subject (graffiti, neon, venue, subject, etc.). Then I’ll go through the photos one by one looking at each for any unique keywords possible.

If the photo is of a neon sign or of a specific location I’ll also frequently go get the address of the venue from Google and paste that into the keyword description.

This meta data is later automatically applied to my image when I upload it online.

9. Step 9. Geotagging. I use Google Earth and Geotagger next to geotag *some* of my images. In general I’ll geotag if it’s easy. For awhile the OCD in me was geotagging every single image I’d process. I’d painstakingly go through Google Earth and geotag them one by one by one. This was a ton of work, especially if the work needed to be done in a city that I’m not as familiar with. Now I’ll just geotag the images if it’s super easy and I can get there quickly in Google Earth or if a bunch of images are from same location and I can batch them.

Once the new version of iPhone’s OS can multitask, I’ll probably start trying out some of the geotagging geolocational apps for the iPhone. Or there’s a good chance that I’ll switch to an Android based phone in July when my iPhone contract is up and I’ll see what I can use for that there.

10. Step 10. Archiving. Once I’m done with this I’ll sort my images into what I consider A quality photos and B quality photos. These are then transferred to a Drobo, where I have an “A to be uploaded” folder and a “B to be uploaded” folder.

11. Step 11. Publishing. Twice a day (once in the morning, once at night) I’ll pull 5 photos from my A folder and 17 photos from my B folder at random and upload them to Flickr. This is a total of 44 photos a day that I upload.

I’ve got about 20,000 unpublished photos in my to be uploaded photos folders at present. I always upload what I feel are my five strongest images of any batch upload as the last five to Flickr. This way these are the five that will show up for my contacts when they see my photos in their contacts page. These 5 will also show up on the first page of my main Flickr page if someone goes there directly.

If a photo gets 25 faves or more on Flickr, I’ll generally blog that photo at thomashawk.com as well. You can see these photos on a version of thomashawk.com filtered only for the photoblog portion here.

Once these photos are published they go into a folder by month based on upload date. (Note, the original RAW files always stay in the folder of the date they were taken).

Anyways, that’s about it. This article is a bit longer than the past few years, but I’ve been doing a lot more with my processing as well. Feel free to ask any questions in the comments or offer up any suggetions you might have for improving my own workflow. Thanks!

New Faster 5 Bay Drobo S Released for $800

New Drobo S

Data Robotics today announced the release of two new Drobo models, a new consumer type Drobo (the Drobo S at an $800 price point) and a new enterprise type Drobo (the Drobo Elite at $3,500).

The main difference between the Drobo S and the previous Drobo is that the device now contains 5 hard drive bays instead of 4. Also, in addition to USB 2.0 and Firewire 800 capability, the new Drobo now supports eSata connection as well. With this new unit Drobo now claims that it offers not only single drive redundancy but dual drive redundancy, meaning that if two drives were to fail at once your data could likely still be recovered. To get all of the hardcore technical details on the new units check out the reviews on Engadget and Gizmodo.

I’ve personally been a big fan of the Drobo and use Drobos for the primary storage of all of my digital data. Remember hard drive failure is not a question of if, but when. I’ve got four Drobos at present with about 12 terabytes of storage and am buying a 5th one today myself as I’m running out of storage again. While a Drobo should not be considered a replacement for offsite backups (remember theft/fire), protecting against hard drive failure (probably the number one way people lose data) makes a lot of sense.

I don’t think that I’m going to pay up $800 just yet for the new Drobo, but it looks like the previous model (which has FireWire 800) has dropped in price and is now offering a $30 rebate. At $319.95, after rebate, this is the cheapest I’ve seen this model yet. If you’ve been thinking about picking up a Drobo, now might be the time to do it.

Drobo Requires Your Serial Number to Access Their Help Forums? That’s Really Lame

Drobo Requires Your Serial Number to Access Their Help Forums, WTF

So yesterday on one of my four drobos all of a sudden one of the lights went red. Usually this means that the drive may have gone bad (I’ve replaced one already). When I went to check on the drobo in the dashboard though, in this case it was showing that a drive was not in that bay when there clearly was one. So I took the drive out and reinserted it back into the drobo and the drobo recognized the drive again. But after I did this drobo began the process of re "protecting my data." The drobo messages reminded me that I could continue to use my files while this protection was going on but that I shouldn’t remove any drives during the process. I had an estimated time of recovery of about 32 hours. I love my drobos by the way and have been very happy with the job they do storing my photos.

So this morning I got up as I always do and went to upload some photos to flickr (my to be uploaded photos are kept on this drobo). Unfortunately, when trying to access that folder I got the following error message: "The request could not be performed because of an I/O device error." And so that’s why you’re seeing this screenshot this morning instead of new photos from me.

It looks like the drobo is still in the process of recovering (it says 22 hours remaining though and I feel like it should be further along as it’s been about 16 hours already) so I don’t want to try and reboot it or anything — but I can’t access any of my photos on this unit which is worrying me a little bit this morning.

So the first place that I like to try to go to start troubleshooting things like this is in community help forums. I often find that simple searches in community forums can often help you find the answers that you are looking for. Basically what I want to know is this. If I reboot my drobo during the recovery process (because I think it is stuck and has hanged somehow) will I risk losing data.

The problem with drobo’s community forum though is that you can’t read it without first registering with the site by giving them your email address and clicking on a confirmation email back from them. Personally I hate those kind of policies. Half the time the confirmation email ends up in your spam folder, sometimes you never get it, other times it takes an hour to get a simple email confirm. But because I need the help I went through that registration process. When I got into the system I checked off that I didn’t want their newsletter or other spamy sort of things and then went to upload my avatar (which I could not because I got an I/O device error on the same drobo). It asked me for my flickr ID which I thought was kind of cool and I put in thomashawk but got an error saying that they didn’t recognize my flickr ID. Oh well.

So I’m all ready to finally access the support forums but when I try to go into them I get still another screen denying me access. This time it wants me to put my *serial number* into the drobo system before I can have access. WTF? Are you kidding me? Why in God’s name should I be required to enter a serial number in order to access a help forum? That’s about the lamest thing I’ve ever seen. What, are they worried that people that don’t really own drobos are going to troll the forums talking about how to fix drobos? I can think of no reason why I would need to enter a serial number in order to access these forums.

So that’s were I am now. I crawled under my desk to try to see if I could ready the serial number anywhere on the back of my drobo but I can’t. So after I finish this blog post I’m going to need to go get a flashlight and crawl around under my desk some more to try and see if I can read it anywhere on the unit. Wherever it is printed it must be pretty small. Hopefully I actually get into the forums and hopefully I’m able to get this drobo back online at some point today and upload some new photos to Flickr so you don’t have to keep seeing this lame screenshot above.

Update: it turns out the serial number is actually on the bottom of the drobo on a sticker. I lifted one up while under my desk and got it and am now in the forums. Hopefully I get this one resolved soon.

Update: I searched in the forum and found this thread. which seemed to indicate that if a protection was hanging that I could shut down the drobo and restart it. So I did that and now all of my data is back. The drobo is no longer protecting my data though and the top bay (where there is a 750GB Seagate drive) is showing red and empty again. I think I may be having issues with this drive and will probably need to replace it. I’ll order another drive today and see if this fixes the problem. It’s great that I was able to find an answer to my question in the community support forum, but I still think it’s really lame that you have to enter a serial number to access it. I can understand the email verification to protect against spam, but even here I’d think they should let you browse, search and read the forums just not post to them without verification. But the extra step to require a serial number is lame. It prevents people who don’t own drobos from researching them. The less barriers to information the better I say.