Adobe Photoshop CS5 Available for Trial And Purchase

Adobe Photoshop CS5 Available for Trial And Purchase

You can go get it here. You can download a free trial to try first here. It’s nice that Adobe allows you a free trial version first before deciding if you want to purchase it.

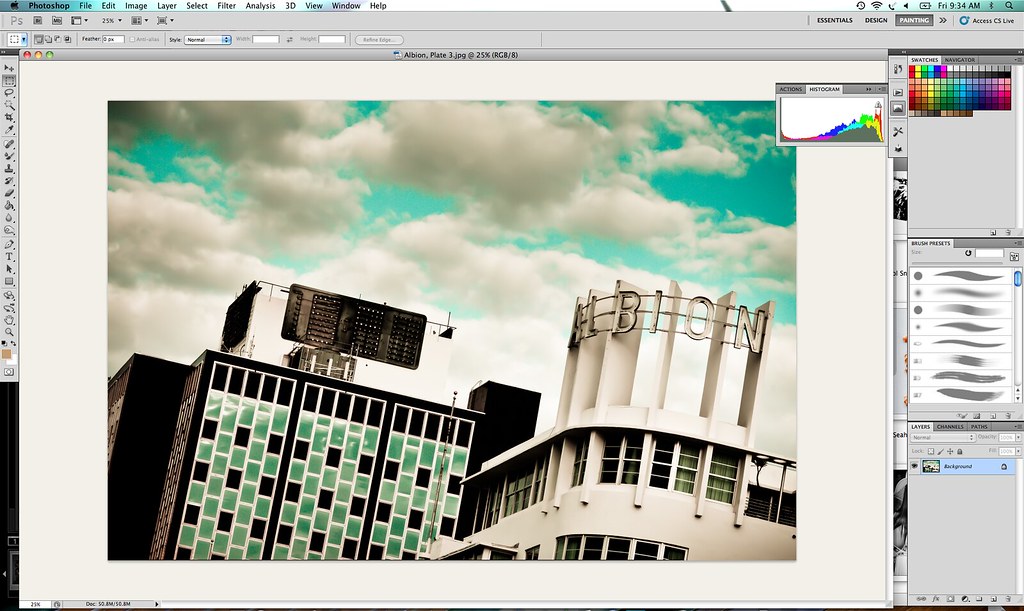
I think this is the most significant upgrade for Photoshop yet. You can read my review on the new software from a few weeks back here.

More from John Nack on the release here.

Full press release from Adobe on the product below.

Adobe Ships Creative Suite 5

Breakthrough Interactive Design Tools and Innovative Online Services Maximize Impact of Creative Content and Digital Marketing Campaigns

SAN JOSE, Calif., — April 30, 2010 — Adobe Systems Incorporated (Nasdaq:ADBE) today announced the availability of the Adobe® Creative Suite® 5 product family, the highly-anticipated release of the industry-leading design and development software for virtually every creative workflow. With more than 250 new product features, the Creative Suite 5 product line brings exciting full-version upgrades of flagship creative tools and workflow enhancements to designers and developers — enabling the creation, delivery and optimization of content across media for greater impact and results.

The Adobe CS5 product family is powering the creation of content and applications for the upcoming releases of Flash® Player 10.1 and Adobe AIR® 2, which are optimized for high performance on mobile screens and designed to take advantage of native device capabilities for a richer, more immersive user experience. Featuring integration with online content and digital marketing measurement and optimization capabilities for the first time, Creative Suite 5 products include access to signature Omniture® technologies, to capture, store and analyze information generated by websites and other sources. Adobe Creative Suite 5 products also integrate with Adobe CS Live*, a set of five innovative online services that accelerate key aspects of the creative workflow and enable designers to focus on creating their best work (CS Live services are complimentary for a limited time).

The Creative Suite 5 line-up includes five new versions: Creative Suite 5 Master Collection, Creative Suite 5 Design Premium, Creative Suite 5 Web Premium, Creative Suite 5 Production Premium, Creative Suite 5 Design Standard, as well as 15 point products and associated technologies. Creative Suite now includes a brand-new component, Adobe Flash® Catalyst™, a professional interaction design tool that allows designers to rapidly create expressive Web application interfaces and design interaction without writing code.

“We’ve seen from early customer reaction that Creative Suite 5 continues to inspire the design and developer world by combining time-saving workflow and productivity features with astonishing new capabilities, such as Content-Aware Fill in Photoshop CS5, that really push the creative envelope,” said John Loiacono, senior vice president of Creative Solutions at Adobe. “Whatever the media, CS5 is ensuring that publishers and creatives can deliver stand-out work and build great businesses around their unique digital assets and content.”

Also available as part of the Creative Suite 5 product family, sold separately or in one of the five Creative Suite editions, are new versions of the Adobe Creative Suite tools, including Photoshop® CS5, Illustrator® CS5, InDesign® CS5, Flash Catalyst CS5, Flash CS5 Professional, Dreamweaver® CS5, Adobe® Premiere® Pro CS5, After Effects® CS5 and more.

The Creative Suite 5 products offer more than 250 new features that embrace interactivity, enhance performance and maximize the impact of creative content and digital marketing campaigns. InDesign CS5 powers the transition to digital publishing with new interactive documents and enhanced electronic reader device support. Image creation and editing get a boost with Truer Edge technology in Photoshop CS5, which offers better edge detecting technology and masking results in less time. Photoshop CS5 also includes the ability to remove an image element and immediately replace the missing pixels with Content-Aware Fill. New stroke options allow Adobe Illustrator CS5 users to create strokes of variable widths and precisely adjust the width at any point along the stroke. New Text Layout Framework in Flash Professional CS5 provides professional-level typography capabilities with functions like kerning, ligatures, tracking, leading, threaded text block and multiple columns. In addition, Dreamweaver CS5 now supports popular content management systems Drupal, Joomla! and WordPress, allowing designers to get accurate views of dynamic Web content from within the product.

Performance improvements abound in the Creative Suite 5 product line with engineering breakthroughs, including native 64-bit support on both Mac and Windows® in Adobe Photoshop, Adobe Premiere Pro and After Effects, that allows users to work more fluidly on high-resolution projects. The much anticipated NVIDIA® GPU-accelerated Adobe Mercury Playback Engine allows Adobe Premiere Pro CS5 users to open projects faster, refine effects-rich HD sequences in real time and play back complex projects without rendering. The revolutionary timesaving Roto Brush tool in After Effects helps users isolate moving foreground elements in a fraction of the normal time.

Accelerate Creative Workflows with Adobe CS Live
Adobe Creative Suite 5 products integrate with Adobe CS Live*, a set of five online services that accelerate key aspects of the creative workflow and enable designers to focus on creating their best work. CS Live online services are complimentary for a limited time and currently include: Adobe BrowserLab, Adobe CS Review, Acrobat.com, Adobe Story and SiteCatalyst® NetAverages™ from Omniture. Adobe CS Review enables online design reviews from directly in Creative Suite 5 applications, while Adobe BrowserLab is an indispensable tool for testing website content across different browsers and operating systems. NetAverages provides Web usage data that helps reduce the guesswork early in the creative process when designing for Web and mobile. Adobe Story is a collaborative scriptwriting tool that improves production and post-production workflows in CS5 Production Premium. Access to Acrobat.com services, such as Adobe ConnectNow Web conferencing, is also included to enhance discussion and information exchange with colleagues and clients around the globe.

Create and Deliver to More Mobile Platforms
Using Flash Professional CS5, designers and developers can create, test and deliver Web content across a wide range of mobile platforms and devices such as smartphones, tablets, netbooks and other consumer electronics. Users can look forward to deploying content in the browser with Flash Player 10.1 and as a standalone application with AIR 2.

Pricing and Availability

Adobe Creative Suite 5 products and its associated point products will be available through Adobe Authorized Resellers, Adobe Direct Sales and the Adobe Store at http://www.adobe.com/store. Estimated street price for the suites is US$1899 for CS5 Design Premium, US$1799 for CS5 Web Premium, US$1699 for CS5 Production Premium, US$1299 for CS5 Design Standard and US$2599 for Master Collection CS5. Upgrade pricing, volume licensing and education discounts are available. Adobe CS5 products integrate with Adobe CS Live online services which are complimentary for a limited time. For more detailed information about features, OS support, upgrade policies, pricing and international versions please visit: http://www.adobe.com/go/creativesuite.

About Adobe Systems Incorporated

Adobe revolutionizes how the world engages with ideas and information – anytime, anywhere and through any medium. For more information, visit http://www.adobe.com.

Netflix Customer Survey

Screenshot1

I just answered an online Netflix customer survey that I was selected for. Among other things I was asked if I’d like to be considered to offer a testimonial in a possible future advertising campaign and was told that Netflix’s advertising agency is currently interviewing customers for this campaign.

The survey also focused on my streaming activity and on how many people were in my family. Netflix was interested both in the devices that I use to stream as well as where I stream.

As a total unrelated aside, I think it’s highway robbery that Microsoft tries to tax me $150 a year to consume my Netflix content that I already pay for on my XBox 360s. The fact that I can stream Netflix *for free* on virtually every other device but get reamed by Microsoft for wanting to consume my own paid for content via my XBox 360 is disappointing. I hope Microsoft reconsiders this horribly customer unfriendly policy. What’s next? Is Microsoft going to start charging me a toll or tariff to listen to my own mp3s on the XBox 360?

If you’d like to see the whole Netflix Survey you can check it out here.

My Photography Workflow 2010

For the last two years I’ve written blog posts detailing my own personal photography workflow that I use. As the tools to process photos change and as I learn more about processing photos, so does my workflow.

I probably get more questions about my workflow (or what camera to buy) than any other sorts of questions. So since it’s been a year now, I thought I’d update my own personal photography workflow.

Self PortraitStep 1. Capture the Image: At present my daily set up includes a Canon EOS 5D Mark II camera (which I love but which has a *horrible* problem with dust), and five Canon lenses. The 14mm f/2.8, the 24mm f/1.4, the 50mm f/1.2 (with crappy autofocus), the 100mm f/2.8 macro and my favorite lens the 135 f/2.

Also with me everywhere I go is a 17 inch MacBook Pro, a Hoodman high speed firewire 800 card reader, my camera battery charger and an extra battery and 3CF cards (a 8GB, 16GB and 32GB, all by SanDisk). My 16GB card has recently been having problems and has been acting up so I’ll probably throw that out and buy another new 32GB card before my next big photography trip.

I recently replaced my camera backpack going from the Lowepro CompuDayPak to the Computrekker Plus AW backpack. The zipper on my CompuDayPak was shot and after three years or so of daily use the bag was falling apart. It supposedly has a lifetime guarantee, but when I looked at the guarantee more closely it looked like it didn’t cover every day wear and tear and especially issues with zippers.

The new backpack is substantially more sturdy. I like it a lot more. My gear feels much better protected and it’s got a ton more room. Unfortunately it does feel a bit bulky and sometimes I feel like it looks like I’ve got a suitcase strapped to my back and look like a dork. 🙂

I shoot almost every day out and about in the Bay Area, sometimes at night for special events, photowalks etc. and most significantly as part of my project to document the 100 largest cities in America. Lately I’ve been taking intensive five day trips to different large American cities where I’ll shoot over 10,000 frames. I shot Nashville and Memphis in January, Miami in March and I’m heading to Detroit next in early June.

The Hoodman RAW 400/800 FireWire Compact Flash Card Reader is Built For Speed2. Step 2. Transfer my images to my MacBook Pro. One of the best photography tools I’ve purchased in the last few years has been my highspeed FireWire 800 card reader (see link above). It can transfer a full 32 GB card in less than 15 minutes. When I’m out in the field I’ll use little breaks occasionally to offload images from my cards to my MacBook Pro with this card reader which is always with me. If you are still using camera cables or a USB card reader, you have no idea the speed you are missing.

I usually drag and drop the files directly from the card to a folder I create on my MacBook Pro with the date of the shoot. If I’m in the field this is the fastest way to get the images off the card and get me back shooting again. It takes over twice as long to have Lightroom copy and import the photos for me, so I only use Lightroom to do this task if I’m already in for the night, at home, etc. and don’t care about the time it takes to transfer files.

I bring two hard drives with me on trips. A 750GB external Seagate Hard Drive that serves as a Time Machine drive to backup my Mac. And an extra 1TB Seagate Free Agent drive (which I LOVE, is USB powered and not much larger than an iPhone or a pack of cards — this drive is the ultimate portable travel hard drive and a great value). The Free Agent drive is where I put extra images when I fill up my MacBook Pro 500GB internal hard drive.

When I get home I’ll frequently offload day shoots from my MacBook Pro to one of my 5 archive Drobos. Here my photos are backed up and replicated. I can then later copy the files back to my MBP when I’m ready to actually process them. At any given time I’ve got photos I’m processing on my MBP (backed up with Time Machine).

I’ve also now begun backing up my files in the cloud to Mozy as well. More on this later.

Synchronize3. Step 3. Synch my images to Lightroom. After I add a day’s shoot to process I’ll synch my MBP photos folder with Lightroom to import these images into Lightroom.

4. Step 4. Flag Images in Lightroom. Next I go through a days shoot using Lightroom to flag all of the photos that I want to process. Depending on the shoot I’ll usually process anywhere from 5% of my shots to 20% of my shots I’d estimate.

5. Step 5. Move all of my flagged images to a “flagged photos” subfolder in that date’s folder. I do this so that I can keep straight which images I’ve processed and which I haven’t. This way if I want to go through the photos that I passed on the first time around and revisit them to process latter I’ll be able to keep this straight in my records. I don’t always process 100% of what I flag, but pretty close.

My Photography Workflow 20106. Step 6. Develop my photos one by one. Here I go through Lightroom’s develop module to individually process every photo on a one by one basis. I rely heavily on presets as well. I’ve got probably 500 or so presets that I regularly use on my photos. Many of these I’ve gotten from other photographers. Many of these I’ve made myself. Sometimes I’ll process a photo without using a preset, but many times I’ll use a preset as my starting point to give the photo a certain look before tweaking it further from there. Rarely do I ever just use a preset and export. I almost always tweak the photo from my presets.

When I’m developing I will frequently adjust contrast, temperature, brightness, exposure, vignetting, sharpening and noise reduction. I’ve only recently been using noise reduction so much more with Adobe’s new beta version of Lightroom 3.

Adobe’s improved noise reduction tool in the new beta may be the single most significant advancement in digital photo processing that I’ve ever seen. It has blown me away and if you are not using it you really are missing out. Anyone can download the Lightroom beta for free right now here. Adobe’s new noise reduction technology allows for regular shooting at 6400 iso on my camera, which opens up a whole new realm of what is possible with night photography.

I was able to shoot some amazing night street portraits down in Miami Beach in March at very high isos and eliminate all of the noise in these high iso photos with this feature. Here’s an example of a street portrait that I shot at iso 4,000 in Miami. It’s amazing to me how easy it was for the new Lightroom beta to get the noise out of this high iso photograph.

Frequently I’ll also use the cloning tool in Lightroom to eliminate visible dust on my images. Canon’s so called anti-dust technology sucks big time (see above). Cloning out dust is the number one waste of time for me in processing my images. Recently I bought the Arctic Butterfly brush to give that a try to improve the situation. I was using sensor swabs and methanol but they weren’t really working. I’ll try and post an update on the Arctic Butterfly once I have time to test it out sufficiently.

6B. Step 6B. External Processing in Nik Silver Efex or Photoshop. Occasionally I’ll do additional developing work on an image using either Nik Silver Efex or Photoshop CS5. Photoshop CS5 kicks serious ass. I haven’t been using Silver Efex really since I’ve been on the Adobe Lightroom 3 Beta. For some reason it seems to warp my images when I send them to Nik as an external editor. My images also get warped if I send them to photoshop as an external editor as well, so usually when I do work in photoshop I’ll just open the exported file directly in Photoshop to do more work on them.

Nik Silver Efex Pro is one of the best black and white conversion packages I’ve ever used. I’m hoping that when the official non-beta LR release is out that it will make it possible for me to use Nik Silver Efex again. You can download and use Nik Silver Efex Pro free for a 15 day trial. If you haven’t checked this out yet, you should.

Mostly in Photoshop I’ll do little things like add a frame, or add a blending layer to manufacture artificial film like scratches on a photo, or little touches like this. I don’t do this alot because it’s time consuming. Lately I’ve also begun painting some of my photographs in Photoshop. You can read more about that in my review on the CS5 Photoshop Beta here. Look for Photoshop CS5 to be released shortly.

My Photography Workflow 2010, Plate 2
7. Step 7. Export my file as a full sized high quality JPEG image. Lightroom defaults to 240 DPI (not sure why) so I use this as my output DPI with the highest quality full sized JPG. These images are exported to a “finished photos” folder.

As I export each photo I will name it at that time. A lot of people ask me where the titles on my photos come from. They come from all over really. My titles are frequently very personal to me, obscure and abstract. They frequently have a story that only I know behind them. They are frequently inspired by music or are lyrics to a song that I relate to that image in my own mind.

Keywording8. Step 8. Keywording. Once I’ve finished processing a days shoot, I will synchronize my finished files folder in Lightroom and begin keywording. I’ll apply broad general keywords to all of the photos usually like the location (city, state, country) or batch keyword big groups of photos that cover the same subject (graffiti, neon, venue, subject, etc.). Then I’ll go through the photos one by one looking at each for any unique keywords possible.

If the photo is of a neon sign or of a specific location I’ll also frequently go get the address of the venue from Google and paste that into the keyword description.

This meta data is later automatically applied to my image when I upload it online.

9. Step 9. Geotagging. I use Google Earth and Geotagger next to geotag *some* of my images. In general I’ll geotag if it’s easy. For awhile the OCD in me was geotagging every single image I’d process. I’d painstakingly go through Google Earth and geotag them one by one by one. This was a ton of work, especially if the work needed to be done in a city that I’m not as familiar with. Now I’ll just geotag the images if it’s super easy and I can get there quickly in Google Earth or if a bunch of images are from same location and I can batch them.

Once the new version of iPhone’s OS can multitask, I’ll probably start trying out some of the geotagging geolocational apps for the iPhone. Or there’s a good chance that I’ll switch to an Android based phone in July when my iPhone contract is up and I’ll see what I can use for that there.

10. Step 10. Archiving. Once I’m done with this I’ll sort my images into what I consider A quality photos and B quality photos. These are then transferred to a Drobo, where I have an “A to be uploaded” folder and a “B to be uploaded” folder.

11. Step 11. Publishing. Twice a day (once in the morning, once at night) I’ll pull 5 photos from my A folder and 17 photos from my B folder at random and upload them to Flickr. This is a total of 44 photos a day that I upload.

I’ve got about 20,000 unpublished photos in my to be uploaded photos folders at present. I always upload what I feel are my five strongest images of any batch upload as the last five to Flickr. This way these are the five that will show up for my contacts when they see my photos in their contacts page. These 5 will also show up on the first page of my main Flickr page if someone goes there directly.

If a photo gets 25 faves or more on Flickr, I’ll generally blog that photo at thomashawk.com as well. You can see these photos on a version of thomashawk.com filtered only for the photoblog portion here.

Once these photos are published they go into a folder by month based on upload date. (Note, the original RAW files always stay in the folder of the date they were taken).

Anyways, that’s about it. This article is a bit longer than the past few years, but I’ve been doing a lot more with my processing as well. Feel free to ask any questions in the comments or offer up any suggetions you might have for improving my own workflow. Thanks!

Slowly But Surely Google is Taking Over My Computing Life

Slowly But Surely Google is Taking Over my Computing Life

Years ago I used to only use Google to do internet searches. Slowly but surely though Google has been taking over more and more and more of my computing life. This is not a bad thing, this is a good thing. Google makes things that make my life easier and their corporate values are more in synch with my own than most publicly traded companies. I’ve especially noticed in the past six months that the trend of Google taking over my computing life has accelerated dramatically. This could have to do with the time I’ve been spending on Buzz, but some of the changes (like changing my internet browser) have involved big chunks of my computing experience.

Below is a loose chronology of the evolution of my experience with Google Products.

1. Search (can’t remember exactly when, but years ago), got off Yahoo pretty early in the game and switched to Google. Google has the best search on the web today. I appreciate Google’s more open nature than other search engines and their better track record when it comes to keeping the web uncensored.

2. Blogger. Used Blogger since 2003. Abandoned Blogger for WordPress last year, mostly due to Blogger’s inability to deal effectively with comment spam.

3. Google Analytics. Still use this. It’s free which is good. I’ve never really gotten what I want and need out of this product though. It’s complicated to build things for me. The two most important things I want from a stats package are the number of page views and referring url information. My view I’m most interested in is the past 24 hours. Before Analytics I used Sitemeter. I liked Site Meter’s analytics product much more, but you have to pay for that and Google Analytics is free.

I get the sense that Google Analytics is a bit like Photoshop for me. You can do anything and everything with it, but I’m still only using about 2% of its true potential.

4. Google Docs. I’m a lightweight user of word processing and spreadsheets, so this works just fine for me. Replaces the need to buy expensive software from Microsoft to do this sort of work for the casual user like me.

5. Google Maps. I used to use Mapquest and Yahoo Maps. Now I use Google Maps exclusively. It’s the best mapping software on the web. I use it *very* heavily when traveling.

6. YouTube. Like everybody I’m on it. I rarely use it though. Occasionally I’ll consume content on it. It takes so much time to watch YouTube videos though. It’s probably the internet site that my kids use more than any other site on the internet though. My son Jackson has spent hours on there learning how to do Yo Yo tricks. One of these days I’m going to have to get him a Google Yo Yo. Actually I just ordered him a green one and a yellow one. He’ll love them. 🙂 I used Google Checkout to buy them from Google (not sure why the shipping charge is more than the yoyos though).

7. Google Earth. I don’t use Google Earth a lot. I find it a bit unweildy actually. But I do use it to do the geotagging with Geotagger for my photos.

8. Gmail, part 1. Unfortunately I was late to the game with Gmail. So alas, I’m thomashawk22 instead of thomashawk. I got a gmail account and then never really used it. A few years back though I was getting so much spam email that I began filtering thomashawk.com email through gmail first to filter out all of the spam. That worked tremendously well. My spam pretty much went away entirely overnight. So I was using Google gmail as a passive filter for my Mac mail reader for about 2 years. Part 2, later.

In the past six months.

9. Google Buzz. Buzz has really become my primary social network. I still use a number of different social networks (Flickr, Twitter, Facebook, Friendfeed), but Buzz now gets the bulk of my social networking time and attention. One of my favorite things about Buzz is that it shows photos *really* well. You can feed your Flickr feed into it and if people click on the thumbnails they blow up huge to get an easy big view. There’s a link to Flickr included that I can cmd click to go fave the photo on Flickr too.

The majority of my faves that I’m faving on Flickr these days are coming from Google Buzz. If you haven’t hooked your Flickrstream up to a Buzz account yet you are missing out. 🙂 Even if you aren’t going to use Buzz, don’t have time for another social network, etc. You should still at least hook up your Flickrstream to it so that people can see your Flickr photos there and get back to your stream via Buzz.

10. PicasaWeb. I’ve had an account on Picasa for years, but just never really used it. I’ve started using it much more though. Presently I’m maxed out my free storage there so I’m just using it to host small sized screenshot files and deleting my larger high res photos as I need space. I’ve thought about paying the $5 to buy more ($5 is really totally insignificant for me to pay) but I need Picasa to convince me as a product first why I should do that.

If Picasa had photostreams and SmartSet technology I’d totally pay. But as it stands today, it’s too much work organizing my photos there manually without SmartSets and it feels to me like the photosharing community is still very much at Flickr. I do use the service though almost daily to host my screenshots.

11. Google Profiles. I like having a profile page on Google and look forward to seeing them continue expanding this product. You can find my Google Profile here.

12. Google Chrome. After a rocky marriage with Firefox for many years we finally split up a few months ago. Google Chrome is just a far better, faster, more stable web browser.

13. GMail, part 2. I haven’t opened my Mac Mail application for about a month now. I’ve been consuming all of my email directly from gmail on the web. Mostly it’s just faster to do email this way. So now it is not only my passive spam filter, it’s my main mail application that I use to consume all of my email.

14. Picnik. Probably technically not a Google Product yet, but acquired by Google recently so I’m including it. I just bought a Pro account there for $24.95 for a year. I did it just because I was curious about what you could do there more than anything. I don’t think I’ll renew it after my year is up based on what I saw. I didn’t really see anything there that I can’t already do in Lightroom or Photoshop. But for someone who doesn’t want to spend the money for Lightroom/Photoshop, this seems like an excellent way to go. You really can do quite a bit for $25 a year.

I need to play around with Picnik a bit more though. Maybe it will grow on me. Google should consider giving away the Pro version in Picasa to get more people on there.

15. Google Calendar. After using 30 Boxes for many years I switched to Google Calendar. Not sure why really. 30 Boxes was working just fine. I think I like Google Calendar better. I like how now that I’ve synched it up with my iPhone that I get a little notification from my iPhone calendar 10 minutes before I’ve got an appointment.

16. Google Chrome URL shortener. this is kind of a minor little tool. Not a product really. But I love it so much that I wanted to include it. You just click on a little icon in Chrome and it automatically copies a shorter url to your clipboard. 🙂

The future.

So what’s next for me in terms of adopting Google products. I’m not sure exactly but here are a few ideas.

Android. I suspect that when my contract with AT&T ends in July that I’ll likely switch to a Google phone of some sort. They seem to be ahead of Apple right now, are a more open company. And I can’t stand how poor AT&T’s 3G network is in San Francisco.

Chrome OS. This will be an interesting one. Switching your OS is huge. It took me years to get off Windows and on to my Mac about 5 years ago. Overall I’m pretty happy with my Mac. Still I paid over $3,000 for my last MacBook Pro. Chrome would seem to make computing cheaper. I don’t know enough about Chrome to really blog about it, but if I can install it on my MacBook Pro when it comes out (later this year?) to check it out I definitely will. Apple’s OS is pretty damn solid though, so I think this switch for me will be a harder one.

Like Father, Like Son

Like Father Like Son

I first met my friend Robert Scoble back in 2004 at a Geek Dinner at Barney’s Burgers in San Francisco back when he worked for Microsoft. Since then I’ve been able to spend a lot of time getting to know him. We’ve worked on photowalking videos together, travelled together, hung out with Ansel Adam’s son together, spent the night in an iPhone line together, and almost everywhere we’ve gone we’ve both had cameras (him usually video, me usually still).

I’ve really enjoyed getting to know Robert over the years. He’s a warm, kind, genuine and generous person. He’s always on top of what the next big thing, the early adopter’s early adopter, is and is a wonderful contributor to technology media.

Along the way I’ve gotten to know Robert’s family too as well. It was amazing to me yesterday to see how fast his son Patrick Scoble is growing. I’ve got a photo of Robert and Patrick from the Maker Fair in 2006 and you can hardly tell they are the same person. Patrick’s in 10th grade now and has taken up running.

Anyways, had a great day shooting the Half Moon Bay Dream Machines show again yesterday (it’s the third year in a row that Scoble and I’ve shot it). So many great car photos to now be processed. Scoble left for Israel last night. It will be interesting to see what he gets over there.