Adobe Lightroom 3, I Feel the Need for Speed, Oh, And The Most Significant Advancement In Photo Noise Reduction I Have Ever Seen

Adobe Lightroom 3, I Feel the Need for Speed, Oh, And The Most Significant Advancement In Photo Noise Reduction I've Ever Seen

For the past week or so I have been editing my photos exclusively with the official release of Adobe Lightroom 3. There’s alot to like about the new version of Lightroom, it’s faster and more stable than previous versions, it has some cool new lens calibration features, it has better watermarking features, more natural post crop vignetting, you can tether the program to your camera now and watch your photos in near real time as you shoot them in a studio, and lots more. But far and away, the single most compelling feature of the new release comes down to two simple words: noise. reduction.

Quite simply Lightroom 3 represents the single most significant advancement in photographic noise reduction I’ve ever seen. I’m *blown* away. Thousands of photos that were previously unworkable for me, now have suddenly become available to process. High iso low light shots with tons of noise can be salvaged, saved and turned into beautiful images. What’s more, pushed to it’s extremes, this new noise reduction technology gives photographs an almost painterly quality, allowing new potential for artistic representation of photographs.

In fact, combined with new in camera technology allowing isos to be bumped to as high as 6400 natively, this new noise reduction technology by Adobe opens up a whole new world of hand held night photography never before available. Not having to worry about the noise at 6400 iso (or higher) gives today’s photographer an enormous amount of freedom to pursue low light subjects that as recently as one year ago would have been simply unthinkable.

Photo Pre Lightroom 3 Luminance Noise Reduction

The photo above is a photograph of mine shot at 6400 iso taken on Saturday night while driving a red convertible sports car over the Bay Bridge, (don’t worry folks, I was the passenger, not the driver). The shot was done hand held as I was standing in the fast moving car at night. The photograph has the following settings (iso 6400, f/3.5, 1/60th of a second exposure). I’ve zoomed in on a very small detail portion of the photograph to display the noise at 6400. If you want to get a closer view at this image you can click through here and see it directly.

Photo Post Lightroom 3 Luminance Noise Reduction

Now. Look at the exact same photo after I’ve used the luminance noise reduction slider to remove the unwanted noise. As you can see, the difference between the before and after is remarkable and dramatic. You can also click through here to see this screenshot in greater detail.

Unbelievably good! In addition to the impressive advancements in luminance noise reduction, Lightroom 3 also has made new advancements in color noise reduction as well. The noise reduction improvements in Lightroom 3 were so dramatic for me that it was hard for me to get as excited about some of the other improvements by comparison. But there are lots of other new features and improvements in the new version.

Lens Correction Features in Adobe Lightroom 3

I’ve only played around a little bit with some of the new lens correction tools, but they offer some very impressive abilities to pretty significantly alter or improve basic lens distortion. Of course you can also use this new feature to do some interesting and extreme things with your photos as well (for instance turning a regular photo into an almost fisheye photo, like in the photo above). The new version of Lightroom also includes some cool new profile tools which allow you to use existing (or future created) profiles to match up your specific camera with your specific lens and have Lightroom automatically make the known lens correction based on that profile. For the purist who wants their photo exactly like it was shot using their exact set up this will be a nice feature.

The lens correction features also include a unique “perspective” lens correction that can turn a photo of a sign or building or whatever shot up at or down at to look more like it was shot directly at.

Other notable improvements include the ability to add natural looking grain to a photograph (this is especially useful in working with black and white images), the ability to create more natural feeling post crop vignetting, the ability to import video files now directly into Lightroom, faster importing, more customized photo layouts for printing and more flexible watermarking. Lightroom 3 also simplifies publishing your photos to Flickr allowing you simple drag and drop functionality using the Flickr API and allows you to synch some of the photos in your collection directly to a folder to then be synched with your iPhone or Google Android phone so that you easily have the photos that you want on your phone.

Default Presets Included in Lightroom 3

Adobe also ships a number of preconfigured presets with this version of Lightroom. Lightroom presets have been some of the most hotly traded items around the web amongst photographers. I wouldn’t say that the default presets are the best that I’ve ever seen, but they are a solid jumping off point for those who would like to work more with presets. Hopefully Adobe continues working with presets and adding more and more custom presets in the future. The photo above is an example of their “Color Creative – Aged Photo” preset.

All and all I’m extremely impressed with this version of Lightroom 3. It is by far the best tool that I know of today to process your photos. If you want to purchase a copy of the new Lightroom or upgrade a previous version of Lightroom you can do that here. The program costs $299 for a new copy or $99 for an upgrade from Lightroom 1.X or 2.X. There is also a fully functional trial version that you can try first before deciding to purchase.

Update: Stephen Shankland over at CNET has another good review here. CrunchGear has a review here. Kerry Garrison interviews Senior Lightroom Product Manager Tom Hogarty for the cameradojo Podcast about Lightroom 3 here. John Nack has a post here. A good link roundup from the Lightroom Blog here.

Top 10 Ways to Improve Adobe Lightroom 2.6 and Beta 3.0

Top 10 Ways to Improve Adobe Lightroom 2.6 and Beta 3.0

I’ve been using Lightroom very heavily on a daily basis over the past year or so. While I absolutely love the software, I think that there is room for improvement and thought I’d jot down some of my ideas on the best ways to improve the software.

I took a brief look at the new Lightroom 3.0 beta and my initial impression was lukewarm. Many of the features like watermarking, printing features, and online publishing from Lightroom, I didn’t really care about. Some of the architectural changes that have been mentioned didn’t feel all that powerful to me based on my initial testing. I found that in many regards, LR Beta 3.0 performed much slower and worse for me than LR 2.6, so I’ve largely abandoned using the beta at this point.

The final LR 3.0 product, of course, will likely be much more robust (hopefully) than the beta and ought to be a stronger product. And many, especially performance based, improvements that I mention in this post may actually be included in the final product. That said, here are the 10 most significant ways I think Adobe could improve the Lightroom product.

At present I am doing all of my Lightroom processing on a MacBook Pro running Snow Leopard with a 3.06 GHz intel Core 2 Duo processor and 4GB of RAM.

1. Performance drag when keywording (possible memory leaks?).
One of the things that I’ve found with LR 2.6 is that keywording seems to be especially taxing on the system. If you keyword a photo, maybe 60% of the time after keywording it you get the little beach ball and have to wait several seconds before LR will free up and let you keyword the next photo. Keywording is already a horribly mundane chore, but having to do it with beach ball delays in Lightroom is especially frustrating. If I restart LR I’ll be able to keyword seamlessly again, but typically within 5 minutes the delays between keywording photos begin again. This is my number one biggest gripe with Lightroom today.

2. Improving keyword autocomplete. When you keyword photos it is nice that LR uses your keyword list to auto complete possible keywords. As you start typing it searches previously used keywords and offers them up to you. You can highlight the word you are intereseted in and press enter, saving you time and typing. For some reason LR treats both the apostrophe and the enter key as one in the same. So, for instance, when you are keywording Joe’s Pizza, It might actually autocomplete the keyword as Joe’s hamburgers as soon as you hit the apostrophe in Joe’s. Apostrophes are commonly used in keywording and it is counter intuitive to have the apostrophe trigger an auto-complete entry. Auto-complete should be restricted to the enter key.

3. Importing large numbers of photos from your memory card into LR can be horrendous. I’ve stopped using LR to import photos directly altogether. Sometimes the import will take place reasonably quickly, but many times it can take literally an hour to import what should take 5-10 minutes. I’m not sure why it takes so much more time to import photos into LR directly from a card, but it is *much* faster if I actually copy my images from my cards from the Mac finder and then synch the folder up manually with Lightroom later. When you are offloading images from a card you want this done very quickly. Adobe should optimize this import process focusing only on first copying the files and then adding them to the catalog or whatever else is slowing imports down after the copying is done, freeing up your memory card faster.

4. Lightroom’s adjustment brush needs work. One of my favorite features with Lightroom 2.6 is the adjustment brush, you can use this brush to burn and dodge and affect key areas of a photo including exposure, contrast, brightness, clarity etc. by selectively painting an area of the photograph and then adjusting the sliders. Unfortunately though, I have found the adjustment brush to be much weaker than the general development tools in Lightroom. If I use the exposure slider for the entire photo (for instance) I have a wide latitude of exposure range with my RAW image. If I have a photo that is too dark in areas and too light in other areas I can use the total photo exposure tool to get either part (the too dark part or too light part) properly exposed. But when I try to use the exposure slider on the adjustment brush to treat the area not exposed to my satisfaction I find I frequently get pixelization if crank it up or down too hard. It would be good if Adobe could use the same technology that they are using to adjust, say, exposure at the entire photo level, with the adjustment brush to get better results when using it.

5. Lightroom needs more ways to stimulate the imperfection of film.
One of my favorite recent ways to shoot has been using Hipstamatic with my iPhone. Hipstamatic does a tremendous job of creating a lofi film like aesthetic with digital photos from my iPhone. The only problem is that they are digital photos from my iPhone. I’d love to be able to have similar options that incorporate to a much greater degree the vintage effects of film from within lightroom. Scratches on photos, old polaroid borders, smudges, and other imperfections can create an entirely different photograph. While I’m sure some of these sorts of effects can be implemented in Photoshop, Photoshop is much more difficult to master. Adobe should follow the trend of Hipstamatic and make very easy to apply vintage film effects for Lightroom. While the LR 3 beta does include a way to sort of get a bit more grain to effect a vintage look in photos, this is a far cry from the effects that a little $1.99 app like Hipstamatic can provide.

6. Improved vignetting control. While Adobe has improved the post crop vignetting available in the 3.0 beta, it is still seriously lacking. In post cropped photos the vignetting is applied perfectly on photographs. With 100% precision and accuracy. The problem is that when people want to add vignetting, they are frequently doing so to give the photograph a more natural film like feel. In camera vignetting is never 100% precise, it is subtly different in every area, in some ways random. LR’s vignetting control pre crop is much more natural feeling than post crop. While the 3.0 beta gives a touch more flexibility in how you can vignette it still does not provide for the sort of natural random vignetting that occurs naturally in camera.

7. Better preset directories. I love my presets. I use them constantly. I’ve got some really good ones. But damn they are hard to find. And there are so many bad ones out there floating around. Presets are a great place to start with your photo editing process, I’ve just had a hard time finding a very strong database or collection of the best ones.

8. When selecting multiple images in the film strip Loupe view, Lightroom should apply keywords to all images. Right now the only way to keyword multiple images in Lightroom is to use the Grid view. But if you want to keyword as you select images looking at them full size (grid view can only get you to half size) then you have to keyword them one at a time. Lightroom should allow me to select multiple images from the film strip in the Loupe view and apply keywords to all images selected.

9. A good in Lightroom geotagging feature that uses Google Maps.
At present I am using Geotagger for the Mac and Google earth to geotag my images. It would be nice if Adobe could as seamlessly interact with Google Earth. Some external app might be out there right now that I’m not aware of for this yet with Google Earth, but nothing that I’ve seen.

10. Color analysis. One of the things that I’ve done on Flickr is to create sets of images based on primary colors in the images. It would be nice if I could filter my images in LR by color. I’d like to be able to filter all of my finished images by dominant color, blue, red, pink, etc. This would better allow me to select these images and keyword them selectively.

So those are my top 10 requests for Lightroom. My views of course are only mine and while my desire for things like more natural post crop vignetting etc. may be important to me and maybe a small minority vs. features like watermarking, web publishing and printing, I certainly recognize that Lightroom is built for a much larger audience that may be much more interested in some of the new features in the LR 3.0 beta than I am.

What are the features that you would like to see in LR 3.0? What would be the killer features for you. Are there ways to get some of what I want out of the existing product that I’m just not aware of? Are they ways to better optimize for performance with keywording, for instance. Do you have any good Lightroom tips that you’ve uncovered worth sharing?

Adobe Launches Free Photoshop iPhone App

Adobe Launches Free iPhone Photoshop App

Adobe Systems today announced their free Photoshop IPhone App. The app is available free of charge at the iPhone store and allows users the ability to edit and add simple effects on photos with their iPhone.

“As the digital imaging leader, Adobe is excited to bring Photoshop.com Mobile to iPhone users,” said Doug Mack, vice president and general manager of Consumer and Hosted Solutions at Adobe. “Now, with access to powerful editing and sharing tools, iPhone users are armed with the resources to document all of life’s unexpected moments, make them look their best and then re-live those memories with friends and family.”

I played around with the app a little bit this morning and have to say that I think it’s very cool — especially for a free app. The app allows you to do some of the most basic edits with your iPhone photos including cropping, adjusting exposure and contrast, converting an image to black and white, rotating an image etc. It also has a very basic set of effects that you can apply and filters that you can add to create effects (like an image border, sketching or blurring effects, and the effect that I liked the most, an effect called “warm vintage”).

I especially liked the cropping tool of the app and found it reasonably robust (for a free mobile app) allowing you to do things like constrain crops to certain aspect ratios (a square crop for example).

You can also use the app to offload your iPhone photos to a free photoshop.com (2GB storage limit) account freeing up storage space on your iPhone. You can also easily access your photoshop.com account via the app to share show people photos from that account via the app later.

The app also allows you to email people albums of photos vs. just sending a single photo with Apple’s own email this photo feature. This feature seems helpful to me as well.

I’m not sure that this product is as comprehensive in terms of cool artistic effects as Chase Jarvis’ new iPhone app (although I still haven’t tried that app which costs $2.99 yet) but for a free app I was pretty damn impressed with Adobe’s initial iPhone product and the price is definitely right. I suspect that Adobe continues to improve it over time as well.

You can find out more info about the app here. If you have an iPhone, just go to app store and search for Photoshop and the app should pull up as a free download.

The 2nd Annual Scott Kelby NAPP Adobe Worldwide Photowalk

All Those Careless Days Are Gone

I had a great time this afternoon hanging out with my Pal Tom Hogarty, Product Manager for Adobe Lightroom, on the 2nd Annual Scott Kelby NAPP Worldwide Photowalk in San Francisco. Tom led a great two hour walk around the Adobe’s San Francisco offices which included lots of modern architecture, old cars, graffiti, and some really cool warehouse grit that you find around Townsend Street there.

After the walk Tom and the staff at Adobe invited us into their offices for pizza and beer/soda and took questions and solicited feedback from the photowalk participants about Adobe products. Tom couldn’t really get into future plans for Lightroom specifically, but he did mention a few of his own personal favorite plug ins including something that I hadn’t heard of before called Mogrify. The plug in seems to be in part about watermarking and borders which I don’t use so I’m not sure it’s for me, but it was nice learning about that. Tom also took feedback from people in the room about what they’d like to see in the next version of Lightroom.

It was great shooting for a bit on the photowalk with my Pal Ivan Makarav from DMU on Flickr. Ivan is currently putting together a DMU photography magazine that I’m really excited to see develop. This is a magazine that I’ll be contributing my own photography to and will blog more about it once the first issue is out and available for purchase. I think it’s going to be about 60 pages and include a lot of the photographers that are currently participating in the Flickr DMU group.

Every Marigold I Pass Below Will Be My Guiding LightTelephone's Still BrokeAh Honey Help Me PIck Up the ChangeOn a Neutral Plane

It was also good to finally meet Stephan Shankland face to face. Stephan writes for CNET and has been a reporter I’ve admired for a long time. Stephen covers a lot of the photography and photo sharing tech stories and blogs at CNET’s Underexposed blog that you can read here. It’s definitely one you’ll want to follow if you are interested in good photography tech related reporting. Here’s a meta shot of Stephan from the walk.

It was also good to catch up with Ziv Gillat, one of the Founders of Eye-Fi. Eye-Fi is doing really interesting stuff with wifi and geolocational information built inside memory cards. Eye-fi recently came out with a new 4GB card for the Pro Photographer that for the first time writes RAW files for wireless delivery. I was excited to check out that card but haven’t tried it yet because they didn’t have a CF version of it out.

SoarAnd I'm Looking Through the Glass Where the Light Bends-at the CracksTom Hogarty

In addition to meeting and socializing with a bunch of other great photographers and Adobe staff I had a great time shooting myself. I found this old Ford car that was so much fun to shoot. I couldn’t figure out what kind of Ford it was. If anyone can identify it from my photos please let me know. I think it might be a Galaxie 500, but the emblem had been removed so I’m not sure. I also loved shooting the condominiums with all their crazy cloud reflections near the Adobe campus.

Thanks much to Tom Hogarty, and everyone at Adobe for hosting a fantastic walk today. I’m definitely looking forward to next year’s 3rd Annual Worldwide Photowalk. This photowalk by the way was held today in San Francisco was merely one of 900, yes 900, photowalks held all over the world. Here is a map of where all of the photowalks were held. You can learn more about this photowalk here.

You can see my complete set of images from this photowalk here.

Kelly Castro’s Portarit of Me: TH 99

TH99

A few weeks back when I was down visiting with Adobe’s Lightroom Team, I had an opportunity to stop by and spend some time with Kelly Castro, an amazing photographer who I’ve long admired who works on the team. Kelly took the above portrait of me while I was down there as part of his Exteriors series. It was a honor to be photographed by someone with Kelly’s creativity and talent. Thanks Kelly for including me in this fantastic series. You can see more of Kelly’s work on Flickr here.

Spending an Afternoon With Adobe’s Lightroom Team

Reinventing Popular Photography

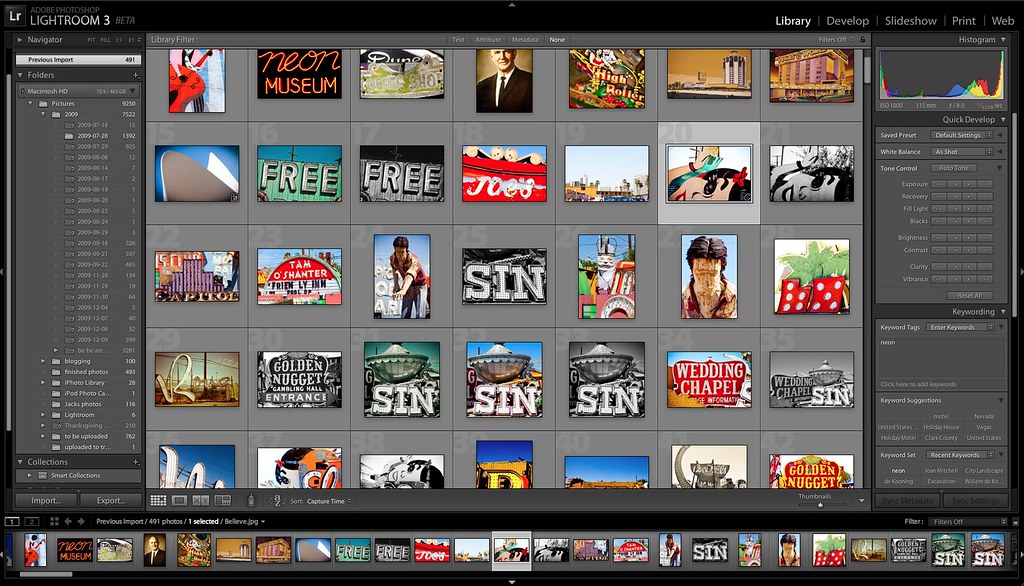
On Monday May 18, I spent the afternoon and early evening down meeting with the Lightroom team at Adobe’s headquarters in San Jose California. At present there are about 30 individuals directly related to the production of Lightroom, the software that I use to process my images (you can see many of their names on the splash screen for the product when Lightroom loads). There are many additional people beyond the 30 that contribute to the product in some way, shape or form and you can click on full credits to see an even larger list of names. Most of the team lives and works in Minnesota with about 30% at the offices at Adobe’s headquarters in San Jose. The following article is based on my visit.

Tom Hogarty is the Senior Product Manager for Adobe’s popular Lightroom imaging software. A proud new father and photography enthusiast, Hogarty started working for Adobe back in July of 2005. Prior to joining Adobe he worked as a consultant in New York City helping professional photographers make the big leap from film photography to a digital workflow. Like most of the people I met at Adobe Tom was as passionate about photography as he was about working for Adobe.

“Is that the 50mm f/1.2,” Hogarty asked me as I arrived and we sat down, immediately wanting to look through my camera bag. “How do you like it,” he asked. Later on another Adobe employee told me that he had been using Adobe’s staff Canon 50mm f/1.2 — that was until Tom’s wife had her baby and now Tom had it. Of course baby pictures of your first born child might trump other photography, so that’s certainly understandable.

As we made the rounds visiting with various members of the Lightroom team I was struck by how much beautiful and amazing photography was on the walls everywhere we went. It seemed like everyone on the team was a photographer. The photography on the walls that we walked by was done by various team members Hogarty told me. Explaining that the team had recently had a contest where employees could submit photos and the results were what we saw on the walls around us. Individual offices were full of amazing artwork as well.

The first thing I noticed when visiting with Adobe Sr. Director of Engineering Winston Hendrickson was (i am not a) photographer Merkley’s book 111 on the shelf behind him. Hendrickson also had fantastic nature photography of his own on his walls along with large photos of his daughter playing softball.

Interestingly enough, when I told my pal Merkley, a former painter, after my visit that I noticed his art book down there at the Adobe offices, he could not have gushed more about the team. Merkley’s own art is much more than photography, it is largely based in digital imaging as much as anything.

“I can’t even imagine going back to painting now, said Merkley. “I could never organize my brushes the way Adobe has. Everything is always in the right spot where i can find it. If they can figure out a way to implement keystroke shortcuts for every day life I might revisit painting. I always extol the magic of Photoshop. the people who created it have no bigger fans on the planet than yours truly.”

“I’d give them all a kiss on the lips if i could,” added Merkley.

Tom Hogarty-2Drawyer Full of CanonsBasketball in the SkyDown Left Right, Plate 2
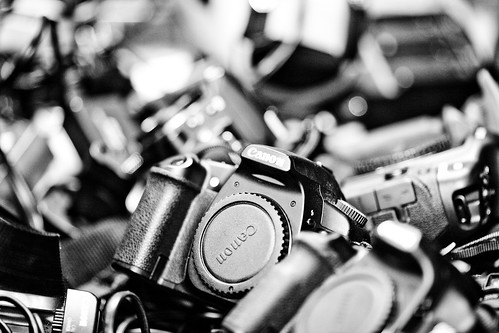
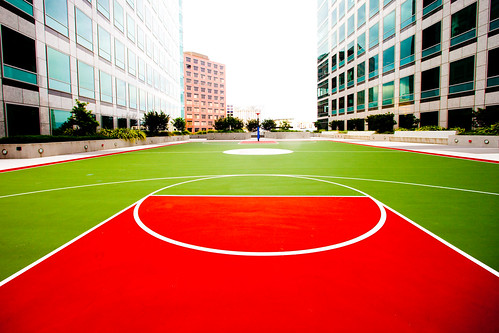
photos, clockwise starting upper left: Tom Hogarty, Adobe Lightroom’s Senior Product Manager, Drawer full of Canon camera bodies that Adobe uses for testing, Adobe’s San Jose headquarters at dusk, and Adobe HQ basketball court in the sky.

When I visited with Adriana Ohlmeyer (who was testing Lightroom support for the new Canon Rebel T1i which will be out shortly), I noticed the fantastic paintings in her office. She told me that they were done by a co-worker of hers. He thought that they looked great in her office so he let her have them. All around the offices you can’t help but notice how personally important photography, and more specifically fine art photography, seems to be to the various team members working on the software that has taken digital photography to a new level for artists and everyday photographers alike.

Part of supporting all of the cameras that Adobe does means having all of those cameras on hand to constantly test and refine. Ohlmeyer and Hogarty took me to a room at Adobe which would be a dream room for any digital photographer gearhead. Unlocking one drawer, Ohlmeyer pulled out a large oversize file cabinet drawer full of Canon camera bodies, another full of various Nikon bodies. Another cabinet was stocked full of Canon (yes, L series too) and Nikon lenses. While another whole cabinet was dedicated to many other camera manufacturers. Sony, Olympus, Fuji, they were all there. It’s easy to see how the Lightroom team would be so excited about photography having such a great line up of equipment constantly at their disposal.

But writing great software is more than just about a love for photography and cameras. It’s about paving the way to make the digital photography of the future even better and better, and at present Adobe seems to be leading this charge more than any other company both in terms of technology and market share. While Adobe doesn’t publicly release the number of copies of Lightroom or Photoshop that they have shipped to date, there is some data out which points to their dominance in this market — especially in the pro market.

Adobe’s John Nack recently blogged about research out based on North American pro photographers usage of Adobe’s imaging products vs. perhaps their largest rival Apple’s Aperture product. On all computers Adobe products dominated that market. Even specifically on Macs alone, Adobe’s Lightroom product still appeared to outsell Apple’s own Aperture product by more than 3 to 1 margin, and that’s not even counting their other camera RAW products like Photoshop.

Hogarty took me down to the Adobe labs area (one of the areas that I couldn’t photograph) to show me some of the new research that was presently going into the Lightroom product. While what I saw down there was off the record, I will say that Adobe is constantly working to refine their products and make Lightroom better and better and consistently more and more reliable with all of the camera gear on the market today. Part of that involves constantly testing all of the equipment out there.

While visiting the lab, Hogarty talked about another technology that he was excited about. Adobe’s DNG file format, A royalty free RAW image format that Adobe created in 2004.

While each camera manufacturer has their own proprietary RAW format, Adobe wanted to make a free format for everyone that could become a RAW standard. Adobe offers a free conversion program for people to convert their RAW images from whatever RAW format that they are using today to DNG. The advantages of DNG are not only that the file sizes are smaller, but that Hogarty said he felt that the format has a better chance of being around in the long term as an archive format 10, 20, 30 years down the road.

The DNG format also allows the metadata associated with your images to be included in the file itself, rather than as a sidecar file attached to your existing RAW file. I have to say that although I currently don’t convert my RAW files from Canon’s CR2 to DNG, Hogarty makes a compelling argument for the Adobe technology. Especially with images sizes getting larger and larger (on my 21 megapixel Canon 5D mark 2 for instance) having smaller RAW files when multiplying the files times thousands begins to make sense. It’s something I’m going to look into.

Designing great products for Adobe is part of what the Lightroom team does, but getting the message out about their software is important as well. Hogarty told me that recently a number of the team members had joined Twitter (I gave him my own personal pitch for FriendFeed as well and hopefully well see some Lightroom team members there soon too). These are definitely some of the people that you should consider following if you are interested in the Lightroom product. You can check out a list of the Lightroom team members that are currently tweeting away here.

Anne YehGo Green For Better Photographic Opportunities, Plate 2Melissa Monroe Itamura
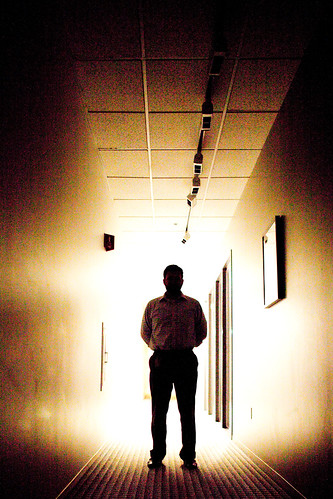
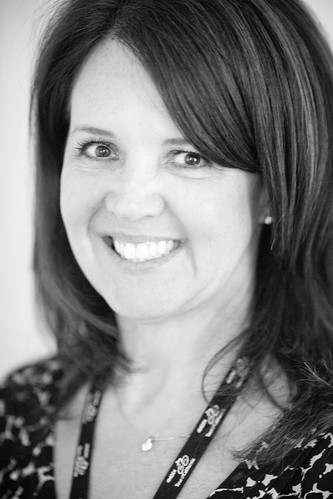
Photo’s l to r: A&R Edelman’s Anne Yeh, silhouette shot of Adobe’s Tom Hogarty down one of their dimmed “green” building hallways, and Adobe’s Melissa Monroe Itamura.

Also part of getting the word out is the responsibility of Adobe’s Lightroom Digital Imaging Evangelist Julieanne Kost. Over the past 10 years, Kost has spoken at hundreds of industry events around the world talking about Adobe products. In addition to live events she is also active with her own website at jkost.com and on her blog. She’s also frequently on AdobeTV.

As a company evangelist, I asked Kost what the most rewarding part of her job was.

“Sometimes it’s when I watch someone nod slightly in the audience, and I know that they just ‘got it,’ said Kost. Other times it’s when someone comes up to me after a presentation and exclaims how they will now be more efficient/productive because of Photoshop and Lightroom and, as a result, they will be more successful — personally, financially or however they define success.”

“But the biggest reward is when you see someone using the tools that Adobe makes, and that I speak about, to create images that allow them to communicate and express themselves in exactly the way they intended. If I can play even the smallest role in helping with that process, then it makes all of the travel and late nights completely worthwhile.”

Kelly Castro is another Adobe employee who finds working on Adobe products rewarding because of what it makes possible for serious photographers today. And Castro personally is one of the most serious fine art photographers around. Castro is presently working on a book of amazing black and white portraits for a series he calls “exeriors,” and is also very active on Flickr publishing under kelco . He’s been a longtime Flickr contact of mine, well before I’d ever even heard of Lightroom. Castro works as a Lightroom Quality Engineer, mostly working on the part of Lightroom that probably matters to my own production more than any other, the develop and export modules.

I asked Castro what he liked most about working on Lightroom.

“There are many things I like about working on Lightroom,” said Castro. “But probably the main thing is being involved in the development of what I feel is the best overall photographic workflow application available today. Many of the people on the team are serious photographers, and we are all completely invested in creating the greatest and most bullet-proof application possible — because we use it ourselves on a daily basis, in and outside of work.” Castro’s office also was pretty much a dream setup. Multiple computers (Macs and PCs) and huge oversize monitors. Check it out here.

All in all my vist to Adobe was a fantastic opportunity to meet so many of the team on a one on one face to face basis. I really appreciate having the opportunity to visit their offices and visit with their team. I also want to thank Anne Yeh over at Edelman for helping me provide access to the team and who made my visit with Adobe possible.

I put together a set of about 45 images from my visit at Adobe that you can check out here. One thing I especially liked about their offices were that they are now certified green. What this meant practically speaking for my visit, was that I was able to find lots of super cool long hallways where the lights were dimmed to save energy where I could shoot interesting silhouette shots, like the one above. Their basketball court in the sky was super fun to shoot as well. Adobe’s offices were a great place to shoot and I’m looking forward to getting back down there again in the future to shoot and write more about the important work that they are doing.

Adobe Photoshop Camera Raw 5.4 Release Candidate Now Available

From Adobe:

Adobe has released its Photoshop Camera Raw 5.4 Release Candidate, available immediately as a free download from Adobe Labs at http://labs.adobe.com. The “release candidate” label indicates that this update is well tested but would benefit from additional community testing before it is distributed automatically to all customers.

The Camera Raw 5.4 Release Candidate extends raw file support to an additional 26 camera and camera back models including the Canon EOS 500D (EOS Rebel T1i), Nikon D5000, Olympus E-620 and 18 Hasselblad models. The full list of newly supported cameras and camera backs is below.

The camera raw functionality in Adobe Photoshop software provides fast and easy access to supported raw image formats produced by many leading professional and mid-range digital cameras. Working with these “digital negatives” provides photographers with greater artistic control and flexibility while maintaining the original raw files. Adobe Photoshop Camera Raw supports the same functionality for TIFF and JPEG files.

The Camera Raw team would like the community to help verify the quality of the Camera Raw 5.4 Release Candidate through normal usage to ensure that the application is tested on a wide variety of hardware and software configurations not available internally at Adobe. Feedback can be provided on the Adobe User to User forum (http://forums.adobe.com/community/cameraraw).

Pricing and Availability

The Photoshop Camera Raw 5.4 Release Candidate is available as a free download for existing customers of Photoshop CS4, Photoshop Elements 7, Premiere Elements 7 and Photoshop Elements 6 for Mac.

Additional Supported Camera and Camera Back Models

Canon EOS 500D (EOS Rebel T1i)
Epson R-D1x
Hasselblad CF-22, CF-22MS, CF-39, CF-39MS, CFH-22, CFH-39, CFV, 503CWD, H2D-22, H2D-39, H3D-22, H3D-31, H3D-39, H3DII-22, H3DII-31, H3DII-39, H3DII-39MS, H3DII-50
Kodak EasyShare Z980
Nikon D5000
Olympus E-450
Olympus E-620
Panasonic Lumix DMC-GH1
Sigma DP2

Thomas Hawk on Adobe.com

Thomas Hawk on Adobe.com

Recently Adobe contacted me about the way that I use their products. I’ve been a long time user of Photoshop and Bridge and last year made the jump to Lightroom 2.0 as well. I’ve been super happy using Adobe products and feel that they are some of the best tools around for processing my photographs. I was pleased when they asked me if I’d like to be included as an Adobe Success Story on their website at adobe.com.

I worked with Laura Thurman from Big Sky Communications to put together the story/bio. Adobe didn’t pay me any money or compensation for participating in this project. I just felt like doing it because I thought it would be good exposure for me and I am a real true to life satisfied Adobe customer and user and am happy to share that experience with the rest of the world.

I’ve also been pleased with Adobe’s outreach to me as a blogger. When they launched Lightroom 2.0, their PR team arranged for Tom Hogarty at Adobe to give me a personal tour of the new product before the launch that allowed me to put together a pretty good review of the product on launch day. I was pleased to see that they considered my blog as press along with the more traditional mainstream media outlets which were also briefed on the launch.

Anyways, I’m pleased with the Success Story that they put together, you can find it at adobe.com here. Thanks Laura and Adobe for putting this together.

Adobe Releases Lightroom 2.3 and Camera Raw 5.3 Release Candidates

adobe-lightroomYesterday Adobe released the latest version of Lightroom, Lightroom 2.3, as well as Camera Raw 5.3.

From Adobe:

“The ‘release candidate’ label indicates that this update is well tested but would benefit from additional community testing before it is distributed automatically to all customers. The Lightroom and Camera Raw teams would like the community to help verify the quality of this update through normal usage as this will ensure that the application is tested on a wide variety of hardware and software configurations not available internally at Adobe.

Both release candidates provide additional raw file support for the Nikon D3X and Olympus E-30 cameras. In addition, the Lightroom 2.3 Release Candidate provides a solution to a memory leak that affected some customers of the Lightroom 2.2 release.

Adobe is also pleased to announce the availability of Lightroom in eight new languages, including Dutch, Italian, Portuguese, Spanish, Swedish, Korean, Chinese (simplified) and Chinese (traditional). The Lightroom 2.3 Release Candidate available on Adobe Labs includes these additional languages, and Adobe greatly appreciates any feedback the community can provide the Lightroom team.”

You can download both Lightroom 2.3 and Camera Raw 5.3 from Adobe Labs here.

You can submit feedback on the new version of Lightroom here.