
I started shooting photography with an SLR (single lens reflex) camera about 23 years ago. I was 15 and my parents bought me a Sigma camera and allowed me to enroll in a summer photography course at the local junior college, Glendale Community. I was the youngest kid in the class and found it one of the most exciting things I�d ever done. Watching a print come to life, when developing in a darkroom for the first time, is an amazing and exciting experience. Although I haven�t done much developing in the past few years, that summer began a love affair with the camera for me that has never stopped.
Today I shoot with a much more expensive Canon EOS 5D, a fantastic full frame digital that has so much more capability than my old Sigma ever did. I�ve had a lot of cameras in between and have taken literally hundreds of thousands of photos between when I started out and today. I�ve got a little over 4,000 of my shots up on Flickr and have recently begun doing a bit of professional work here and there. You can see my photos in the last three issues of San Francisco Magazine and I�m working on another assignment for them now as we speak.
Along the way I�ve picked up a few things here and there and thought I�d share what I feel are some of the basics in a post for new Digital SLR photographers. Bear in mind that these are only my suggestions and observations. Many other photographers will disagree with them and the art of photography truly is an art with many different photographers taking many different approaches. That said here is my list of 10 tips you might want to explore if you are new to the hobby.
1. ISO, ISO, ISO. In real estate it�s location, location, location. With an SLR it�s ISO, ISO, ISO. I can�t begin to tell you how many new photographers I�ve met who have no idea what an ISO is. It�s perhaps the single most important technical thing to know about your new SLR. Technically ISO stands for the International Organization for Standardization and in the old days of film it had to do with film speed. But without getting very technical here, if you are shooting in the dark or a poorly lit room or at night, you can dramatically improve your photos by bumping up your ISO setting. Most digital cameras these days go to 1600.
When you see those blurry shaky photos that people take at night without a flash what is going on here is that the camera lens is being opened on an automatic setting too long to avoid the movement of your hand which produces the blur. By increasing your ISO setting you will be able to shorten the amount of time the lens is open and thus get a less blurry photo due to the ever so slight movement that naturally takes place in your hand when you shoot. I�m not going to go into the differences between ISO, noise at higher ISO settings etc. Experiment around with the speeds yourself but make *sure* you know how to change your ISO setting and make sure that you understand that it will make a world of difference to the photos you are shooting in low light situations by increasing it.
2. When dealing with low light situations that are still blurry at high ISO settings, find something to brace the camera on. You can set it on a table, chair, bar, etc. You can hold it tight against a light or telephone pole or wall. You can lay on the ground and set it there. Find something for stability. This will dramatically improve your ability to steady the camera in a low light situation.
3. Don�t cheap out on a tripod. Cheap tripods are like cheap umbrellas. They will inevitably break and you will be back buying another one. Further, they won�t work right, won�t get your camera at the right angle, will shake in the wind when it�s blowing, etc. Tripods are one of those areas where you truly do get what you pay for. Especially if you are going to be shooting at night budget for a quality tripod that can last you for years. Personally I use a Manfrotto. Manfrotto makes some of the finest tripods in the world. Spend the extra money and buy a good tripod or you will regret it. It should have a ball head and for everyday use be somewhat light and hopefully fit in your back pack. You may want a more sturdy industrious larger tripod for the car, but a basic smaller one for a backpack of good quality is money well spent.
4. It�s all about the glass. I�m continuously amazed at folks that will spend $3,000 on a digital SLR and then keep the low level stock lens that they bought with it and never do anything else from there. Personally I think you�d be better off buying a cheaper SLR but with a few good core lenses to use. The difference in shots using better lenses is dramatic. At a bare minimum find someplace that rents lenses and go rent one for a day, you�ll be surprised at the difference over the stock lens that came with your camera. With Canon their L Series lenses are amazing � you will not go wrong with any Canon L Series lens. Whether zoom telephoto, macro, wide angle, prime (fixed focal length), all will make dramatically different photos come out of your camera. Experiment with lenses and make sure that a fair portion of your camera budget is dedicated to at least one if not two quality lenses. My favorite lens for basic out and about shooting these days is the 135 prime L series, but most would prefer the flexibility of a range of distances over the fixed focal rate primes.
5. Join Flickr. Flickr is almost certainly the best online photo management and sharing application in the world. Something happens when you start sharing your artistic photographs with the rest of the world. It�s hard to say why or how it happens but it gives you a tremendous amount of emotional support and genuine satisfaction to see like minded camera geeks sharing their work and appreciating yours. Even with one or two close flickr friends you will find that flickr provides motivation for you to continue shooting. And best thing of all Flickr is free or very modestly priced at (a well worth) $25 a year if you want a Pro account with more bandwidth. You can join other photo sharing sites too if you want. I also have my photos at Webshots, Zooomr, Riya, Vizrea and a few other places, but it is the social network of Flickr that makes the most difference.
Flickr will also give you a lot of great ideas and ways to shoot that others are using today. For more on how to use Flickr you might want to check out this review I wrote yesterday on Richard Giles’ new book, How to Use Flickr, The Digital Photography Revolution. I’ve also published two other top 10 lists on Flickr, The Top 10 Ways to Get Attention on Flickr and the Top 10 Ways to find great photos on Flickr.
6. Know your rights. Nowhere are rights more misunderstood than with photographers today. Can you take photos of strangers on the street. Yes. Can you take photos of buildings from the street even after security guards tell you not to? Yes. Can you shoot into an open door from the street into a bar? Yes. Know your rights and stick up for them. This not only helps you but it helps other photographers. For a
great primer on your rights as a photographer check out Bert Krage�s excellent .pdf called �The Photographer�s Right�
7. Shoot in RAW. Even if you shoot in JPG a lot too, shoot in RAW. I really only shoot in RAW for my art shots. RAW files are large, cumbersome and difficult to work with. They take up a lot of space on your hard drive. But being able to make modifications to the exposure, contrast and temperature (white balance, think are your whites whitish blue or whitish yellow) before really processing the photo makes a *huge* difference. Shoot in RAW and then learn how to do the production necessary with your photo processing app to do the minor modifications necessary to make your photo the best that it can be. I still shoot in JPG a lot of the time when I’m doing family snapshot stuff and don’t want to be bothered with the extra time it takes to process but for my art stuff it’s all RAW.
8. Photoshop, Photoshop, Photoshop. Whether buying the low end version of Photoshop Elements for $75 or the more professional CS2 version for $600, buy Photoshop and use it. Do *not* listen to the naysayer that will tell you that you are not a purist if you edit your photos. Almost every digital photo can be improved by editing it. Simple things like bumping contrast, altering saturation, sharpness, selective color, etc. all can make a world of difference. Buy Photoshop and use it to process every artistic type image you do. If you really, really can’t afford Photoshop or want something else for a laptop on the go or something, also take a look at Google’s Picasa. It’s pretty good for free software. Not as good as Photoshop, but you can’t argue with the price and it does do a lot of the basics nicely.
9. Take lots and lots and lots of photos when you shoot. Feel free to throw out the vast majority of the shots you shoot. When you see something you like to shoot, shoot 6 shots of the exact same thing. Some will be bad and you can pick the very best one and throw out the rest. I throw out most of the photos I take. I also have about 60,000 photos that I’ve yet to process that need more consideration on a hard drive I’ve named Scratch sorted by date. I shoot like crazy. On a typical outing I can easily fill two memory cards. And while I’m on the second card I’m transferring the photos off of the first card to my laptop to free up more space. Others disagree with me and a photographer I admire a lot Tim Gasperak was telling me recently about this discipline process thing of only being allowed to take a single photo a day in order to better focus and understand your composition and photography in a thoughtful way. There is probably something to that and as an expert it may have merit, but as an amateur shoot away.
You should never come back from a shooting outing with any room left on your card. Shoot, shoot, shoot and shoot. You’ll be surprised at the gems that you come back with.
10. Change your perspective. Whenever you think you have your shot framed and captured take your shot and consider different perspectives. Can you get down on the ground (or simply set your camera on the ground and shoot from there standing up) and get a better perspective. Look up. Is there someplace higher you can get. What about closer, further back. Turn around. What’s behind you? Are you missing something great? Look everywhere at once. Keep your eyes open for different ways to take the same shot. Tilt the camera, take a vertical, a horizontal, a diagonal. Crop out the sky. Crop out all of the land but a thin small strip at the bottom. Play with your perspective on a shot and take several different versions of the same thing.
There is this Chinese Restaurant in San Francisco called All Seasons. It’s not a favorite of mine but I’ve been a time or two. One day I went to lunch there and walking up the stairs just decided to look directly above me for some reason. There were these amazing umbrellas hanging from the ceiling. Had I not looked up I would have missed them. This shot in turn has become my most favorited and popular shot on Flickr. If I hadn’t turned my head and looked straight up at the ceiling I never would have gotten the shot.
Are you shooting at night and using a manual shutter speed for long exposure shots. Try it at 2 seconds, try it at 10 seconds, try it at 30 seconds. Shoot the same shot in many different ways.
And finally, have fun. Digital photography is a great hobby and can be loads of fun but make sure that you don’t get so serious about it that it stops being fun for you. It’s a wonderful way to be creative and to express yourself. Buy your kids, spouse, partner, brother, sister, mom, dad, friend cameras like my parents bought mine. Teach them to shoot as well. Photography is a wonderful hobby full of ways for you and them to be creative. Oh and by the way when buying all this gear (did I mention this hobby can be expensive?) resist the temptation to buy the cheapest discount gear online. Take my advice and check out my bad experience in the past in this department. Personally I like and would recommend B & H Photo for all of your online purchases but their are certainly many other reputable dealers as well.
Update: In the article I mentioned that Flickr is a wonderful place to get advice and share your love of photography with other like-minded photogeeks. In addition to my 10 tips are some more that you may want to consider that I solicited from the members of Flickr’s largest group Flickr Central.
Jeff Clow adds: “Might I also add that they should learn how to use the manual settings as opposed to just the auto focus – since manual settings are intimidating intially but become second nature when one understands how important shutter speed and aperture are to crafting good shots.
I think another important item for newcomers to learn is the steps necessary to access the great features like auto bracketing and remote shutter release that almost all DSLRs have built in to their menus. Once a person becomes adept at those, the world of photography opens up even more broadly – and not surprisingly, better photos become much more the norm.”
carpe icthus adds: “Cheap advice for beginners? In addition to the basic zooms for the range you need, pick up a 50mm f/1.8 or f/1.7. Every line has one, they’re very cheap, you will instantly be able to do things with low-light and depth-of-field that you cannot do with a bridge camera, and practicing zooming with your feet will teach you a lot about composition.
Also, if you find yourself doing a lot of flash photography, picking up a flash that can bounce its flash angle (and, better still, rotate) will improve your photography immensely. For most, the basic such flash in their line-up is more than enough, as long as it takes advantage of their camera’s metering. SB-600 for Nikon, 430EX for Canon, etc.
Also, an addition to the ISO item is to address the common newbie mistake of thinking it is better to underexpose while shooting at a lower ISO then exposing properly at a higher ISO. It’s not; always try to get the right exposure if at all possible. In particular, your images’ color will thank you for it.”
Morven adds: “One tip I got a long time ago and never forgot: carry your camera as much as you can. Great subject matter, great photographic moments, don’t just occur when you’re hunting for them. Sometimes
they just happen totally randomly. Not an SLR tip, but a general tip; in fact, it’s one of the best arguments for also owning a point-and-shoot. Even shots with a crap camera can be good, and they certainly beat the shot you didn’t take because you didn’t bring the camera with you.
Another: be cold and be ruthless when selecting shots. One of the secrets of many master photographers is simply that they take so damn many photographs and then cull ruthlessly. Garry Winogrand died with almost half a million photos he’d not even looked at yet. He deliberately didn’t look at his photographs until he’d forgotten the circumstances of taking them, so that he wouldn’t be influenced by good memories of the circumstances into favoring a poor photo. You don’t have to be that extreme, but try and divorce your emotions about the subject matter and the circumstances of the photo-shoot from your judgment of the resulting photographs. Attempt to see them as a stranger. Sometimes the most fun days out photographing produce no good shots at all, and sometimes an awful day with a subject you hate produces a winning photo.
Don’t wear good clothes. Sometimes the best shots are found by lying in the dirt or climbing up things. By the same logic, buy a camera bag that can absorb the inevitable knocks your equipment will get when you’re doing that.”
monkeyc.net adds: “Dont fall into the trap of thinking that the more expensive the camera you buy is the better your shots will be – buying a professional SLR for your first camera is pointless, it wont make you a better photographer but it will make you a poorer one – start with an SLR you are comfortable with and can use and wil use – the entry level models from Canon and Nikon are excellent but there is a lot of value in the offerings from other companies – Pentax in particular make some excellent price competitive DSLR’s that have the added advantage of being able to use a massive range of lenses and as theyre almost the ubiquitous student choice Pentax gear is readily available second hand meaning you can get some cheap lenses at a good price.
A pro camera wont make you a pro photographer no matter what that guy at the camera store tells you.
And my second advice is the most important – 3 things every photographer needs to know and understand. Depth of Field, Arpeture and Composition – theyre not hard to learn but they are essentials of taking good photgraphs – pick up one of the many handbooks on 35mm photography – you can get them cheaply normally and the principles are the same and learn what they mean – once you have these basics down pat your photography will take off – you will be amazed how much difference understanding them will make to your work.”
Proggie adds: “If you don’t want to carry a tripod, get (or make) a beanbag camera support, to support the SLR on surfaces where you may not be able to normally place your SLR. These may not work as well with larger lenses though. But they work well for me as supports when I hold the SLR on a railing, or rock.
Check your image in the viewfinder by zooming in to make sure it’s sharp. Often when zoomed out the viewfinder will make you think that a soft or out of focus photo looks good, but when you download it to your computer you’ll discover that it’s not that great. Check the histogram in the preview as well (though I’m still learning how to interpret it correctly).”
f8125 adds: “Take a photo with every mode and setting. Even if you don’t use all the functions all the time, knowledge is power and with technical fluency, your creative juices will have no bounds.
Get a a good sized memory card or 2 (at least 1 GB), running out space during a shoot is depressing.”
est0al adds: “A good habit for any beginner (I am still struggling with this one though) in my opinion is to not be shy to shoot anywhere.
If you get out your gear in a crowded place just ignore the interested or just plain weird looks of passers-by. In the past I have missed some nice opportunities just because they occured in a setting in which taking out a camera seemed awkward. Oh yeah, and always take along enough spare batteries and memory cards. Also, it pays off to check your gear before you set out 😉 I nearly went bananas the other day when I I had checked the status of my batteries before leaving the house but when on site I realized that I had left my CF in the card reader at home… Luckily I had my backup cam (an A620) with me.”
leecullivan adds: Take your camera with you everywhere you go, work, dinner, church, hairdresser… I took my camera to work yesterday and took the latest in my stream which I am happy with. I also took it to dinner last night and got a couple of great shots of a friends kid which I’m sure they will be pleased with.
Learn what Depth of Field is and how to effectively use it.”
Great write-up Thomas! As a young beginner myself, it’s nice to have these things reinforced.
Superb as per your usual high standards of writing and assistance, Thomas.
I get requests all the time from Flickr folks about DSLRs…and I intend to send them to this article in the future to help them get a good start with their new cameras.
WELL done, Sir…!
Thanks.
Fantastic tips! One more I keep in mind… always look behind you. Many times I’ll be focused one way, turn around and the light or subject matter is so amazing.
keep up the great work!
Interesting read. I just bought a Nikon D50 yesterday, and came across your article. Lucky coincidence. I’ve been trying to think back to my high school photography class. One thing you might want to mention to people too, is to read their manual. Surprisingly it’s full of more information than just how to flip switches and push buttons.
Thank you! I’m still working with a point-and-shoot, but sometime soon I’m hoping to move up to a digital SLR. I like your tips about buying lenses beyond the stock ones, and to not cheap out on certain things, like a tripod. I also agree that flickr is amazing for motivation and support. This was very helpful.
–Peyri (http://www.flickr.com/photos/peyri/)
This is great, Thomas. Peter Norby pointed me here, and since I’ve just bought my RebelXT *and* have a baby on the way, this is a great way to learn: from others.
–john allspaw
It’s nice to see pretty much all of the comments (apart from “join flickr”) being echo’ed here and concentrated in one place. I’ve always been a proponent of shooting a lot, somewhat to my detriment, and this means I have a huge backlog that I almost never have the time to go through. I’d like to add that folks shouldn’t just take a lot of photos just for the sake of taking a lot of photos. You need to be following the other rules in concerts with this — mix it up, try different settings, angles, composition, lenses, wtfe. But as you point out, it’s often the random shot or unexpected trial that will net you a winner. My most favorited photos was taken without looking, and sat unnoticed for a couple of months before I found it.
-/\/
Thanks for the great summary. I think i’ll be going out and renting me a good lens for my eos300d as per your recommendation.
Love reading your blog,
-sean
Great advice! I’ve long been a fan of your work and it often inspires me to try new things with my photography. I’ll add a few things to your comments. First, I learned from a pro to figure out why you want to take a certain picture – what about it is interesting to you – and make sure your composition focuses on that. So concentrate on your subject or inspiration and make sure it’s represented in the frame and crop out anything that might detract from it. The other is to fill the frame with your subject. So many beginners tend to try to put too much in their shots and there ends up being nothing to draw the viewers eye to. I also remember the rule of thirds with composition – envision a tic-tac-toe grid on your shot and place your subject in one of the intersections. Of course, rules are meant to be broken and one can often create an interesting composition otherwise, but it helps beginners to stop putting the subject dead center in the frame all the time.
Great advices
thank you
Dror Engel.
thanks – great tips for a beginner like me…
Great post for a beginner like me.
Could you also please post recommendations on what book to buy for understanding DOF, ISO, aperture speed etc.
..and what would be a good manfrotto tripod (lightweight)..
Thanks!
Great piece – very impressed with your pics too – they are fantastic.
Interesting point about Flickr too – i currently use coppermine on my own website to show my pictures as they are a mix between arty shots and personal photographs, but am considering putting some of the arty ones on Flickr.
blog: http://www.fergus-macdonald.com
gallery: http://www.fergus-macdonald.com/gallery
Don’t leave home without it!
Keep the SLR with you all day long. Lug it to work, lug it to your kid’s games, lug it to parties and before you know it, you’ll be a photographer.
sfbuckaroo
Thanks. Great tips. Now I just need a Digital SLR.
Thomas…
Just stumbled on to your site.
I don’t know a damn thing about your work, i’m just trawling to find out more about best buy/quality before i lay cash down to buy a good digital slr.
Must say, after being in the TV/film industry her in OZ for some 38 years, that it’s nice to see some honest and commonsense advice, for what can sometimes can be, a plethora of subjective rubbish from industry try hards!!
Your advice is the sort of thing ordinary people sometimes think about, but aren’t always sure whether they could possibly be right, or should speak about openly in case they are branded fools!
Good on you… i’m about to take early retirement and have a bucketload of fun with a now more mature digital slr revolution, than was available just a few years ago.
All the best … Alvin
WOW, nice blog! Great articele!�Digital cameras, nikon cameras, discount�cameras rebates you can find here: http://www.discountnikoncameras.com/
Thanks for the advice. Just got my Nikon D-50 a few weeks back. I take it with me everywhere. I am a beginner and hope to develop my skills.
WOW, nice blog! Great articele!�Digital cameras, nikon cameras, discount�cameras rebates you can find here: http://www.discountnikoncameras.com/
Here, here about all your suggestons. Great information.
Re: mispelled word. In your sentence “…for all of your online purchases but their are certainly many other reputable dealers as well.”, “their should be “there”. (FYI, don’t include this note in your blog)
Ref: http://thomashawk.com/2006/04/10-tips-for-new-digital-slr.html
i bought a canon d60 no more than a week ago so when i came accross your blog i felt like it was ment just for me.
I have photography experience already but being an amature there is still a lot of hit and miss when i shoot stuff.
anyway just wanted to say thanks and thai i love your stuff.
Q
Hey Thomas, thanks for the good tips. I knew most from being out there and learning on my own/from other photographers.
Im 16, Started taking pictures at the racetrack when I was 14-15, the same age as you. My whole family races and since I was not able to race yet, I found taking pictures was a fun thing to do while at the racetrack watching. At first I just took pictures of my dad/brother’s racing from behind the car mainly. After that I started to get more into it, and started taking pictures of the people I knew, random cars, and at the present day, im out on the racetrack in front of cars, taking pictures of their burnouts, the cars launching (its fun trying to catch the wheelies and people like pictures like that.).I used to take maybe 20 pictures at a day at the track. Now im taking 300-400+ each day im there, which is 2-3 times a week. I started out using a P&S; 5mp camera, but now recently getting into photography even more I bought a Canon Rebel XT and love it, and now starting to spend money on lenses and other gear. I just recently started selling pictures too and it is pretty cool how much people like my pictures. I can also tell from getting the experience of being out there taking pictures every week, how I have gotten and am getting better. I have never taken a photography class, I want to though and am going to take a class when school starts back up.
Sorry for telling my life story, haha. But ill keep in mind the things you and others have written on this page and thanks again for the tips!
I’ve got to disagree with you on joining Flickr. Flickr is turning into a useless vat of crap just like YouTube. If you’re serious about photography and want to learn how to improve then you want to join Pbase. http://www.pbase.com … just go out there and look and you’ll see what I mean.
I have a cannon digital slr that I bought two years ago. It works great and takes great outdoor shots. I like taking photos of daughter playing soccer. I have been trying to take photos of my nephew playing basketball, they photos often blur and have bad color. I know that I need to understand manual settings better, but I am looking for help, on the best settings for this situation. Any help would be appreciated.
Thanks,
Wes
groverwes@yahoo.com
SWEET add man it helpd me in ways alothough i still can figure out some things or how my light meter works
Funniest, saddest, most alarming blog I’ve yet come across regarding the Online Scam. What a testament to buyer beware. Excellent posting. Good tips too…
Thank you so so much for this! After I read your blog I made a Flickr account. I can’t wait to get started. 🙂
hi..
im a young girl REALLLY interested in photography but am still a newcomer. There’s this thing i dont really understand – APERTURE .haha . I’ve read from school and from the ner that the smaller the f-stop, the bigger the aperture gets, more the picture brightens up . And the bigger the f-stop gets, the smaller the aperture ,the more the images gets sharper.
But i’ve tried taking lots and lots of pictures with the different apertures and the images doesnt get sharper or blurrer – they just get lighter or darker .
One last question , how do we blur the background with the use of aperture? heh. spologies if im troubling you. :]
10 tips are awsome!!
thanks
Ravi
About your tip #6, you may be able to do those things in America, but there are many places around the world where you are NOT allowed to take photos of various buildings, etc. For example, you cannot take photos of military buildings and installations in many countries.
I guess it comes down to “know your rights in the country you’re shooting in“. Just because you can do something back home, doesn’t mean you can do it when on holidays.
Hello Thomas
I’m Mauricio from Miami, Fl I’m a Tattoo artist and just got into The Art Institute for graphic designing. i need a great camera for my work and other art purposes. i usually want the best so
i’ve been thinking on a DSLR for a while and truly, i still don’t know what i should get i’m will to spend between 1000 to 1300 dollars for it. I’m a student that will eventually will take some classes. what do you think i should get Nikon d40 ,d80 or Canon EOS 40D , Digital Rebel xti, xts or is there any other company’s worth looking at like fuji, sony or olympus ?????????? plz help me!!!! been trying to get info but nothing has really worked…..
Thanks a bunch man
…………Mauricio
Great tips especially for beginner like myself. Thank you.
What are your thoughts on image stabilization and the like? Would this be an essential feature to have, especially for new dslr enthusiasts?
My son who is turning 15 in a few weeks is asking for a camera for his birthday. Thomas’ advice and the posted comments have been super helpful. Thanks!!
For those who don’t want to fork over even the $75 for the cheapie PhotoShop, try looking into The Gimp; open source and free. Although it takes some getting used to, it far surpasses Picassa, and I haven’t yet found something that can be done with PhotoShop that CAN’T be done with Gimp.
this was very helpful thankyou!!
http://www.flickr.com/photos/surferlele/
this is great i am a beginner and this tips really helped me
really
Thank You….
I just bought a new entry Nikon D60 and learning all the functions in the SLR. Good tips! I feel excited and can’t wait to try out all the functions. I’m still trying to figure out ISO 🙂
Thanks for the helpful tips. I wanted to try something different from the point and shoots and bought a Digital SLR by mistake. Im now in love with taking pictures mostly of my little girl, but once I learn the ins and outs of my canon i am sure to start shooting onther things.
Napoleon
Hi Thomas!
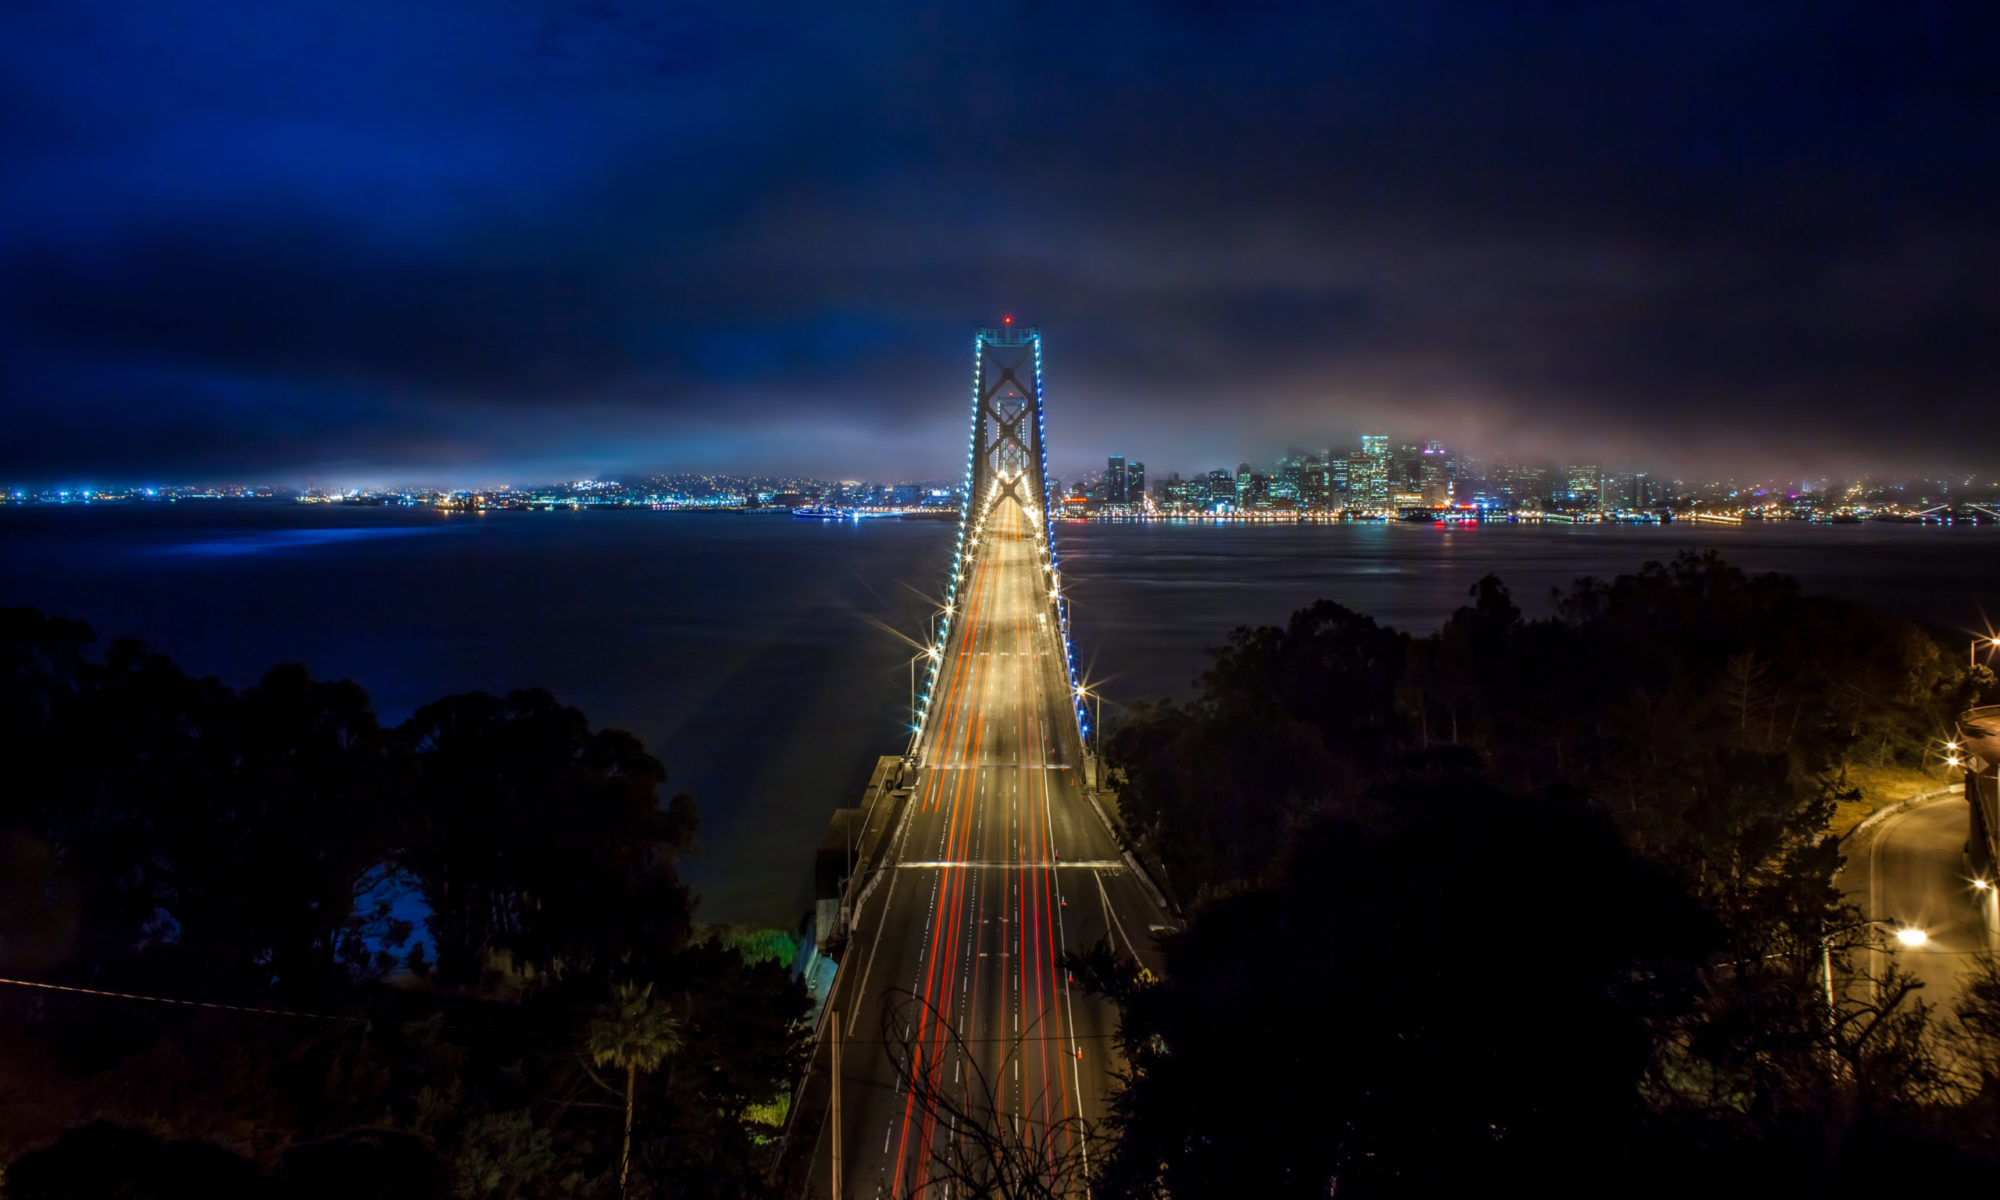
HOW do you manage to get such fantastically crisp night shots?What settings do you need?
What lenses would you consider essential for good shots?
Which macro lens would you recommend for close-up for a Nikon D40?
Thanks!
Great information in this post, including the additional offerings from other people at the end. Thanks much for the post.
Thank for the tips! I just got myself a Rebel XS! Liked your pics a lot too 🙂
Thanks a lot for these great tips! Just got myself a Rebel XS! Liked your pics too 🙂
This made a beginner smile.
Great article, I am a beginner and it feels like I am welcomed here. Thanks
Flickr is cool, you might want to try smugmug as well. I use smugmug and have never ever had a problem with it. Totally love them. Been with them now for three years, and I still love them.
Fantastic advice for a newcomer! You’re going to def hear more from me in the times to come! Thanks!
I started out using my DSLR to just point-and-shoot without realizing what an amazing gadget it was. It’s very important that people tinker with their DSLRs because that’s how one would be able to maximize its full use and features – it’s way more than just a point-and-shoot device. I have summarized the tips that I can share to new users as well and you can find them here.
Great advice, I am one of those lucky people that travel the world as a job and have been taking pictures for the last 3 years with a Nikon coolpix which has been very good. I have just graduated to a Nikon D90. I am still learning but enjoying every moment.
hi thomas…
i really noobs here n really interesred on photography..
but im really confuse which camera to buy…
what do u think the best camera which is user friendly that i should to take into my consideration….as for me to get started…
i really appreciate ur help…
A really handy website for photographeres of all levels. Some of the things you point out seem to be really obvious, but are quite often overlooked in the shooting or preparation.
hah, thanks for this, it’s been an inspiration, i have the nikon d40, i am a beginner and i just got the 55-200mm lens today [VR]. now im a little bit more excited to take pictures tomorrow. thanks. (:
I just got the Canon Rebel XSi for my 21st birthday. I can’t let it out of my hands and find myself wandering into my backyard with a set of horse shoes and work boots just to see what pictures end up on my computer. I am slowly learning with everyones help. You mentioned to bring your camera everywhere, shoot everything, show no fear essentially. I must say, one requires a great deal of courage to shed the fear of public scrutiny; but this is a challenge I am eager to tackle. I will join Flickr per your recommendation. My new XSi will also be joining me on an adventure through the Mediterranean. I depart for a Semester at Sea in one month and will be snapping as much as I can until we sail. Thanks for the great advice and good luck with molding the vision of your future.
-Ian
Hi there! Just wanted to say that this is probably the best article I’ve read for beginners. Helped me a lot!
THANK YOU for the great tips!!!
I’m new to DSLR cameras and excited about all the possibilities! I read your article from top to bottom with total amazement of your insight for individuals looking to invest in a DSLR camera. I recently bought my first DSLR camera, I chose the Nikon D90 mainly because at work I have access to a Nikon D80 and love the picture quality. I also enrolled in a Intro to Digital Photography class with the Washington School of Photography, yesterday was my first class and I learned so much about ISO, aperture, shutter speed, and composition.
~Bridgette
I just purchased my first DSLR online two days ago and am eagerly awaiting its arrival. I went with the Canon Rebel XS but had also considered the Nikon D40 for its budget-minded price and either the Sony A200 or A300. This was a great article to come across with some wonderful tips. I’m excited to dive head first into the world of photography and am trying to soak in as much advice as possible from all the seasoned professionals out there. Thanks!
Hi,
Amazingly it was really great reading the article… I just purchased an entry level camera N-D40 few days back, I used to have SONY DSC – H3 before, and I am struggling to understand the features with my new cam D40.
Thanks for the great post…
If you re-read the above comments, at the beginning of 10 Tips for the New Digital SLR Photographer | Thomas Hawk Digital Connection, don’t you notice that you are arguing the same point but differently (I’m referring to handbooks downloadand therefore contradicting the main point and making this a lot less pertinent? I will come back next Wednesday to see how this has evolved.
Here’s another pretty cool set of pieces that I found on using DSLR’s…it REALLY inspired me!
http://www.associatedcontent.com/article/1825291/manual_dslr_controls_basics.html?cat=2
Hi.I am 15 years old and new to photography.I just bought the Nikon D40 SLR camera.Is there any tips or recommendations anyone has?
Hi,
I am new to the world of photography, having been bought an Olympus E-420 as an overly generous birthday gift.
Thankyou for the 10 tips for the new DSLR user, it is a positive and practical piece which I found really reassuring and helpful.
The blog is cool too, lots of info and friendly!
Ta very muchly.
Teresa
Thanx Thomas,
For a lovely post. It was very encouraging and must say a relief. I am very new to the world of SLR and Digital SLR that too …Have been discovering my camera, have been very enthusiastic and not letting go of ant opportunity to gather tips and keep improving. Ur post was yet another reinforcement that i am on the right track. Thanx a ton once again…will read more as we go along 🙂
Cheers !
Payal (India)
A couple of things which need to be corrected.
1. “the camera lens is being opened on an automatic setting too long “. With the exception of a few fairly rare cameras with in lens sutters, what is opened when you take a photo is the SHUTTER, not the lens.
2. “Know your rights… Can you take photos of strangers on the street. Yes. Can you take photos of buildings from the street even after security guards tell you not to? Yes. Can you shoot into an open door from the street into a bar? Yes. Know your rights and stick up for them”
This is very dangerous advice. I have no idea what country you are based in (probably UK or USA??) but if you were to follow the advice given in many countries, you would end up being shot or imprisoned.
Also, even in countries which normally allow you to shoot, if there is a particularly sensitive event (Bilderburg ??) going on, you still risk detainment.
3. “You should never come back from a shooting outing with any room left on your card. Shoot, shoot, shoot and shoot. You�ll be surprised at the gems that you come back with.”
Hmm, this may get you a few good photos, but it will NOT help you improve your photography. When taking landscape photos, I have been known to sit there for 3 or 4 hours until the right shot was there! So I would have to side with Tim Gasperak.
Other than that, I completely agree with you. Many top tips.
Here is another one:
Do not clip the whites.
If you are a little bit underexposed, you can recover this (e.g. in Photoshop). If you overexpose and clip your whites, they are gone!
One thing I’ll add, is to reiterate the point on memory cards. They are so cheap. I have three two gig cards (there’s a fourth card in my son’s camera if I really think i need it for a shoot.) I shoot in RAW exclusively and still manage to get around 700 +/- files on a card.
I tend to shot a LOT and have noticed many of my shots lately are similar to other shots I take. Continuous (or burst) shooting mode is really nice for sports/action photography but it can be over used if you’re not paying attention to how many times you hit the shutter release. When I think of it (sometimes it’s hard to make yourself drop bad habits) I try to limit shooting to one frame at a time, being more selective with the shot.
If you think about the rule of thirds, look through the viewfinder a lot, and plan out the shot before you make the exposure, you may often surprise yourself with the results.
I always have a tripod in my car, the quick release plate is all but permanently attached to the bottom of my primary camera. I have a second mini-pod for when I want to get really low to the ground but not on it. I don’t have a cable release (yet) but I use the self-timer function on the camera for longer (up to 30 seconds) shutter exposures.
You can also play a lot of tricks with bouncing an external flash off white or near white walls (colored walls, even light pastels, will add a color cast to your subjects, make people look a little blue or green or red) and almost never use a straight flash when shooting people (it’s usually aimed back over my head at a 45 degree angle.)
Get a good bag too, with room to grow in it. Lens cleaning supplies, batteries (two resealable sandwich bags, one labeled “dead” for batteries, one labeled “fresh” for the flash.) Pens, a notepad, filters…
I have a UV filter on each of my lenses, they almost never come off. My “long” lens, a 70-300mm Nikkor, took a hard shot from something during a shoot. I never saw what it was but I saw the shattered UV filter. Replacing a $30 filter is much better than sending a lens out for refurbishing. It also didn’t end my shooting for the day either.
I find info about slr camera and your blog have very good content and infomation about that Thank you.
Hi,
Sort all things to buy a camera when fall-in-love with this geek hobby =)..looking several websites for the info and found yours as more helpful for beginner as I am from others..tips for shooting + evading internet criminals + your flickr link + many more completely stunning me to read and read and read until finish!!
Would like to link up this to my friends as well…thanks!!
Great articles! Thank you all for taking time to share your knowledge/experiences. I’m a beginner with a Canon Rebel XTi.
I’m excited to get started in the photography world and happy to have graduated from my Canon SD630 “point and shoot.” 🙂
Thanks for the “Know your rights” tip. I’ve been using a few different point and shoot cameras over the last 10 years and just bought my first DSLR. It’s almost overwhelming as to how much more complex it is to use over a point and shoot. The technology is amazing!
Great tips, cool tricks. Regards from Mexico.
I’m 16 and I love photography it is one of my favorite things in the world (aside from my puppy :D). I just got the Canon 50D a week or two ago and I LOVE it. In July I got a Canon Rebel – I begged my parents to get me a bigger camera but they didn’t understand (they didn’t used to be supportive of my photography since it is so expensive). I have won 12 Scholastic Gold Keys (they are the highest award you can win in the Scholastic competition for high schoolers), all of them except 2 were for my analog photography. I started with analog and since most film cameras are very old, the automatic settings on them (if they even have them) are not very reliable, so I was forced to learn the ropes on ISO, aperture and film speed. I also got to be a dark room expert and enthusiast. I recommend to anyone interested in photography that they become familiar with the darkroom. Even if you do not want to buy an analog camera or go through the hassle of developing negatives, you can still utilize the dark room’s many features that will certainly enhance your art. Since I fell in love with my Canon 50D, I sort of abandoned my analog camera for the past week or so. However, I still use the dark room all the time with my digital photos. What I like to do is print my digital pictures on transparencies (they are transparent, plastic slips of paper that can be used on over-head projects), bring those into the dark room and place them over Poly-Contrast RC Glossy photo paper and turn on the enlarger light so the photo paper is exposed at all different levels all over the picture and creates a wondrous negative version of your original print. It adds a unique and dramatic touch to all my photos, it is somewhat my signature. I suggest this technique to anyone looking for a way to enhance their art!!
Another great feature of using transparencies in the dark room is you can cut up photos and expose them, layer photos, and add quotes into them. Last year I made a “Green” portfolio, and my favorite piece was a picture of under my dad’s Dodge Durango (his exhaust pipes and other stuff like that) and in the corner was a quote from Al Gore’s Inconvenient Truth. I made this in the dark room so the under-side of the car was a negative – it was SO dramatic – and in the bottom right corner this distressed and somewhat blurry hand-written quote. While some people are really moved by this piece, others scoff at it (usually conservatives and small minded ass holes).
Having bought my nikon d3000 today, and just hovering on google bought me to this page, what can i speak of? ITS TRULY AN INFORMATION HUB FOR BEGINNER.
I enjoyed reading this article. I am a noob. hihiihi
thx for your guide ~ i really enjoy when i reading ..thx a lot
Thanx! Great article, great tips 🙂 I think I should take my camera with me more often�
thank u so much
Just trawling the internets for information on DSLR’s when I came across your page. I have to say, this has been a very good read and would like to thank you for the tips, advice and suggestions.
Very helpful
Thank you
Thank Thomas for the tips I agree with Raw.. I need to learn it more… I can see the benefits it has for editing and maybe one day i will post my findings.
Keep snapping I say
Cheers
Craig
This was super helpful – thanks for the great tips! Especially about ISO (as I’m ISO challenged!) I look forward to be putting these tips to good use!
Thankyou very useful tips. I will review them again!
Thanks for that…i really like it…
i will show u my fotos later…
Great piece of practical advise! Very useful for amateurs
Think and shoot, no lucky machine gun shoots. 🙂
This is great stuff, I just tweeted your blog out to my small amount of fans 😉
Some great tips. I bet I still manage to mess it up though.
Thanks for the great tips.
One of the best is the “join flickr” tip. Most of my posted shots are point and shoots – but I finally bought a Canon T1i DSLR. I’m very proud of my P&S shots.
I did, and started posting photos. When others saw them and commented the feeling you’re a ‘photographer’ hits you.
The other part of flickr: join GROUPS – more than ONE – join a bunch. You can search for any topic, camera type, country, interest. Join a group(s) and post to a specific group and you’ll have a ton more people seeing your photos. And you’ll see photos of hundreds of others like you.
sorry forgot to post the flickr page:
http://flickr.com/photos/tom-vaastu
eeks:
http://flickr.com/photos/tom-vastu
Hi. I found this review very helpful. I’m a beginnier and recently purchased an DSLR. I’ve been trying to learn how to use it by reading online. I haven’t gotten any better. BUT I LOVE to take pictures. I snap so much that my friends get annoyed of me. I wish to become a professional photographer someday. Do you have any suggestions where I can take classes in new york for an affordable price? Thank You so much for sharing ur experiences with everyone. I hope i will be able to do the same one day.
GREAT SUGGESTIONS, thanks for the helpful info here.
Great resource. I especially like your emphasis on understanding how important ISO is. Knowing that alone increases a photographers flexibility exponentially.
You also have a lot of great shots up in Flickr. Thanks for sharing!
Some great advice. I have really started to just take tons of pics when I am out. Since then, i have really started to get better quaility. Never really knew why i was holding back. Thanks again for the other great advice.
How long did it take you to learn how to use photoshop to edit your pictures? I’m keen on learning how to use it but so far find it really complicated.
I had a nice read! This is such a very helpful and informative post specially for newbies like me. I just bought a new Nikon D5000 and I’m on the process of learning some basic shots particularly with different light settings, focus and some macro shots! 🙂 I learned a lot from your post and I hope you post some more techniques on photography! 😀
Thanks good article very useful
Nice write up !!!! Thank you..
You made certain fine points there. I did a search on the topic and found the majority of persons will have the same opinion with your blog.
This list of tips was really helpful. It is written without making us newbies feel stupid…thanks..
Do you mind if I quote a few of your posts as long as I provide credit and sources back to your blog? My blog is in the very same niche as yours and my visitors would genuinely benefit from some of the information you provide here. Please let me know if this ok with you. Cheers!
Nice tips, thanks!
Wonderful tips I must say! Many of them are what I follow today and would love to follow your tips in total.
Good day sir, I’ma newbie with DSLR.My concerns is how to take photos of group of people without blurring some of them specially those at the back and far left or right…pls…give some tips…thank you..
There is an excellent free software comparable to Photoshop (come would argue it’s better) called GIMP.
I definitely agree. Flickr is really a great help in posting our images. Ive been also joining competitions in photography online.
Great practical tips, lots there to ponder over. As a novice your comments were great. Would add though a photography wokshop for beginners really speed up the leaning process.
Bryan