PRIIME PRESETS FOR LIGHTROOM

Disclosure: I am an advisor to Priime.

A lot of people tell me that they know that they should shoot in RAW and edit their photos in Lightroom but that they just don’t have the time or desire to do the editing work. I’ve long been an advocate for photo editing, but also understand that time can be short sometimes and many people would rather spend more time behind a camera than behind a computer screen editing photos.

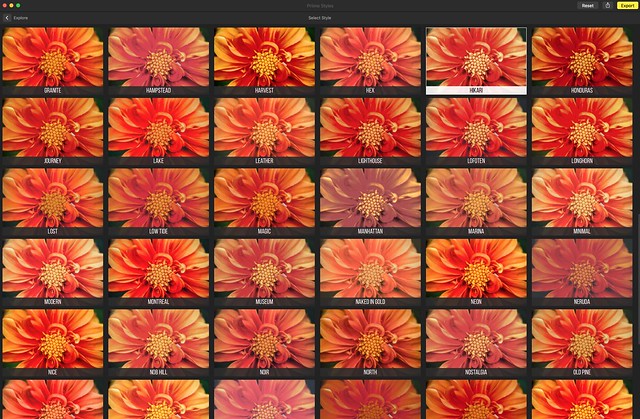
Here is where Adobe Lightroom presets can be super helpful. There are many different preset packages out there that you can purchase, but one I’d like to highlight today is a new preset package put out by the photo editing company Priime.

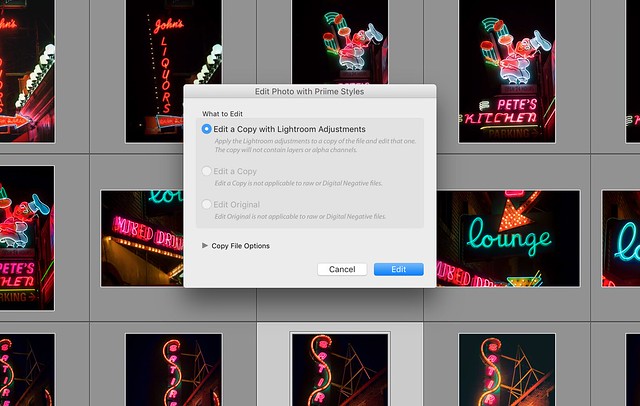
Lightroom presets are super easy to install with a few clicks and then when reviewing your photos in Lightroom you just hover over a preset to see which look makes your photos look the best. With a single click, instantly your photo is given the full editing process of that preset. Sometimes I’ll use a preset and just leave the photo exactly as edited in the preset and other times I’ll use the preset as a base doing 90% of the editing for me and make a few finishing tweaks from there. Either way good presets can save a ton of time and are a useful tool for photographers who want to edit their work quickly and professionally.

One of the the things I like about the new Priiime preset package is that the presets were developed by photographers for photographers. My friend Art Chang, Founder and CEO of Priime, is also an amazing and accomplished photographer who personally helped design this package himself.

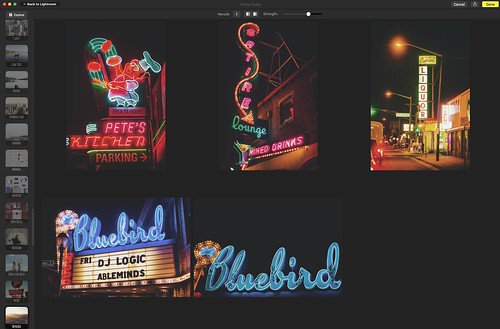
Below are some before/after photos that I edited today using some of the new Priime presets so you can get an idea of the impact a particular preset can have.

Priime’s preset package comes with 13 presets with 112 variants on the styles. Priime’s package sells for $49.99.

You can learn more about these presets and purchase them at Priime here.

Capitol Lights Pre Edit
Capitol Lights no editing

Capitol Lights
Capital Lights edited with Priime’s Atlantic preset

Texas Sunset Pre Edit
Texas Sunset no editing

Sunset, Marfa, Texas
Texas Sunset edited with Priime’s Montana + contrast preset

Marfa Portrait Pre Edit
Marfa Portrait no editing

Marfa, Texas
Marfa Portrait edited with Priime’s Utah preset

Hank Williams Grave Pre Edit
Hank William’s Grave, Montgomery Alabama, no editing

Hank William's Grave, Montgomery, Alabama
Hank William’s Grave, Montgomery Alabama, edited with Priime’s California vibrant preset

Coca Cola Pre Edit
Alabama Coca Cola, no editing

Montgomery Alabama
Alabama Coca Cola, edited with Priime’s California + green preset

Priime Styles for Mac

Priime Styles for Mac Batch Editing

Disclosure: I am a style author and advisor for Priime.

One of my favorite ways to edit photos on my iPhone the past year has been with the Priime app for iOS. In addition to being one of the style creators for Priime, I’ve enjoyed utilizing the custom styles created by so many other talented photographers for my mobile photography. I don’t always have as much time to work with an image when I’m editing it on mobile and it’s nice to have some super easy styles that I can easily apply to my photos and quickly publish on the go.

As great an app as Priime for iOS is, 98% of my photos that I work with are still processed the old fashioned way, using Adobe Lightroom and Photoshop on my iMac. One of the things that I love about using Lightroom in my workflow is that more and more you are finding quality external editors that can be used as part of your editing process. Recently Google made headlines when they decided to give away their Nik software (which I have also used for several years now and love). So I was really pleased to hear that in addition to the iOS app, Priime was also releasing an external editor for Lightroom.

The way that I use Priime Styles for Mac is as part of my normal Lightroom editing process. Here I can easily take a special photo (or batch of photos) and quickly move them into the Priime editor to make changes and then have copies saved back to the Lightroom catalog I’m working in. I don’t process every photo with Priime, but if I find one that is special I will often import it in there and work with it.

Sometimes you want just one final version of a photo, but oftentimes I find myself making multiple versions of a photo. While some photos look great in color or black and white. Some photos look great in color AND black and white. I like creating different versions of photographs and then later deciding which I like better or maybe even publishing a few different versions. Priime allows me to try different things with a photo that I may not have thought about creating organically myself in Lightroom. With over 100 different editing styles from some of the top photographers out there today, there are a lot of new things to explore.

Priime Styles for Mac Lightroom External Editor

The nice thing about editing something in Priime with Lightroom is that I can still iterate on that version even after I bring it back into Lightroom, adding additional edits or touches to the photo, customizing it more as my own even as I borrow edits from others.

I think Priime Styles for Mac will be an excellent Lightroom add on tool that serious and professional photographers can have at their disposal to make their photos look as good as possible.

In addition to more serious and professional photographers using Priime Styles for Mac as a Lightroom plug in, I think it also is a great first step for the new or emerging photographer. Some people are not quite ready yet to pay $10/month to Adobe every month to use Lightroom. They just want something that can quickly make their photos look better that’s a bit more affordable.

Even if you are not a Lightroom user, in fact especially if you are not a Lightroom user, Priime may be something for you. In addition to the Lightroom plug in, Priime can also be used as a standalone editor as well. You simply launch the app and then drag and drop the photos that you want to work with. For a lot of people $24.99 (on sale for launch) as a one time cost is a better value proposition than paying $9.99 a month ongoing for Lightroom.

PExploring Styles with Priime Styles for Mac

Priime Styles for Mac has a great Explore function as well. This allows you to look at all of the styles as they’d be applied to a photo at once, which makes it easier to narrow down what might look best.

Another way I think Priime can be helpful is for the less serious photographer/blogger who just wants a consistent look for a batch of photos. A lot of bloggers I know are not exactly photographers but need to include images with their posts. Priime Styles for Mac allows bloggers an easy go to solution where very quickly they can edit a batch of photos and have a consistency to their photos that makes them work much better together as part of a total post.

Anyways, check it out.

Priime Styles for Mac supports JPG, RAW and TIFF files.

20 Cool Things You Can Do With Nik Software’s New Analog Efex Pro 2

I’ve been playing around with Nik Software’s new Analog Efex Pro 2 photo processing software (brought to you by the good folks at Google) all weekend long and I’m super impressed. The purist film photographers out there are probably going to hate this new software, but for you digital photographers who dig an analog look and feel, you are going to love this.

I shot film exclusively for about 15 years before switching to digital in the early 2000s. While there is an absolute undeniable romance with rolling your own film, hanging out in a darkroom with your college girlfriend, and licking the fixer off your own prints you made yourself, it’s not something I think I’ll ever go back to — unless and maybe when my hipster buddy Daniel Krieger finally convinces me to buy a film Hasselblad.

I used to joke around with anyone who asked me what camera I shot and tell them a Holga. Now it’s like I really am shooting a Holga, just with my Canon 5D Mark III. 😉

Anyways, check out 20 different looks you can create with Analog Efex Pro 2. I’m a fan. You can buy it here if you want.


Motion Blur. It’s like owning a lensbaby without having to actually use one of those horrible awkward things. Just kidding, lensbabys are great!


How did I ever get a double exposure of this classic neon sign? I’ll never tell.


Hey It’s Amanda Morgan shot with my cool Toy Camera #9.


Wet plate photography, without all the sticky wet plates.


Jenna Jamieson shot with Toy Camera #1.


Every respectable concert photographer brings their Toy Camera #2 to the photo pit these days. Chvrches rock!


Instant triptychs.


Classic Camera #7 has such a nice warm film feel, doesn’t it?


Hey tilt shift and I didn’t even have to buy the $2,500 Canon TS-E 17mm f/4L Tilt-Shift Lens! Which is a totally awesome lens by the way that I actually will buy someday. Canon L lenses are the best. I cannot say enough positive things about all my Canon glass. I’m not being sarcastic there, I’m being serious.


One of my neon signs that I took back in 1972 while on a photography junket across America with Stephen Shore.


Motion blur with Jeremiah Owyang. It’s just like Star Wars only better because it’s got Jeremiah in it.


Colorcast #2 makes butterflies look so pretty.


Colorcast #2 makes models look so pretty too, but this one was already pretty to begin with. 🙂


I think this painting from the Met in New York City looks better this way, don’t you? I could totally print this up and hang this in my house. So can you too, because I licensed it Creative Commons non-commercial. Friends share right? 😉


Oopsie, a little light leak thing happened in my Holga again.


Doing wet plate photography in Holbrook, Arizona.


Love the authentic real life colors from Classic Camera #2 on this San Francisco victorian in the Mission District. A couple million in stock options and this too can be yours.


Smoothdude let me borrow his Hasselblad to make this photo on our Route 66 trip last year.


I took a photo of my Kodak Instamatic with my Kodak Instamatic. Get it?


More Seattle fun with Toy Camera #2.